Take the Mystery Out of Steam-Bending
It's not magic-all you need is a source of steam, a box and a reliable bending form
Synopsis: Lon Schleining demonstrates the basics of this technique by showing how to bend a back slat for a chair. He explains what the best wood is for steam-bending, and how predicting springback is not an exact science. Make a practice run before bending a piece. Along the way, he details options on sources of steam, how to build a steambox, and how to make a sturdy bending form. An accompanying article discusses how compression straps aid tricky bends.
Steam-bending is fast, strong and authentic. You’ll never see a glueline nor have a piece break because of short-grain weakness. Steam-bending does not require green wood. Nor does it require a vast array of tools. What it does require, though, is lots of heat, a box to capture steam and a sturdy bending form.
Once you realize that each of the components works in conjunction with the others, the setup for bending is straightforward. There is almost no limit to the parts you can make by steam-bending—chair parts, table legs, curved drawer parts—except your imagination. I usually start with a drawing of the finished part, then design a form to bend it, allowing for a bit of springback (how much the part relaxes after it’s been bent). The size of the bending blank determines the size of the steambox you’ll need to use. The larger the box, the larger the steam generator it takes to heat it, so the box should be only as large as necessary for the parts you plan to bend.
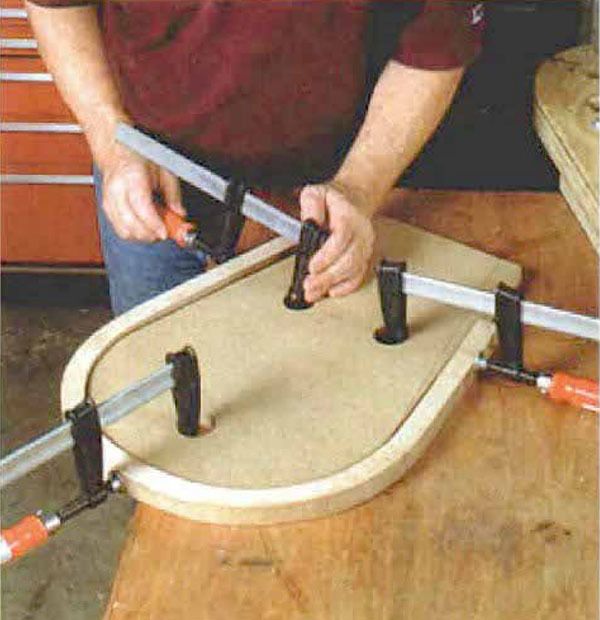
The easiest way to understand the basics of bending is to see it done, so for this article I’ll demonstrate by bending the back slat for a chair. The slat is made of in.- thick material, and the radius is not very tight, which makes this is a good bend to warm up on.
The bending techniques illustrated here will work for simple bends of a slight radius as well as for more complex bends using compression straps. Whatever bending you design into your projects, what you learn here should lay the groundwork for success. As you gain experience, your confidence in bending will build, and your designs will grow bolder.
The best wood for steam-bending
Many experts claim that you must use green or air-dried lumber for steam-bending, but in the Los Angeles area where I live, air-dried stock is not a convenient option. I’ve had no choice but to bend kilndried material, and the results have been quite successful.
Kiln-dried wood is not only easily available, even if you live in the city, but it’s also dimensionally stable, dry and ready to be milled as soon as bending is complete and the piece has had time to cool.
From Fine Woodworking #149
For the full article, download the PDF below:
Fine Woodworking Recommended Products

Ridgid EB4424 Oscillating Spindle/Belt Sander


Comments
I had never tried steam bending, until I recently needed to make a lading net for my flyfishing. The one I have used for 30 years was simply not large enough for the fish I encounter today. I am a volunteer guide for a group that introduces veterans to flyfishing on trophy water. And as a guide, I need a net with a longer handle than when fishing alone.
I ordered the net kit and sketched out the shape and size of the bow to match the net, then added the handle. Then made bending form and picked up a piece of ash to go with the walnut I had on hand.
Then the challenge was for the steamer components; I didn't want to spend much, as it would likely be a one time project. As I scoured the web for a used steamer, up popped an ad for a floor steamer. Aha! We have 2; the old castoff being in the storage room in the basement adjacent to the shop. Would it produce sufficient steam? Only one way to know. Then off to HD for a piece of 1 1/2" PVC pipe 2 caps, a brass nipple and some 1/4" vinyl tubing.
I removed the steamer head and clamped the body in the vice forced the tubing on the outlet. Drilled a 1/2" hole in the middle of the pipe and threaded in the nipple. Caps on the ends, not glued. I supported the pipe in the middle and allowed the ends to droop. Drilled 1/8" holes to allow condensate to drain.
Fired it up and within 5 minutes, I got 170F steam at the ends of the pipe.
I put small spacers between the laminations to insure penetration of th e steam and slid the wood into the pipe. 30 minutes of steaming and they bent like butter.
I have now made 4 nets, a couple quite elaborate, and have 2 people asking for nets. The setup would make Rube Goldberg cringe, but it works.....works very nicely.
Total cost? About $15, and it worked perfectly.
Log in or create an account to post a comment.
Sign up Log in