Gilding Is Easier than You Think
Peter Gedrys gives a step-by-step tutorial on oil, or mordant, gilding.
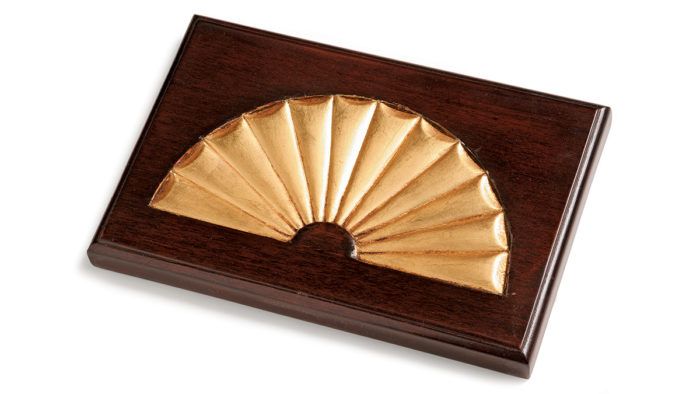
Synopsis: Finishing expert Peter Gedrys gives a step-by-step tutorial on gilding, the art of adorning a surface with ultra-thin layers of gold leaf. This material was used regularly during the 18th century to decorate parts of furniture such as finials, shells, and fans; contemporary furniture designers also use gold leaf. Here, Gedrys demonstrates a method known as oil, or mordant, gilding. He shows how to prepare the surface, apply a smoother known as gesso, apply the leaf, and finish it. He also shows methods for subtle aging or adding an antique finish.
The art of adorning a surface with gold leaf has been practiced for thousands of years. The ancient Egyptians realized that if they beat this very malleable metal into ultrathin leaves, it could be affixed to any surface and give the illusion that the object was solid gold.
Gold leaf was used regularly during the 18th century to decorate parts of furniture such as finials, shells, and fans; Federal and Empire pieces often were adorned with gilded elements. Contemporary furniture designers also use gold leaf.
There are two ways to gild: the traditional method known as water gilding and an easier way called oil or mordant gilding that I’ll illustrate here on two fans. And you won’t need to raid your retirement fund to buy the gold: Each fan used less than $25 worth of leaf.
A smooth surface is vital for gilding
With a clear finish, proper surface preparation is important; when gilding, it is critical. Gold leaf has an average thickness of 0.05 microns, or 100 times thinner than a page from a phone book. This thinness, plus the reflectivity, will accentuate any surface flaws.
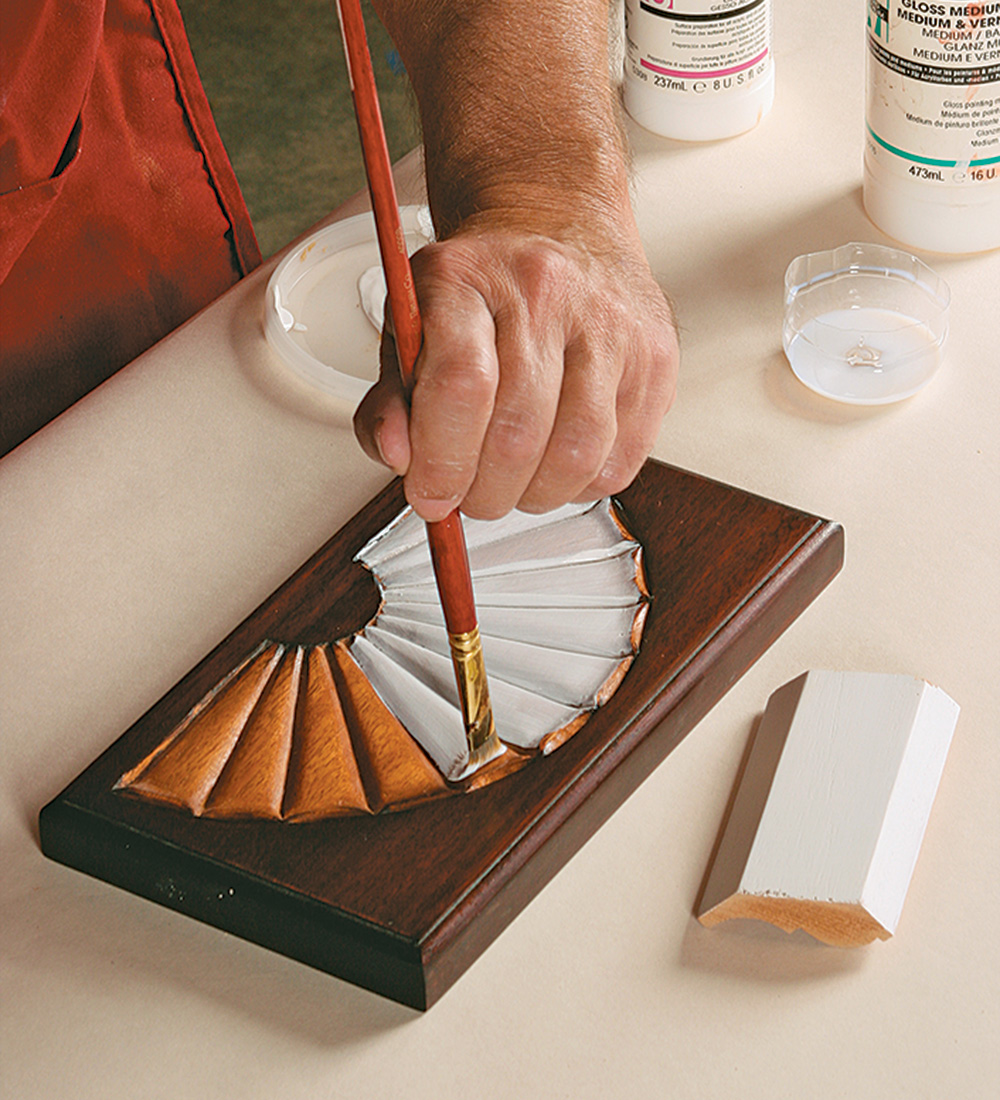
Begin by sanding the surface with P150-grit paper. Then dampen the wood to raise the grain and, when dry, sand with P220-grit paper. The idea is to soften any tool marks without completely removing them, and to avoid flattening out the rays of the fan, so it retains visual movement. If the gilded area adjoins non-gilded wood, it is best to finish the surrounding surface and then tape it off.
Gesso gives the wood a porcelain-like base
Even if you were to sand to 5,000 grit, the surface would still be too irregular for gilding. You need a smooth, uniform layer called ground. This is provided by a substance known as gesso, which is applied in multiple thin layers.
To begin, give the wood a couple of thin coats of dewaxed shellac to seal the surface. Pour out enough gesso for a few coats and thin it by about 5% with a 50/50 blend of warm water and Liquitex acrylic varnish. Apply the gesso in long, even strokes with a good quality, synthetic sable brush. Avoid overbrushing, and if you miss an area, get it on the next pass. Lay it on as flat as possible to minimize later sanding.

From Fine Woodworking #204
To view the entire article, please click the View PDF button below.
Fine Woodworking Recommended Products
Bahco 6-Inch Card Scraper
Diablo ‘SandNet’ Sanding Discs


Log in or create an account to post a comment.
Sign up Log in