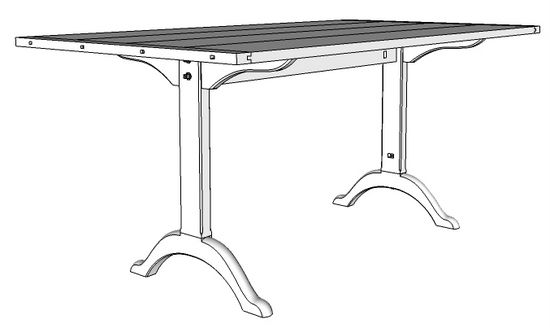
There are many designs for breadboards. In this case I’ve chosen one that uses a continuous tongue length and wood screws. Of course, the breadboard connection must accommodate top expansion/contraction. I’ve incorporated a slotted shank hole for the wood screws for this purpose.
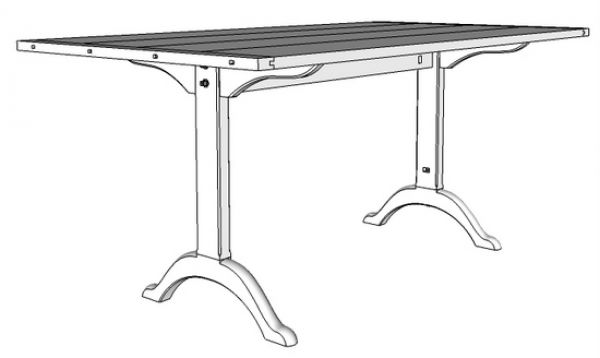
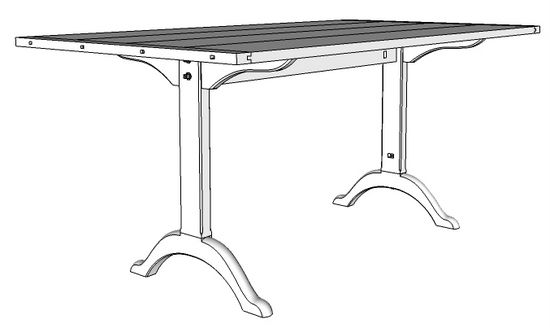
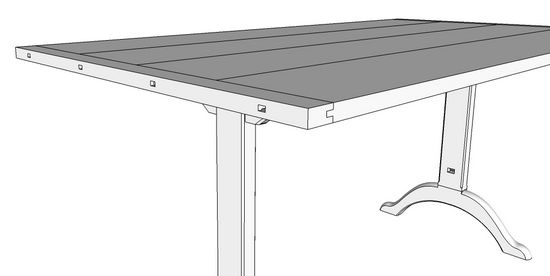
I’m building a Shaker table and will use this to show how I created the breadboard and its connection details. Here is the overall assembled view of the table.
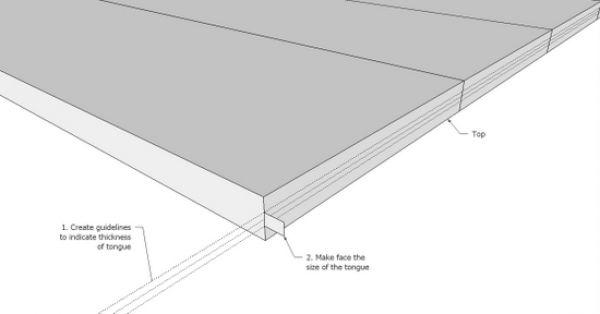
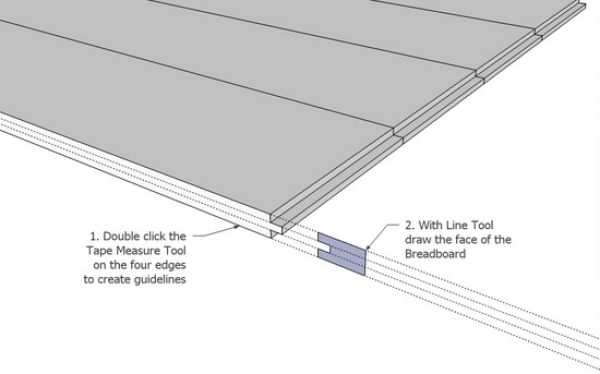
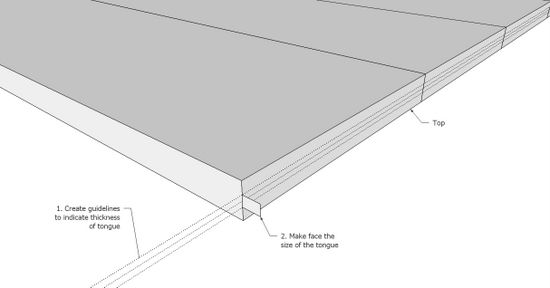
Step 1: Create the tongue on the ends of the table top. This involves creating the face of the tongue after installing some guidelines to help with the layout.
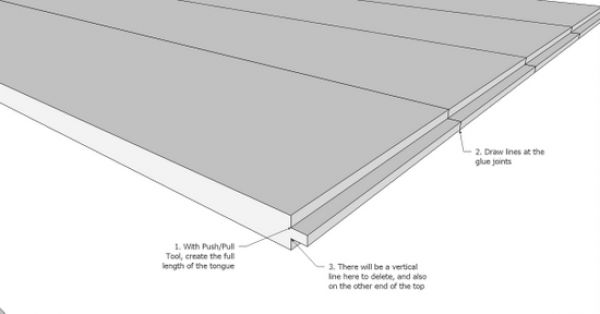
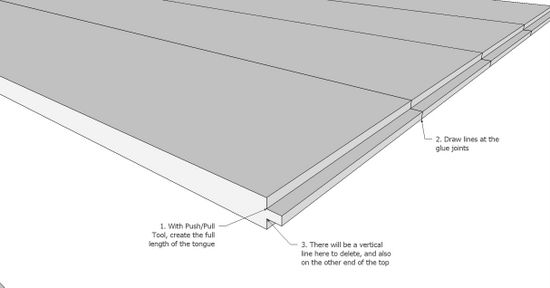
Step 2: Use the Push/Pull Tool to create the full length tongue. Since I used four glued-up pieces of lumber for the top, it is necessary to apply lines to the tongue at the glue joint. (I did not make the individual planks separate components – the overall top is one combined component).
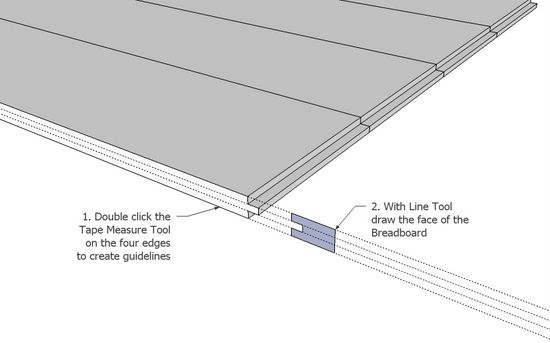
Step 3: Now we need to make the Breadboard component. I used guidelines from the table top to help with its layout. I included the groove shape in the creation of the breadboard face.
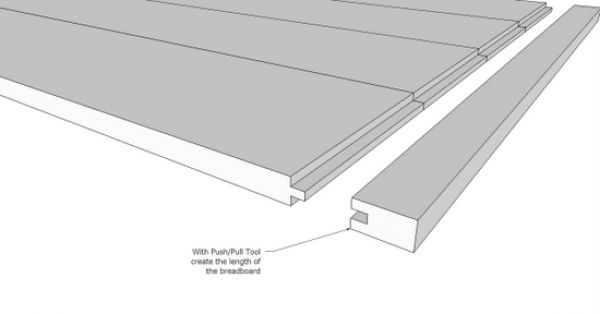
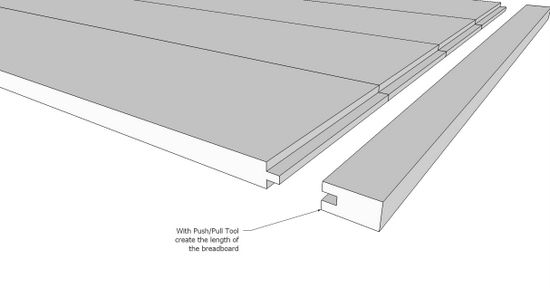
Step 4: Use the Push/Pull Tool to make the full length breadboard.
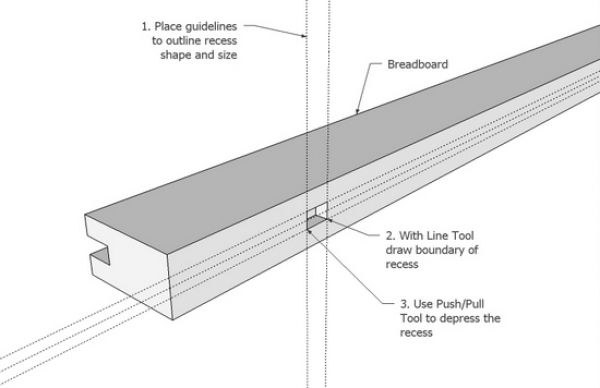
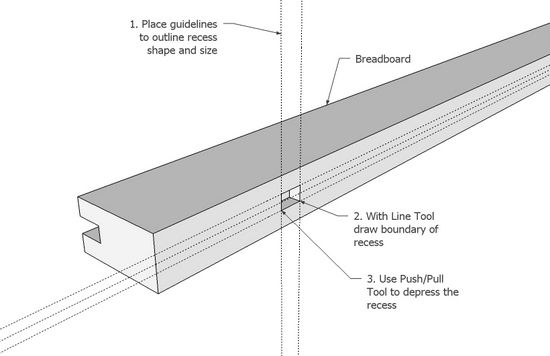
Step 5: In this step, I begin to make the slotted shank hole for one of the wood screw locations. First make the recess which will be plugged after fastening the breadboard to the top.
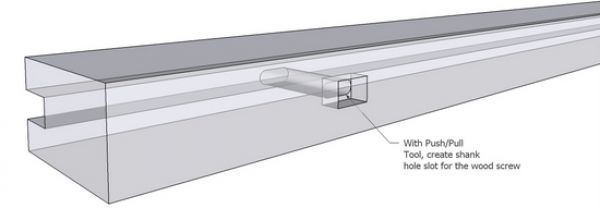
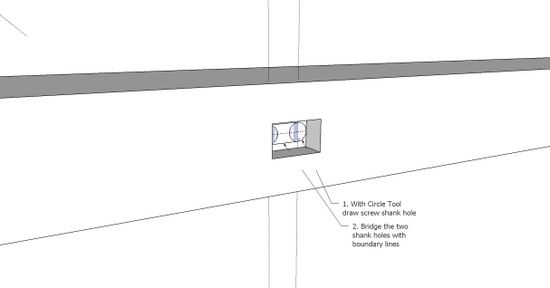
Step 6: I plan to use the drill press to create the shank slot inside the recess. I use the Circle Tool to place circles on each end of the bottom face of the recess. Then I connect these two circles with two boundary lines. With some erasing, I’ve created a shape of the shank hole slot.
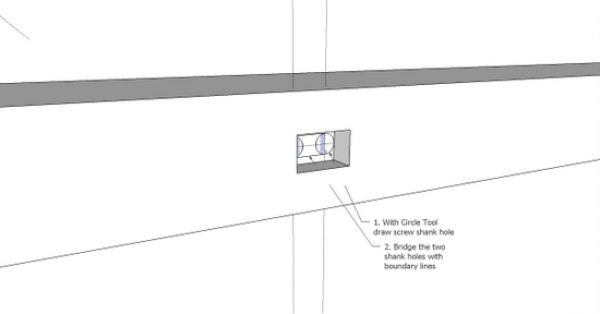
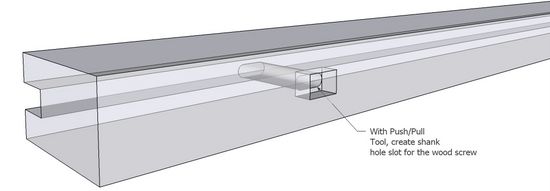
Step 7: With the Push/Pull Tool, push out the shank hole slot. I’ve made the Face Style X-ray, so you can see the resulting slot.
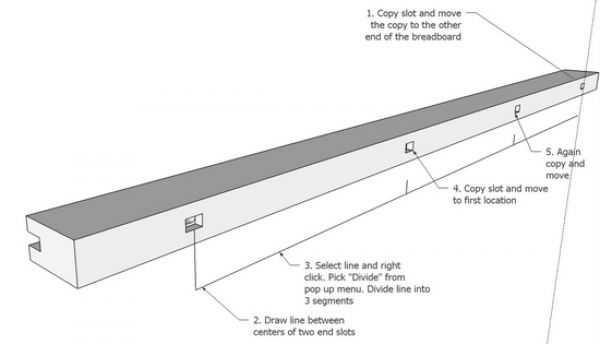
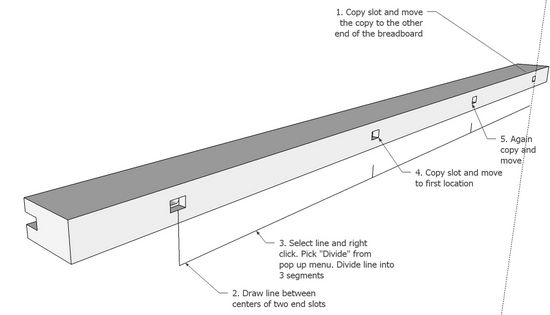
Step 8: Now that there is one complete slot, I copy this to the other three locations. These wood screw locations are equally spaced. So I’ve created a line and divided it to help with equal spacing.
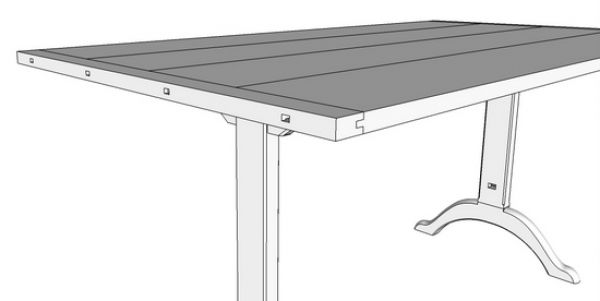
Step 9: The breadboard can now be installed on one end of the table top. Copy this breadboard, flip along the red axis, and place on the other end of the top. These recess holes will be plugged with similar wood grain and flush with the breadboard edge.




Comments
Apparently I missed something- what's a push/pull tool?
To divencar: Push/Pull is one of those basic and very effective tools in the standard SketchUp Toolbar.
Here is the Google Help explanation of the Tool:
Use the Push/Pull Tool to push and pull Face entities to add volume to or subtract volume from your models. You can use push/pull to create volume out of any face type, including circular, rectangular, and abstract faces. Activate the Push/Pull Tool from either the Modification Toolbar or the Tools menu.
In woodworking, it is one of the most used tools to make specific lumber components. Typically we create 2-dimensional faces of the cross-sectional shape of a lumber component. Then with the Push/Pull Tool, we pull or push the shape to the components length, width, or height. We also use the Push/Pull Tool to create holes and recesses as done above in the breadboard.
Tim
Very clear explanations. I didn't realize that you could just double click with the tape measure tool to create guidelines.
Thanks Tim
Tim - I'm uncertain just how to copy and move the completed screw slot. Could you please explain this step? Thanks for your guidance.
Clem2: I will expand on the Step 8 above where I copy the screw slots.
First it helps when copying these details to have X-ray on so you can see the whole slot. With the Select Tool, draw a select box around the whole existing slot. Since X-ray is on, you can see that you get a complete and successful selection with the highlighted coloring. Also, you can see whether your selection box may have been too big and included other segments of the breadboard which should not have been included in the selection.
Now with the Move/Copy Tool, zoom in and pick the midpoint of one edge of the slot. Tap the Ctrl Key for a copy, and move the copy down the axis. I find it helpful to tap the appropriate Arrow Key so as to force the movement along the correct axis. (Left Arrow Key in my case to force along the green axis).
Now with mouse find the line division point previously created to equally space the copies. Click your mouse to fix the copy at this point.
Let me know if this is helping you with the exercise.....
Tim
I like all the tips about how to use SketchUp but was wondering if you share your SketchUP models? Can I download them from the google library?
TIA from HotLanta
Zargon, my SketchUp models are not on the Google Warehouse or Library. I have attached .skp files to some of the past blog entries. Often I'm preparing models for teaching and for distribution to my students. In the case of this table, the model was required so that I could build the piece for my daughter's home.
Several of my models are available as Digital Plans on the Finewoodworking.com website. Others can be acquired through email correspondence.
Tim
Log in or create an account to post a comment.
Sign up Log in