
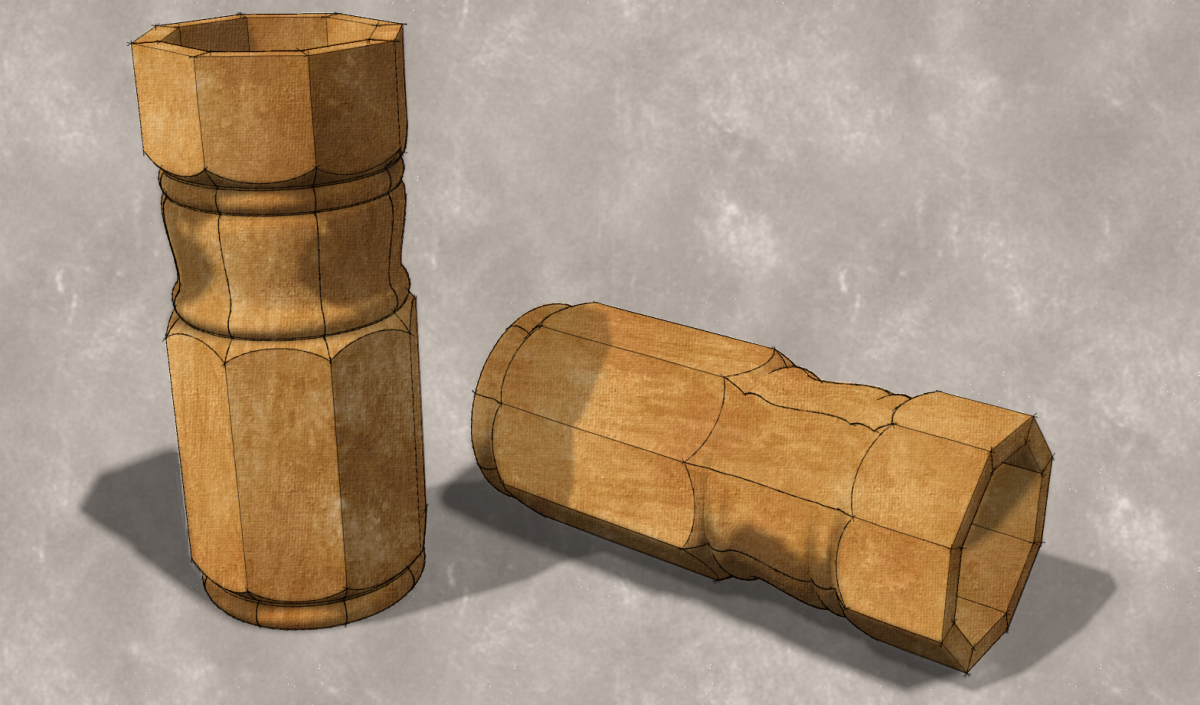
The other day I got an e-mail from a reader asking about how I would make a turned octagonal pedestal for a round table. Here’s how I did it.
The pedestal could be made in one piece but I made a stave component much as we would do if this was real wood. Using a component of a stave reduces the amount of work needed to get the entire turning done and it helps to keep file size from getting out of hand. There will be a large number of edges and faces created in making the turned sections so using copies of the same component helps keep things in check.
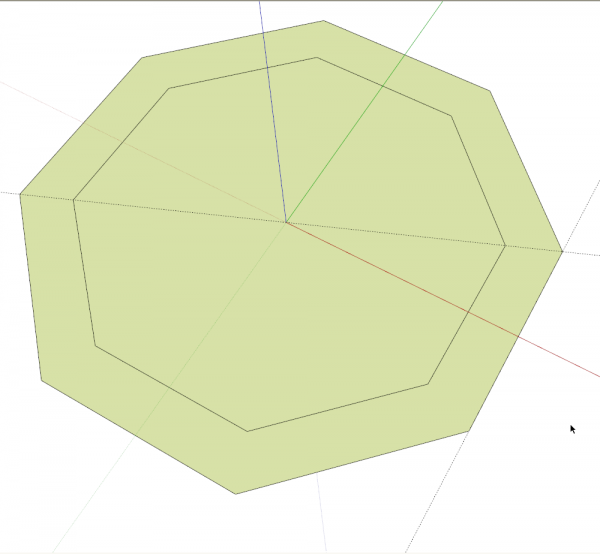
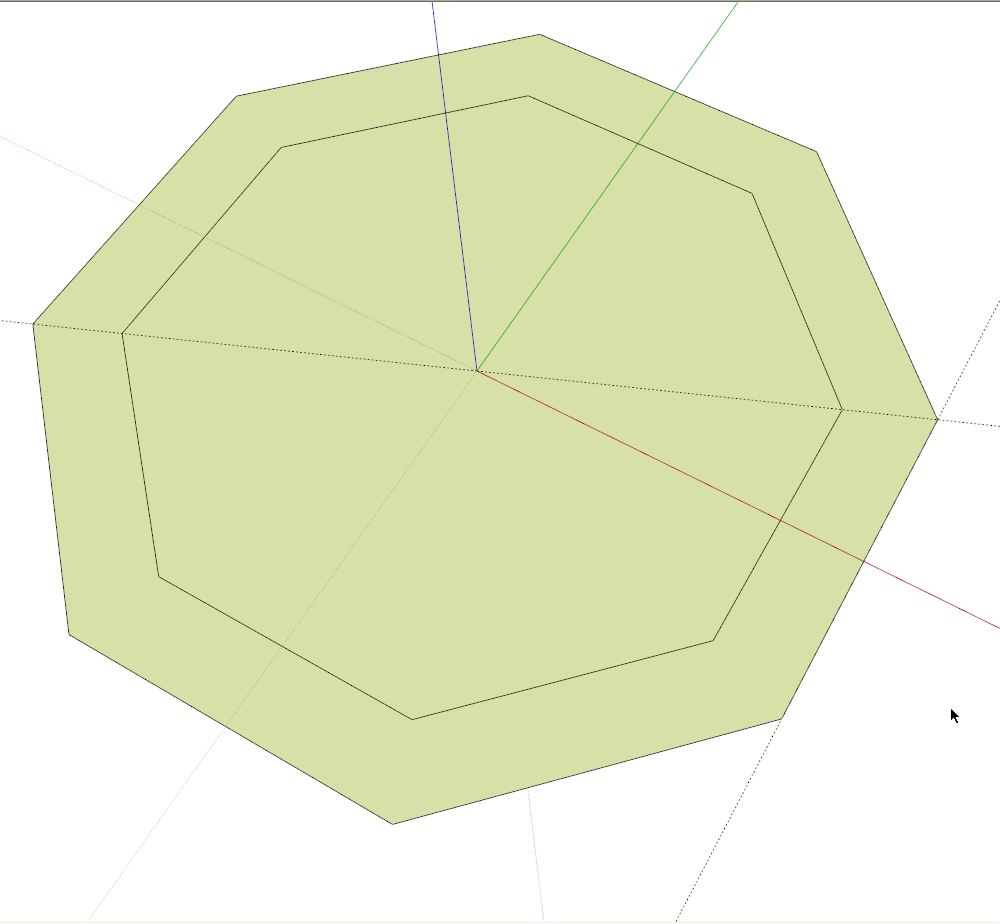
I’ll work around the origin so I have a reference for the center. To start, I laid out a couple of guidelines. One is parallel to the green axis and another is at 22.5° to the green and passing through the origin. The intersection of these two guidelines gives me the radius of the outside octagon. Then I got the Polygon tool. By default it is set to draw a hexagon. Type 8 and hit Enter to make it draw an Octagon. Click at the origin and drag the radius out to the intersection of the two guidelines.
Then get the Offset tool and drag in from the edge. The distance is the thickness of the staves.

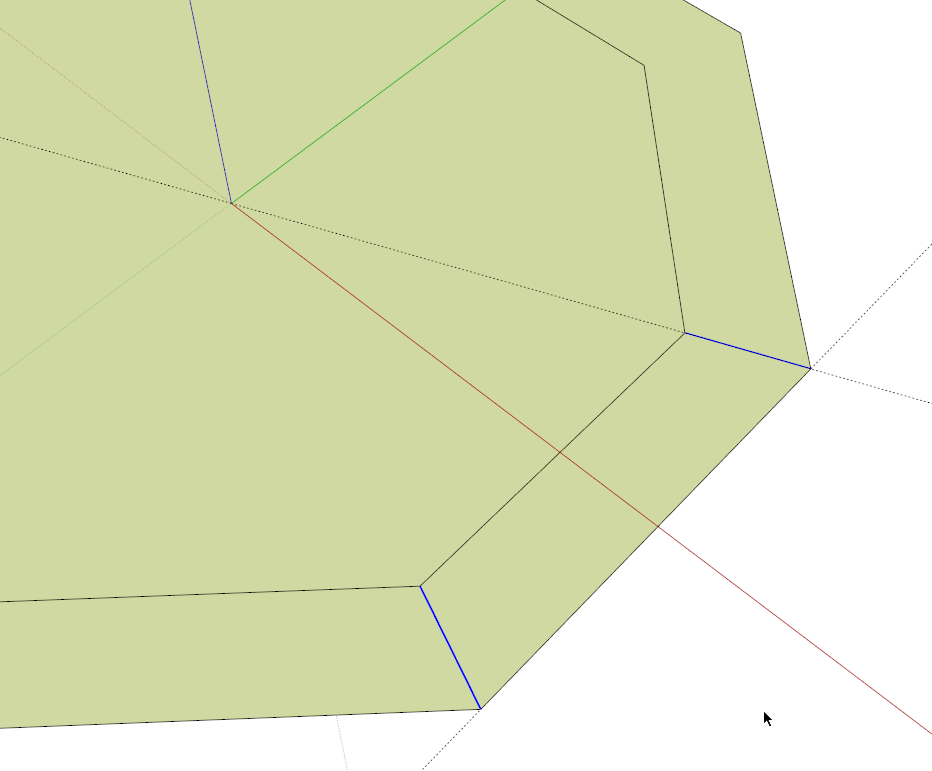
With the Line tool, draw lines to connect corners on the inner and outer octagons. Then delete the unneeded edges of the octagons to leave the end of the stave. The guidelines can be deleted now, too.
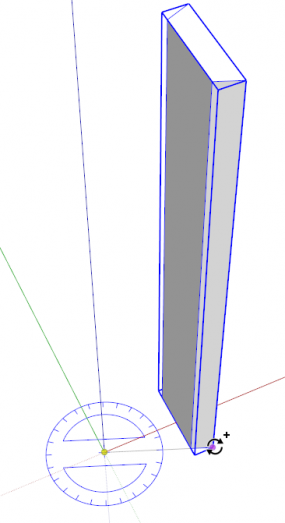
Use Push/Pull to raise the stave to 3D and make it the required height. Then make it a component. To make the rest of the staves, get the Rotate tool, hit Ctrl to invoke the copy function. (Option on Mac) Click at the origin, then one corner of the stave and drag it around to the opposite corner or type 45 and hit Enter.

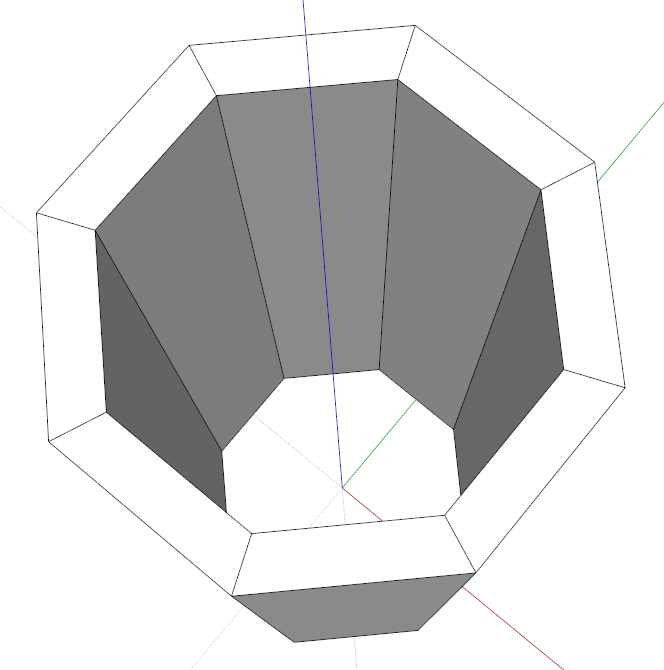
There’s the basic pedestal.
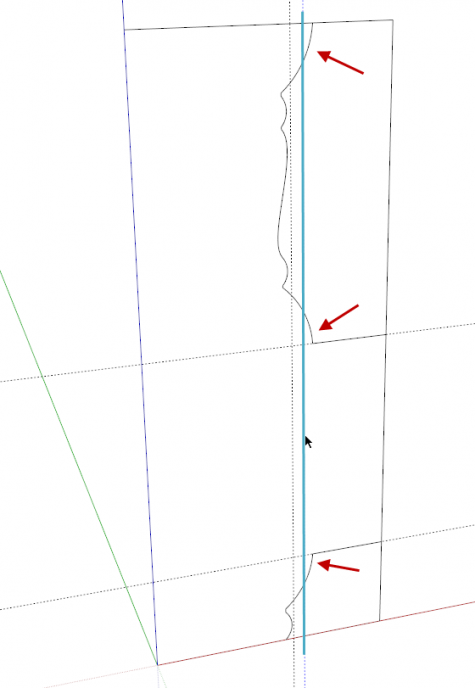
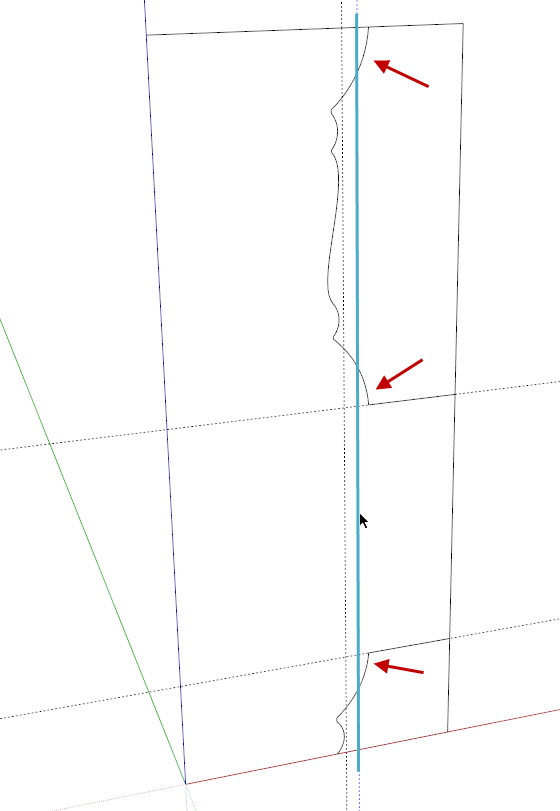
The next step is to draw the “cutters” for the turning. I set up a vertical rectangle and put in guidelines to show me where the ends of the turnings fall. Although they aren’t shown here, I used other guidelines to help me identify where transitions from one curve to another occur. I think of this in the same way pencil lines are placed on the roughed-out turning would be used on the lathe.
I also put in two vertical guidelines. The one on the left shows the outside face of the stave. The other one, shown colored, is at same distance from the blue axis as the corner of the octagon.
Then I drew the curves for the turnings using the Arc and Bezier tools. Notice that the ends of the curves are placed beyond the colored line. The arrows point to these. This is where the cutter comes off the work. I use the same method to create the pommel on turned table legs and spindles. After getting the curves drawn I draw lines out to the edge of the rectangle to create faces.
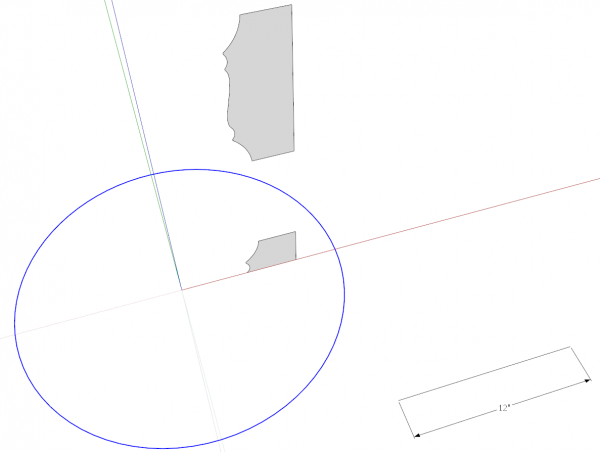
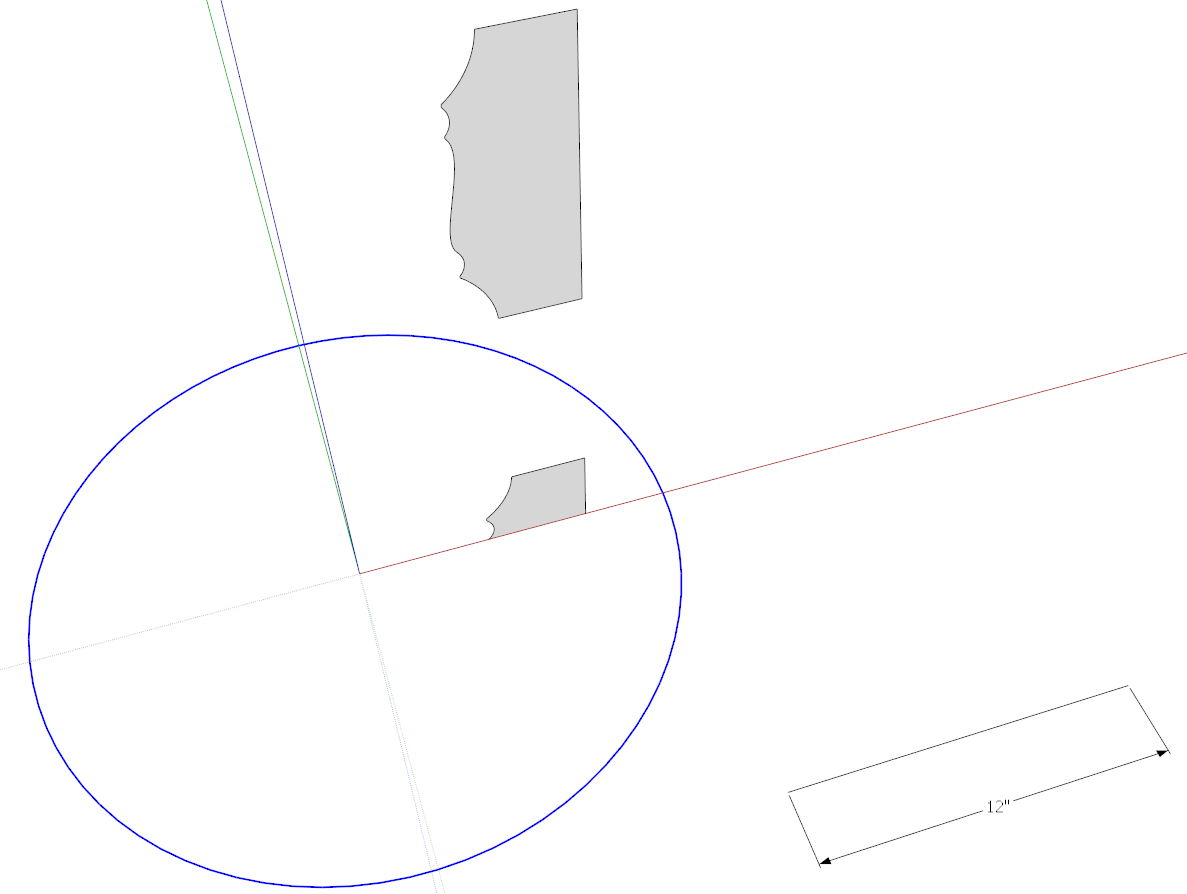
Delete the unneeded edges of the rectangle leaving just the cutters. Then draw a circle centered on the origin. It’s radius is not important. It’s the path for Follow Me. To make the turned faces look smoother, I set the number of sides for the circle to 80 before drawing the circle. The exact number isn’t terribly important but you don’t need to go too high. If you’re just practicing drawing this, you can probably stick with the default 24-sided circle. With the large number of sides in the circular path, SketchUp will create a lot of tiny faces which likely won’t fill so we’ll need to scale the model up before running Follow Me.
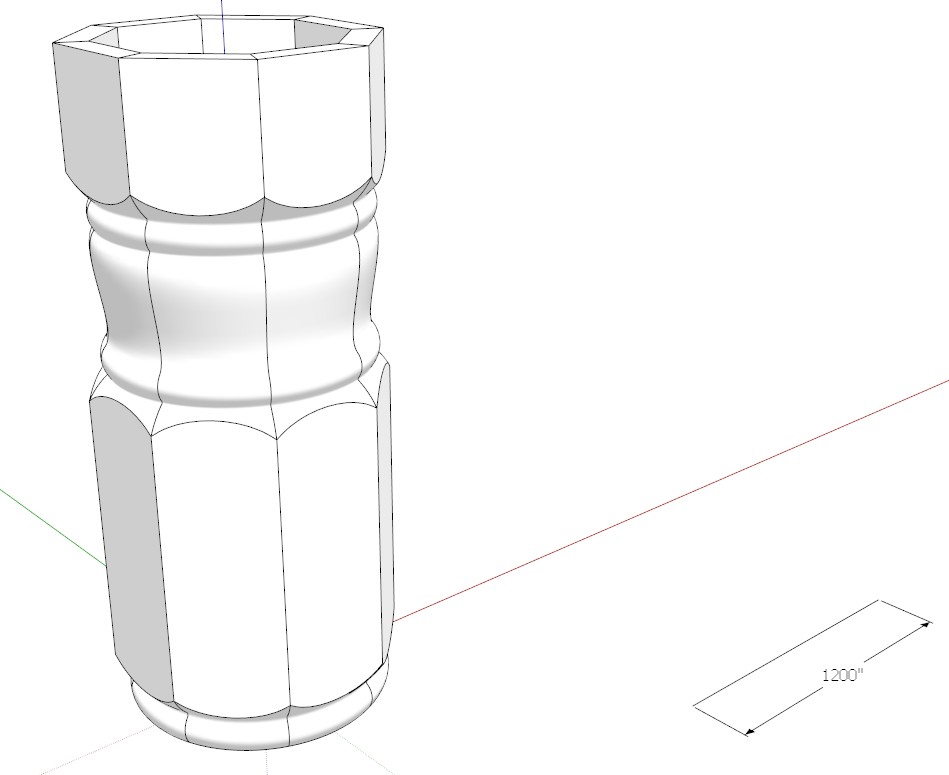
I drew a line, lower right, of a known distance. I’ll use it to resize the model. I added a dimension for illustration but in practice, I don’t bother. I just remember the length of the line.
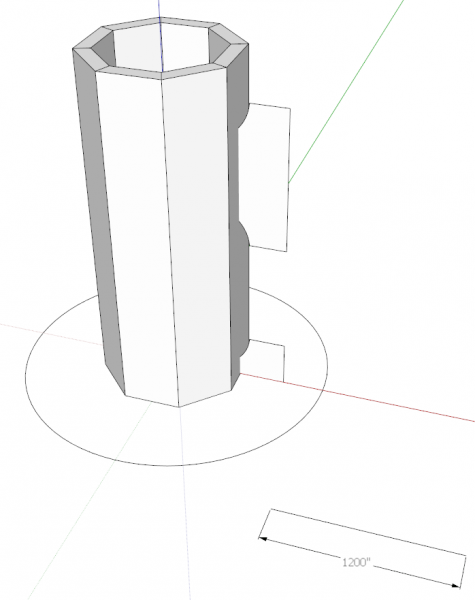
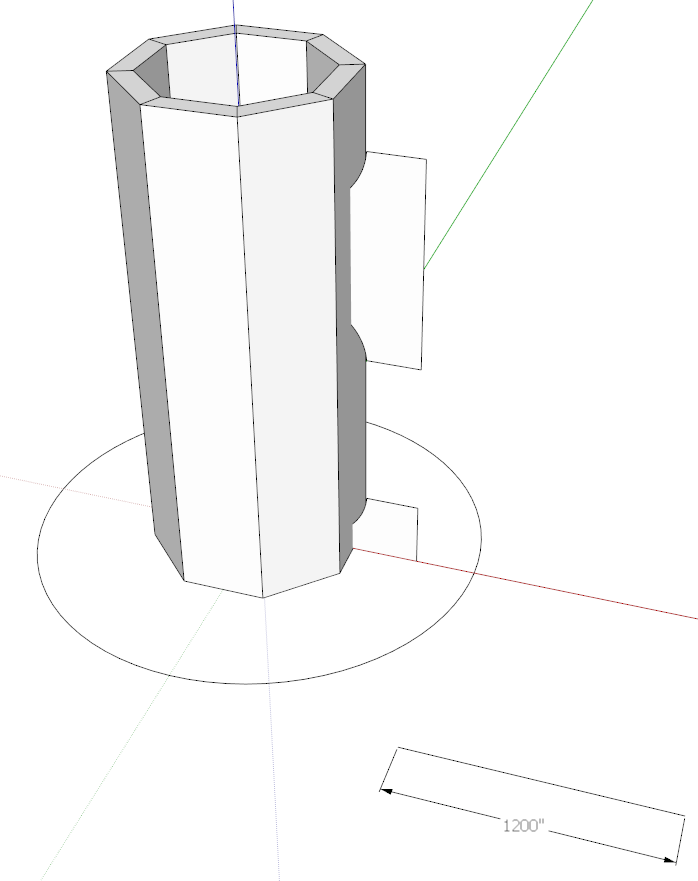
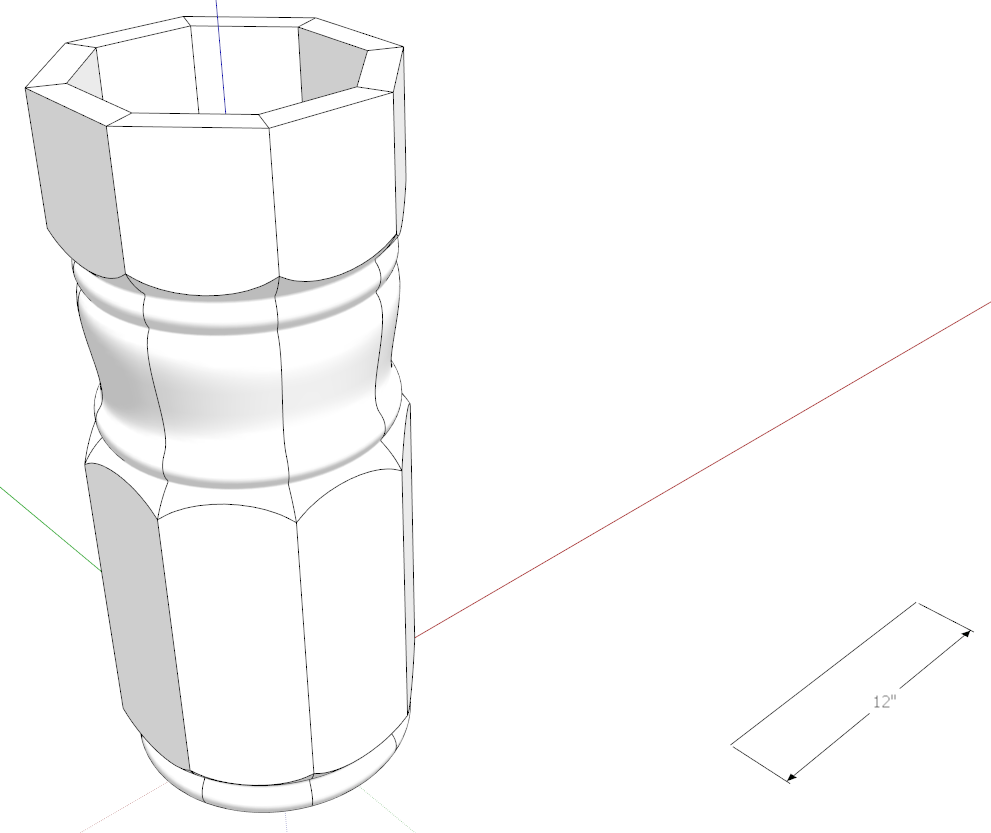
To resize the model, get the Tape Measure tool. Click on one end of the line and then the other. SketchUp displays the measured length of the line. It’s 12” in my model. I typed 1200 and hit Enter. SketchUp asks if we want to resize the model and we choose ‘Yes.’ The model is now scaled up by a factor of 100. The image above shows the model scaled up and with the staves unhidden.
Resizing could also be done with the Scale tool but I find it is easier to do this with the Tape Measure tool.
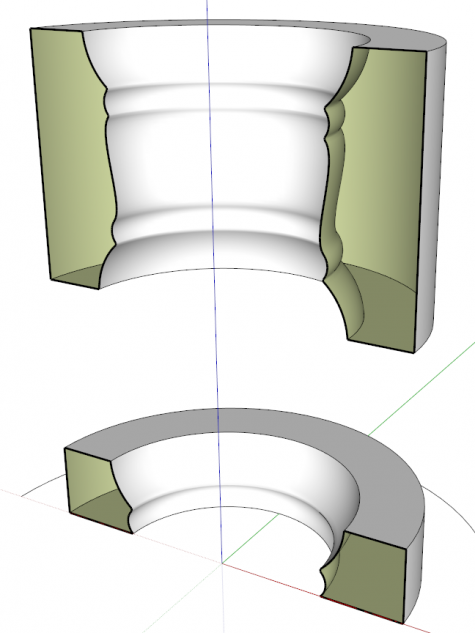
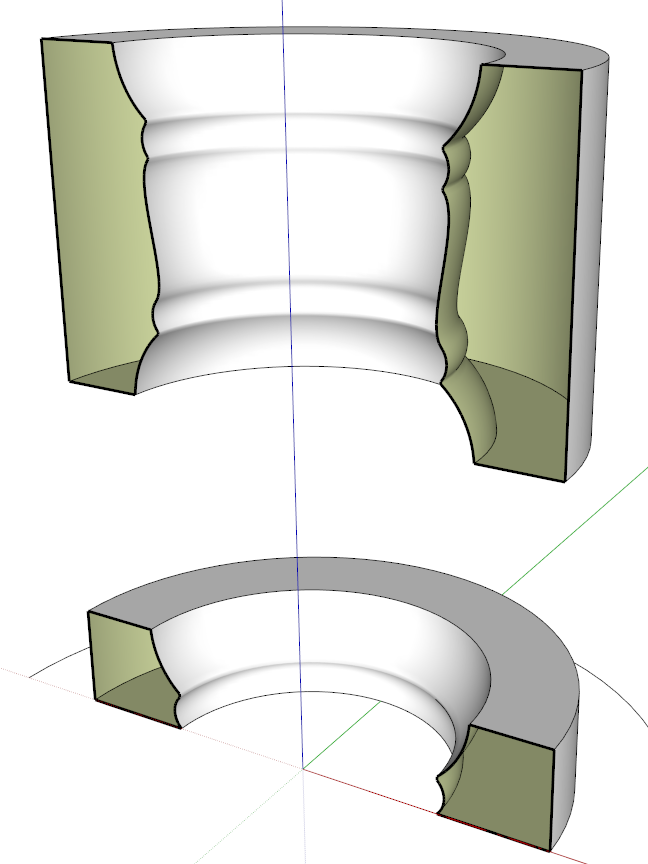
With the staves hidden, select the circle, get the Follow Me tool and click on a cutter profile. Repeat that for the other cutter. The image above shows a cross section of the results of Follow Me.
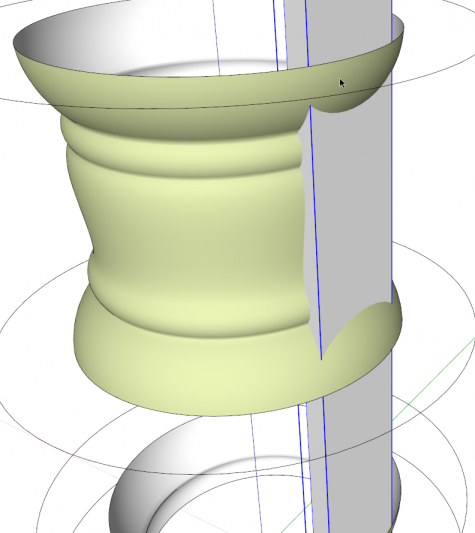
After deleting the top, bottom and outside surfaces of the turned cutter and unhiding one of the stave instances, you can see the relationship between the two.
I’ve been asked why I make the cutter in a full circle when all that is needed is a small part of it. The reason is that it’s much faster to draw a circle with a specified center than it is to draw an arc. It’s the same amount of work to delete what I don’t need when I get finished with it.
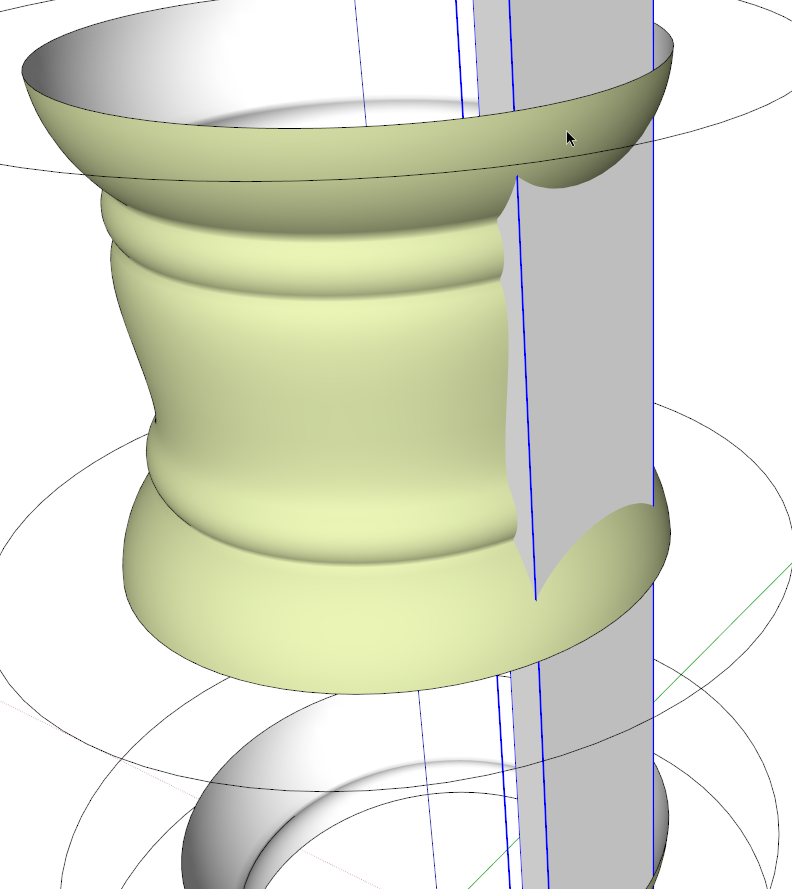
Notice in the image above there are no edges where the cutter passes through the stave. We need to create the intersections.
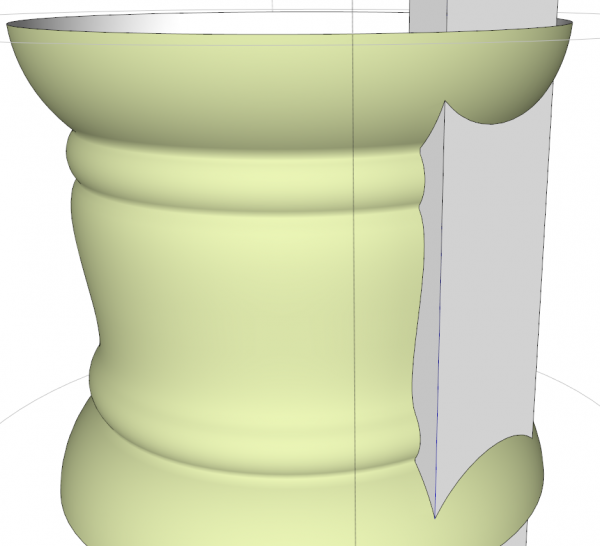
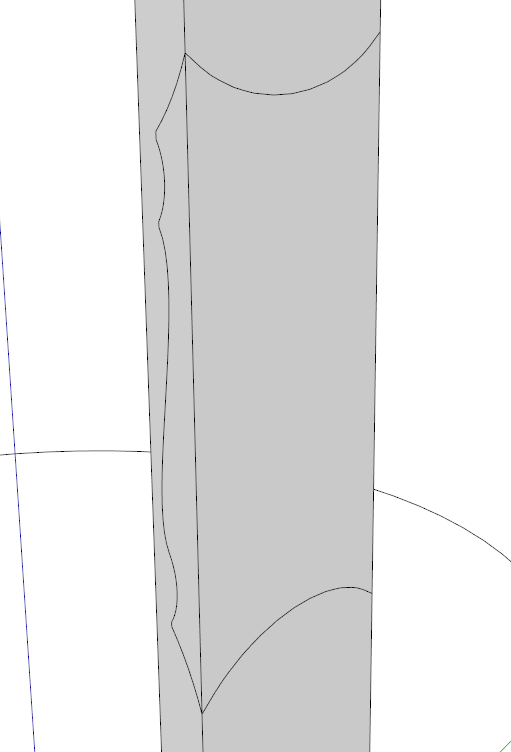
Select the entire cutter with a triple click of the select tool. Hit Ctrl-X or Command-X on the Mac to Cut the selection. Open the stave component for editing and click on Edit>Paste in Place. With the cutter geometry still selected, hold Ctrl (or Option on the Mac) and add the stave geometry to the selection. Right click and choose Intersect Faces>With Selection. After a little processing, you should see edges where the intersections have been created.
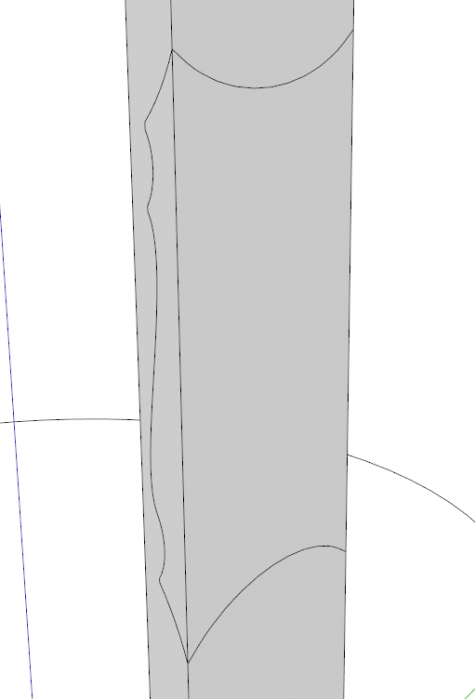
Delete the unneeded part of the cutter and you’ll be left with something like the above.
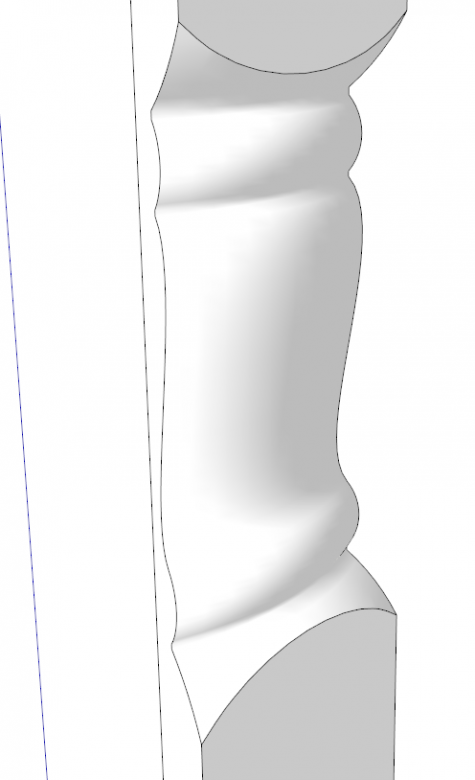
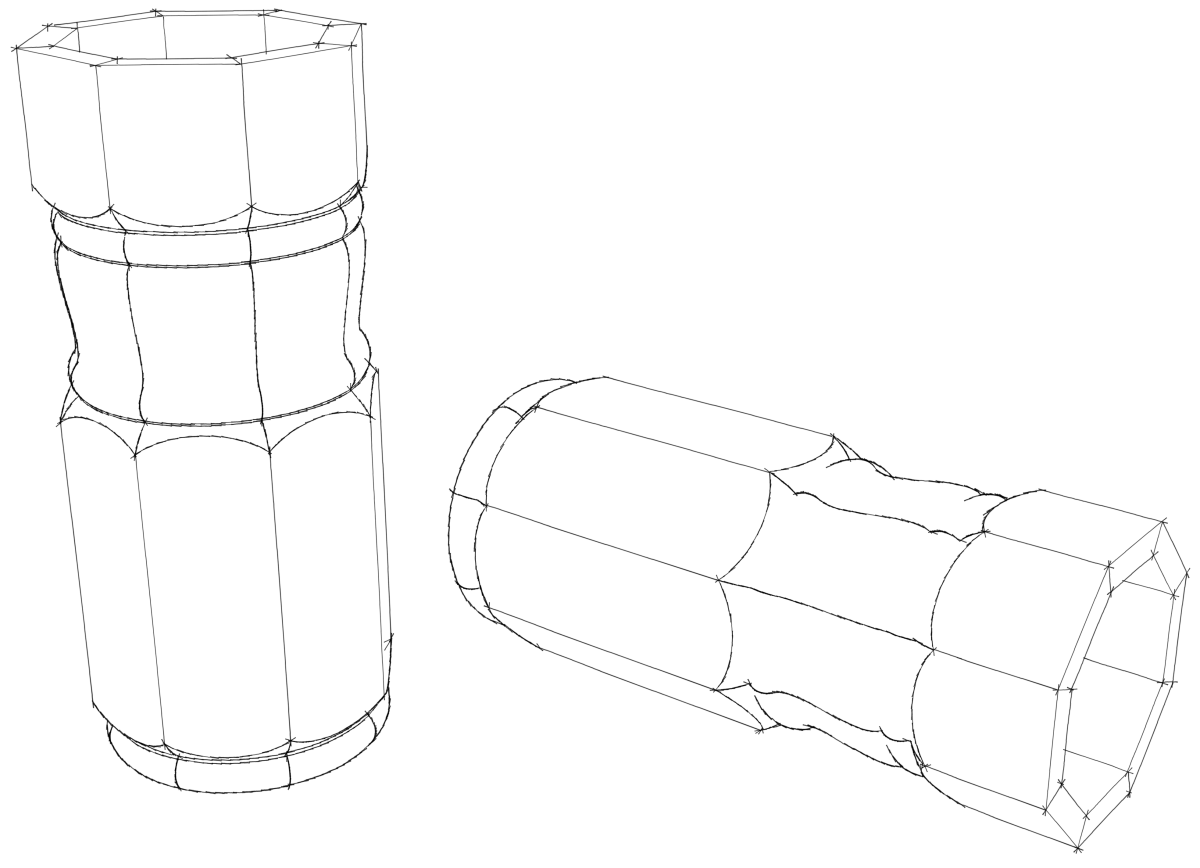
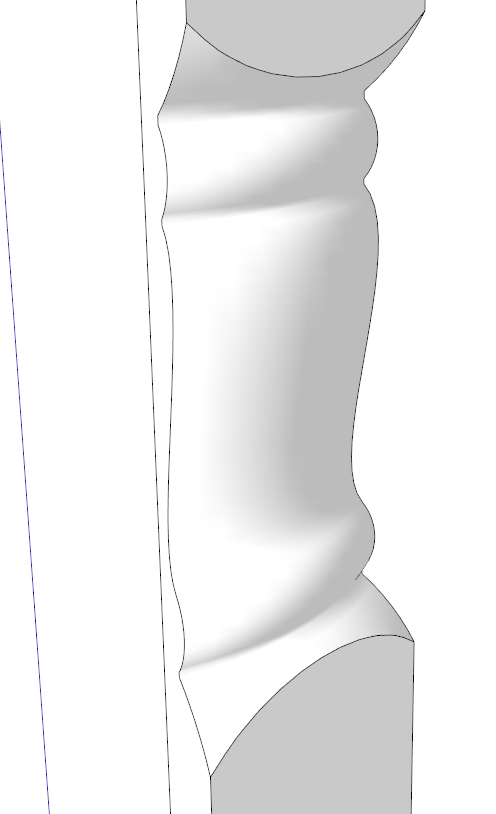
Delete the waste part of the stave and correct the face orientation and you have the turned portion of the stave.

Repeat for the other cutter and unhide the rest of the stave components.
Now, for users of SketchUp 8 pro, this process can be simplified a bunch by using Subtract from the Solid tools. You can forego making the copies of the stave until after the turning is complete (you could do that with the free version, too) and leave the cutters as solids after the Follow Me operation. Make the cutters components and then Subtract them from the stave. After you run Subtract, the stave is converted to a group so you’ll want to make it a component again. This process will leave you with the cutter components and the original stave component in the In Model library in case you need them again.
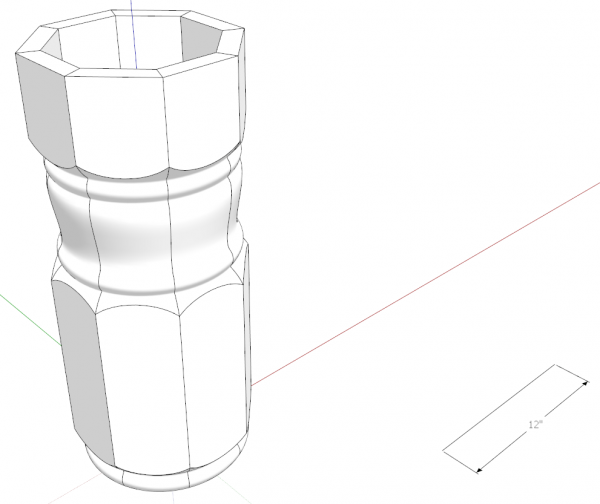
Get the yellow Tape Measure tool and measure the resizing line again. Type its original length and hit Enter. The pedestal is now complete. Add legs, a top and the rest and you’ve got yourself a table.
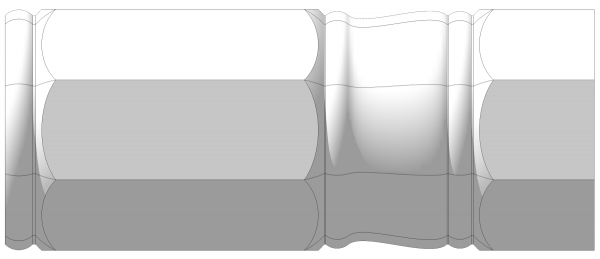






Comments
Dave,
That's sweet. A bit daunting at first, but once the concept is understood it becomes a bit easier.
Tanks Dave, it has been very instructive
Log in or create an account to post a comment.
Sign up Log in