Fast Shellac Finish
How to build an attractive finish in three easy steps.

Synopsis: If you’ve shied away from shellac because you once tried to brush it straight from the can, or if you’ve been put off by the thought of a French polish, it’s time to give this versatile, fast-drying finish a second look. The keys to success are excellent surface preparation and using thinned shellac so it goes on easily. Using this technique, you’ll get a nice satin finish that’s friendly to the touch in about a half hour.
Shellac is a finish that a lot of woodworkers shy away from. If you’ve ever tried to brush it on straight from the can, you probably didn’t like it very much. And if you’ve read an article on the fine art of French polishing, you’re forgiven if you were left feeling a little intimidated.
The truth is that shellac is a great fast-drying finish that’s easy to apply and perfect for small projects and last minute gifts. It dries quickly between coats and lets you build up the finish gradually so you can really dial in the sheen you’re looking for. I have a very simple technique that yields a nice satin finish that’s friendly to the touch in about 30 minutes.
The key to success is thin layers, but it all starts with surface preparation. Any mill marks, tearout, or sanding scratches will show up in the final finish, so getting a flat and smooth surface is a must. For open-pore woods like oak, sand to at least 400 grit; for closed-pore woods such as cherry and maple, sand to 600 grit.

Premixed must be remixed
One of the funky things about using shellac is that it’s not ready to use straight from the can—it needs to be diluted. Undiluted, the shellac will be prone to runs and drips, and will take longer to dry. Diluting, or cutting, the shellac remedies these issues. Fortunately, getting the right mix ratio from canned shellac isn’t difficult. I prefer SealCoat from Zinsser, a light-colored shellac with the wax removed. Wax occurs naturally in shellac, but removing it increases the clarity, durability, and moisture resistance of the finish as well as allowing other finishes to adhere to it. To use SealCoat, simply dilute it 1:1 with denatured alcohol.
Build the finish in thin coats
I wipe on the shellac with a clean cotton cloth. The diluted mixture will dry fast, so drips and runs shouldn’t be a problem. Store the rag in a closed container to keep it from drying out and you can use it indefinitely.
 For the full article, download the PDF below:
Fine Woodworking Recommended Products

Osmo Polyx-Oil


Waterlox Original


Comments
Mike, more a question than a comment. In this article you advise: "Shellac dries fast, so you can finish parts without
slowing down assembly. This means you can prefinish components like these dividers that would
be hard to reach after glue-up." I agree with the advantage of access to the parts pre-assembly, but wonder, do I need to avoid pre-finishing any surfaces which will be part of a glued joint in final assembly?
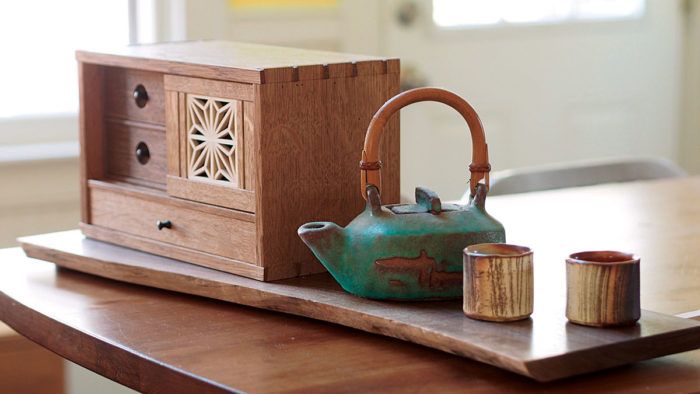
Is there a project plan available for the item shown in the photos of this article?
Thank you,
George Irwin
I don't think so. I'm pretty sure it's in Mike's first book.
Ben, I got Mike's first book and made the Tea Chest--take a look. I ran out of stock on the mystery wood so the back panel and drawer fronts are something else. I decided I like Mike's style so I made his wall hanging cabinet too and I just signed up for Mike's class in January. Thanks so much for the tip. I think you and Mike have set me onto my next journey. I like the "sticky-outie dovetails".
Thanks again-George. (BTW, we met at the Lie-Nielsen Lobster-Fest a few years ago. Great event!)
I'll (virtually) see ya there!
Thanks Ben! I'll look for the book.
Log in or create an account to post a comment.
Sign up Log in