Traditional Crackle Finish
A crackled milk paint finish can add bold color and texture to any piece.
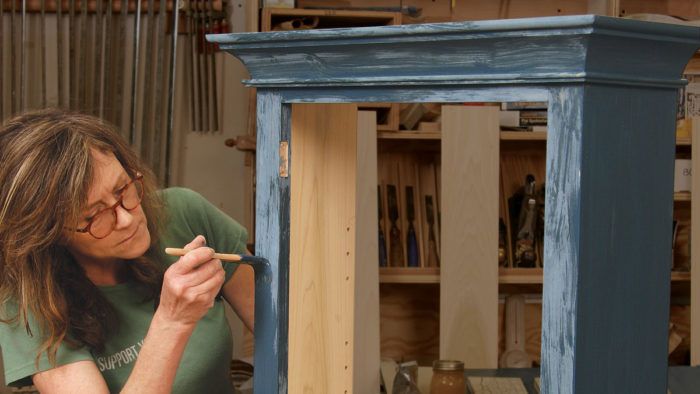
Synopsis: A crackled milk paint finish can add bold color and texture to any piece. Typically used in Shaker or Colonial-style furniture, it is a surprisingly simple finish to achieve. Just brush on a base coat of milk paint, a layer of crackle medium, and a topcoat of milk paint, and get ready to watch the show.
If you’re looking for a painted finish that’s different from the norm, consider crackled milk paint. Though it’s most often used in Shaker or Colonial style furniture, antique reproductions, and restoration work, you can add crackle finish to almost any piece to create an eye-popping effect. And it has an added bonus: It’s non-toxic.
 |
Video: Watching Paint
|
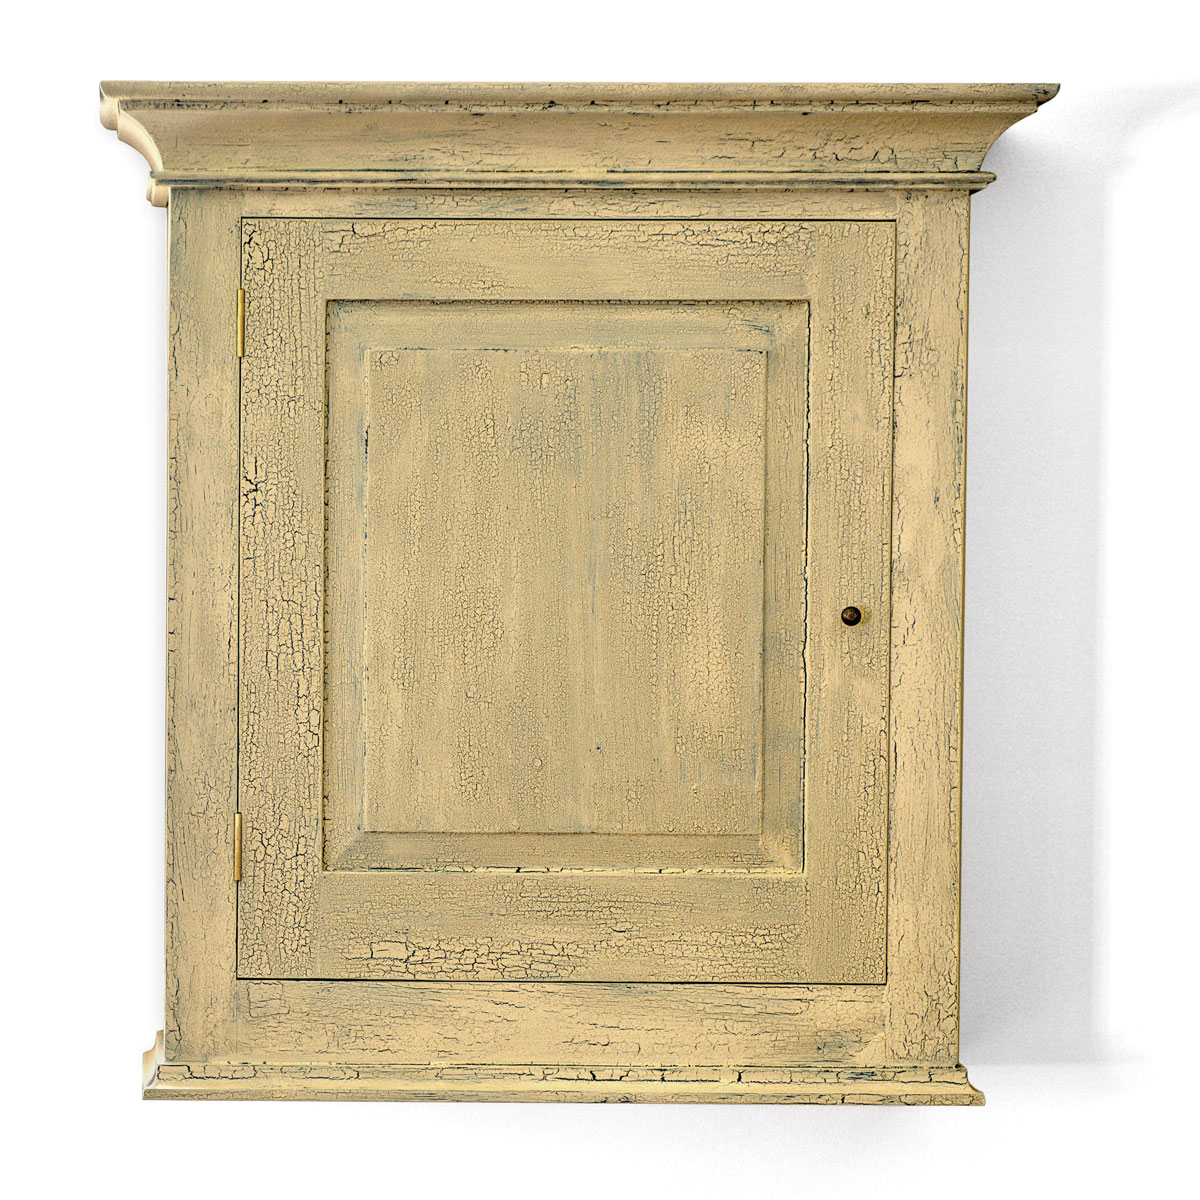 Producing a crackle finish is surprisingly simple. It’s brushed on in three steps: a base coat of milk paint, a layer of crackle medium—essentially, thinned hide glue—and last, the topcoat of milk paint. Then get ready to watch the show. As the top layer of milk paint dries, the hide glue layer underneath, with its glasslike surface providing little purchase for the paint, causes it to break apart and form the crackle pattern. Depending on the type and strength of crackle medium you use, you can achieve anything from a fine, filigreed crackle pattern to a much coarser and bolder one. By choosing contrasting colors for the two layers of milk paint, you can emphasize the crackle effect. Once the topcoat is dry, you can either use your piece as is or seal it with a clear coat to protect the finish from staining by water, oil, and dirt.
To arrive at a satisfying crackled finish, it’s critical that you experiment and make color samples using the entire process before applying it to a piece of furniture. Prep the wood and brush on the base coat Milk paint adheres best to raw wood. Sand the wood to the fineness you desire, and remove dust thoroughly after sanding. Mix the milk paint in a non-metallic container following the proportions recommended by the manufacturer. Apply the base color with a natural-bristle brush or a foam brush. You may need two to three base coats to ensure adequate coverage, depending on the color you are using and the porosity of the wood.
Next comes the hide glue When the base coat is completely dry, brush on a layer of crackle medium. Franklin Titebond cold hide glue works well, as do The Old-Fashioned Milk Paint Company’s Antique Crackle and the Real Milk Paint Company’s Natural Crackle. Thin the crackle medium with water to produce a finer pattern, or leave it at full viscosity for a bigger, bolder pattern with wider cracks, revealing more of the base color. Thinning by 1:3—one part warm water to three parts liquid hide glue—and applying a thin, brushed-out layer should result in a fine crackle pattern. You can adjust the pattern not only by changing the viscosity of the crackle medium, but also by controlling the thickness of the film, and the pattern in which you apply it.
From Fine Woodworking #261
 For the full article, download the PDF below:
Fine Woodworking Recommended Products
Waterlox Original
Bumblechutes Bee’Nooba Wax
Odie's Oil


Comments
Nice!
Log in or create an account to post a comment.
Sign up Log in