How to Build a Heavy-Duty Workbench
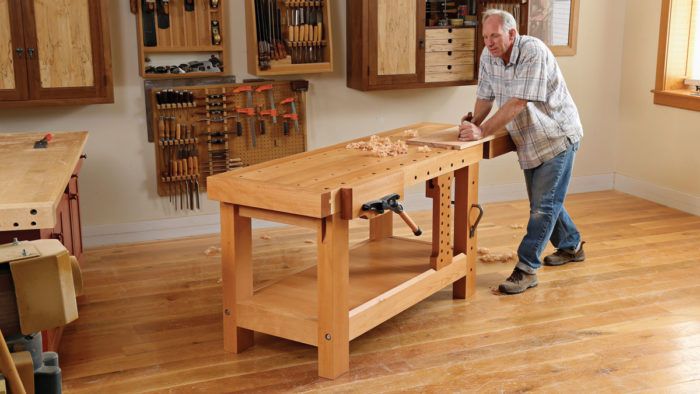
For Chris Gochnour, the tail vise is the heart of this versatile workbench.

I’ve done a fair amount of handplaning during my 32 years as a professional furniture maker, and I’ve found that the best way to secure a board for face-planing is between two benchdogs, which can be set below the board’s surface so you can plane without hindrance. Clamps and holdfasts, by contrast, seem always to be in the way. And unlike a planing stop, dogs have no trouble holding the board in place when you plane diagonally or across the grain.

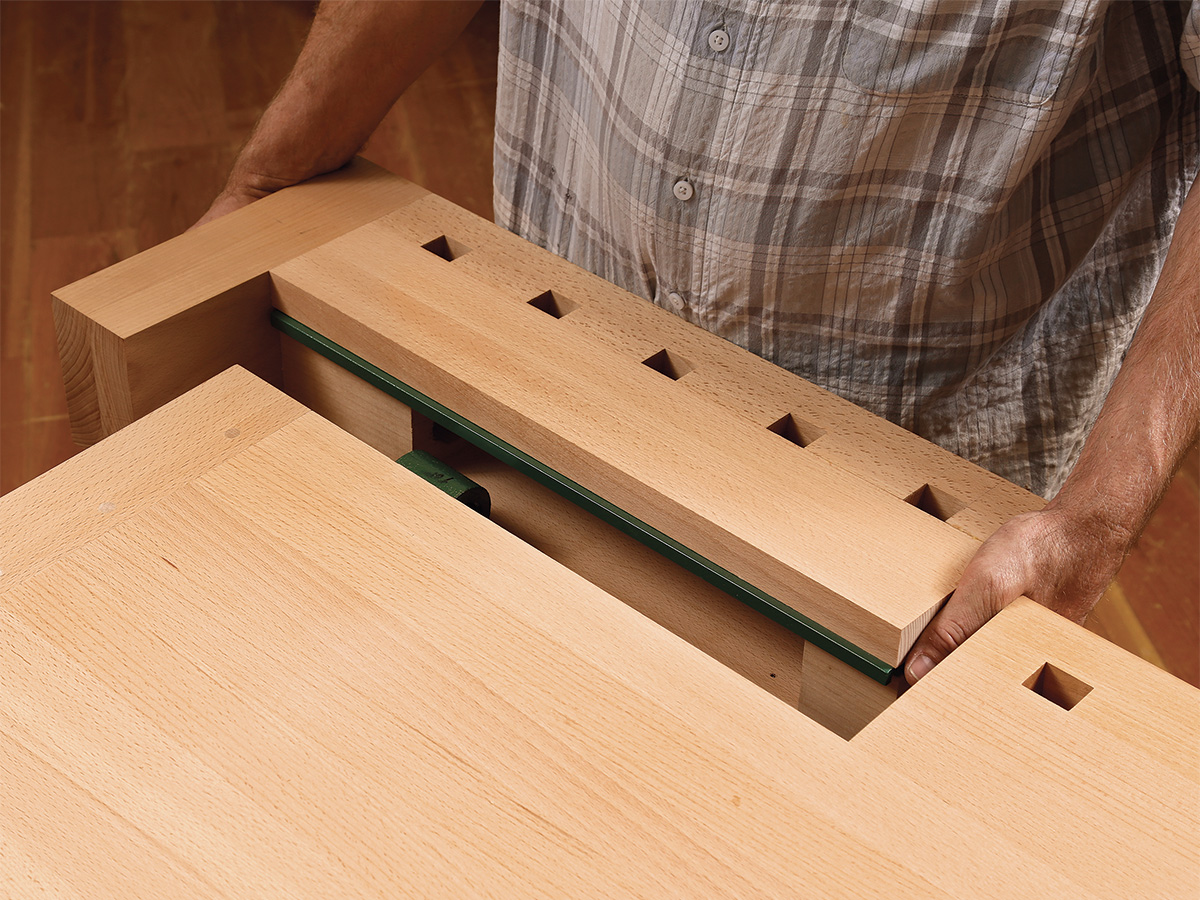
Benchdogs require a vise, and when I build a workbench, I like to locate that vise on the end. There are four options for an end vise: a traditional tail vise, a wagon vise, a metal face vise mounted on the end, and a twin-screw vise. All four can be used for face-planing boards, but the tail vise has several advantages over the others. With a tail vise, the dog holes can be placed very close to the bench’s front edge, which makes it possible to plane narrow boards with a plough plane or similar plane that has a fence that hangs below the benchtop. That’s something that isn’t possible with a steel vise. Wagon vises work great when the board is flat on the benchtop, but with a tail vise you can also clamp a workpiece vertically, which lets you cut tenons, for example. The fourth option, the twin-screw vise, handles tenons and edge-planing fine, but doesn’t support work as well as a tail vise for face-planing. These advantages are why I chose a tail vise for my bench.
For many woodworkers, building and installing a tail vise seems intimidating, but it shouldn’t be. I’ve installed quite a few, both on benches of my own and on student benches, and have developed a process that ensures the vise slides smoothly and doesn’t snag. I’ll show you how I do it.
The top is thick where it needs to be
Making a bench is a big undertaking, but fortunately most of the work involved is fairly routine. The base of this bench is four big legs joined to the rails between them with mortise-and-tenons. Shiplapped boards set between the lower rails provide a nice place for storing jigs and anything else you like to keep close by. I am going to skip over the base construction here, because the process is relatively straightforward, and focus instead on the top and the tail vise.
The benchtop is thick along the front and back edges but has a wide, thinner section between. The that a dog, which has a head that’s wider than its shaft, can fit completely into the hole. Cut the dog holes in the vise jaw at this time, too.

From Fine Woodworking #265
To view the entire article, please click the View PDF button below.
*In the magazine there is a typo in one of the measurements on the breadboard drawing on page 38. The PDF has been updated
More workbenches on FineWoodworking.com
- Video: Matt Kenney’s Monster Workbench
- New-Fangled Workbench – With six pipe clamps and some dressed framing lumber, you can make an inexpensive bench
- Video: Ed Pirnik’s Not-So-Big Workbench


Comments
Where are the expanded plans and the complete cut-list
Plans?
The store has been updated with plans!
They are coming soon.
Thanks!
Wow. Thank you.
My workbench looks very similar and has three vises; one double-posted chain connect, one end vise "L", and one side vise. Most used is the double end vise which has several holes for the small brass bench dogs. Love it.
I'm looking to build a bench similar to this. What type of wood do you suggest?
I am planning to build this bench and I purchased the plans, but I can't find any mention of the type of wood to use? Does Chris recommend Maple?
Thanks.
I bought these plans (PDF), but it won't print out dark enough to read. Adobe format is garbage. Totally useless. Can you send this in Jpeg form so I can print out the information?
“[Deleted]”
Are the plans not available??
Log in or create an account to post a comment.
Sign up Log in