Easier Joinery for Curved Drawer Fronts
Clever jigs control the curves
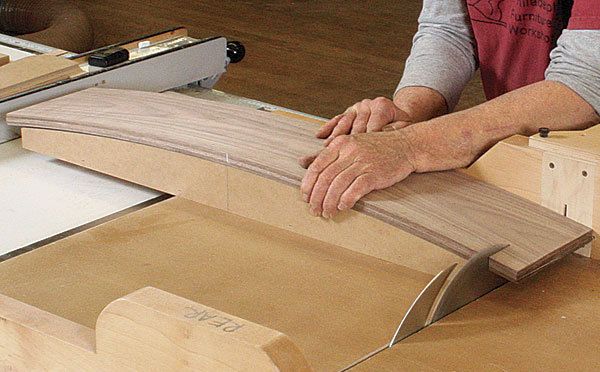
Synopsis: To produce predictable curves and accurate joinery on a bowfront dresser, Alan Turner built a series of jigs: a two-part bending form, a cradle for crosscutting the curved drawer fronts, a jig for routing the stopped dovetail sockets, and a curved fence for the router table that enabled him to cut the slot for the drawer bottom on the concave inner face of the drawer fronts.
My colleague at the Philadelphia Furniture Workshop, Mario Rodriguez, recently designed this threedrawer bowfront dresser and handed it off to me, the resident jigmeister, to figure out an efficient way to build it. The key questions I faced were how to produce the curved drawer fronts and how to join them to the drawer sides.
I considered steam-bending the drawer fronts, but I thought I wouldn’t get consistent enough curves. I could have bandsawn the fronts out of solid wood, but that would have wasted material and created an unappealing grain pattern. I decided on bent lamination, which conserves wood, has minimal springback, and affords complete control of the grain. I decided to join the drawer sides to the fronts with sliding dovetails, the strongest method of attaching overlay drawer fronts.
To produce predictable curves and accurate joinery, I built a series of jigs to speed up and simplify the building process. I made a two-part bending form, a cradle for crosscutting the curved drawer fronts, a jig for routing the stopped dovetail sockets, and a curved fence for the router table that enabled me to cut the slot for the drawer bottom on the concave inner face of the drawer fronts.
Master patterns are the starting point
I built all these jigs using convex and concave ribs. The MDF ribs are easy to produce on the router table using male and female pattern-routing jigs.
These master routing patterns are the key to the whole chest. I generated the curves with an adjustable trammel arm and a router. I drilled right into our wooden floor to set the trammel pin, and then I screwed a fence into the floor perpendicular to the trammel arm. To ensure that it was exactly 90° to the arm, I measured carefully to make the two ends of the fence equidistant from the trammel pin. After routing a 1⁄2-in.-deep groove with a 3⁄8-in.-dia. bit, I bandsawed through the waste and then cleaned up with a router and a flush-trimming bit.
For the full article, download the PDF below:
Fine Woodworking Recommended Products

Jorgensen 6 inch Bar Clamp Set, 4 Pack

Stanley Powerlock 16-ft. tape measure


Log in or create an account to post a comment.
Sign up Log in