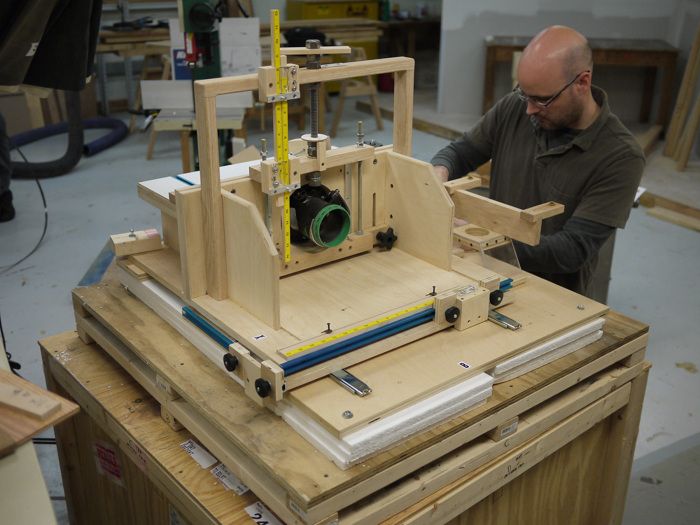
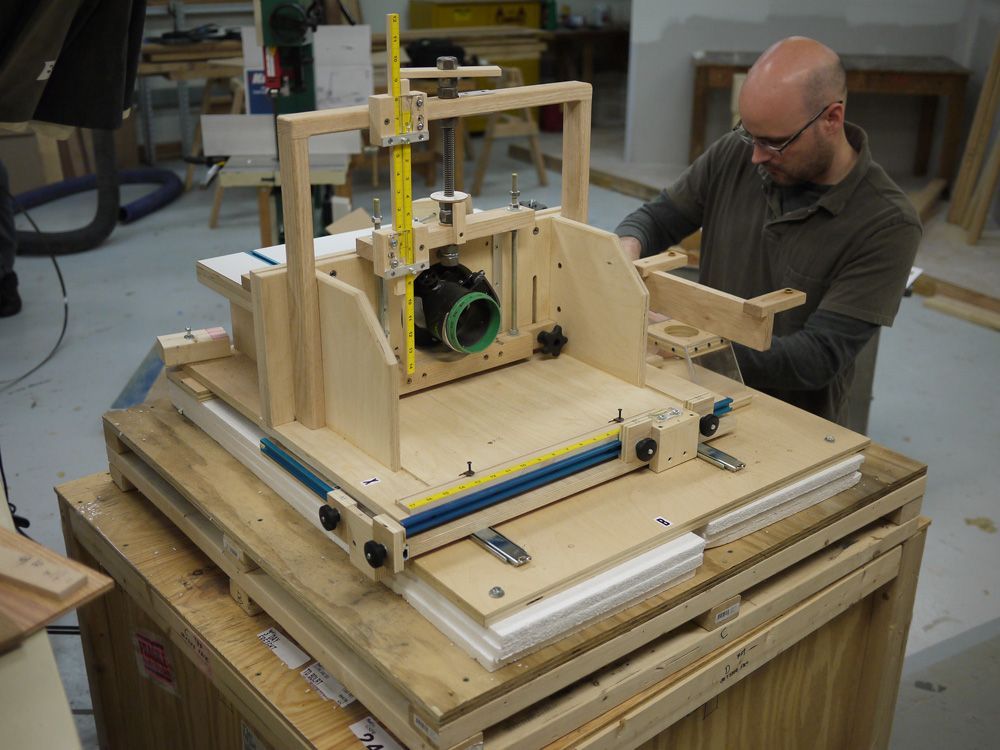
Big tool, big crate. Here I am unpacking the horizontal router table. And, yes, it is sitting on the crate it was shipped in.
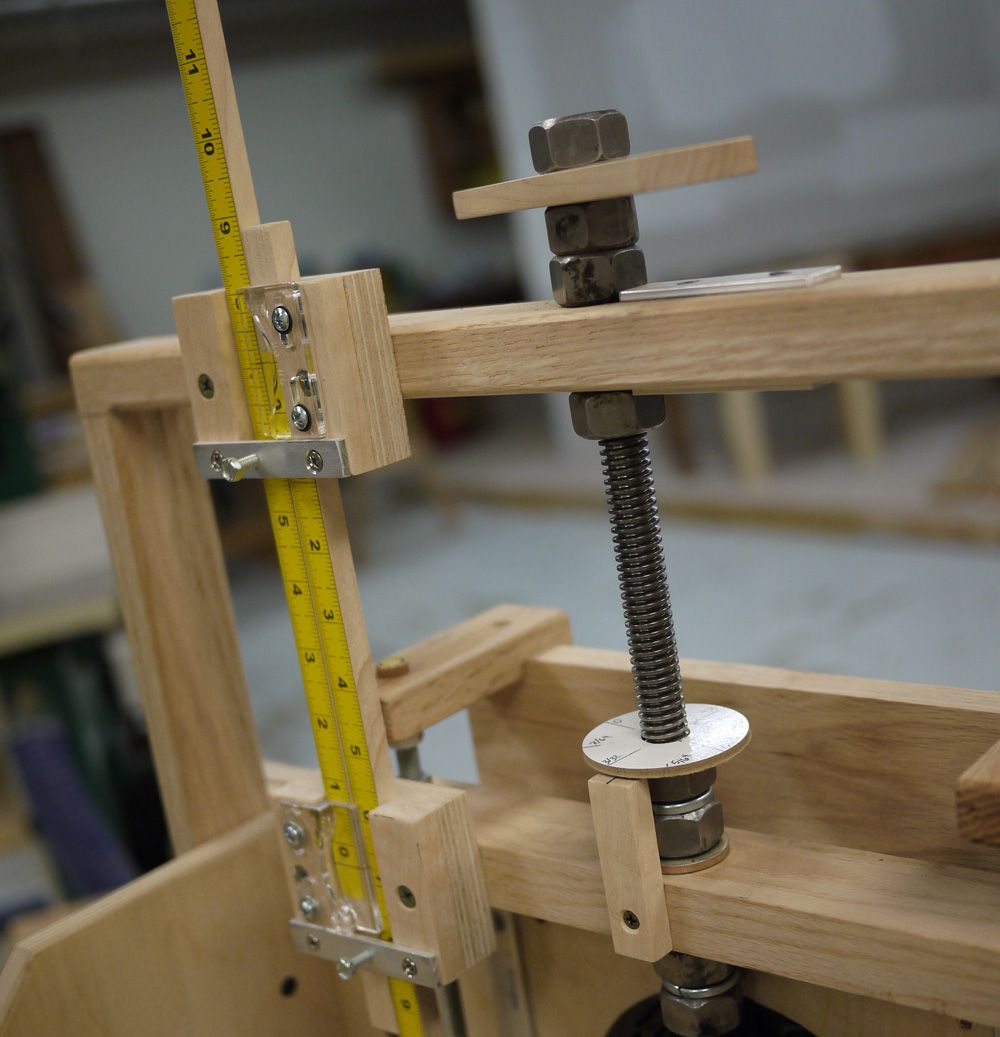
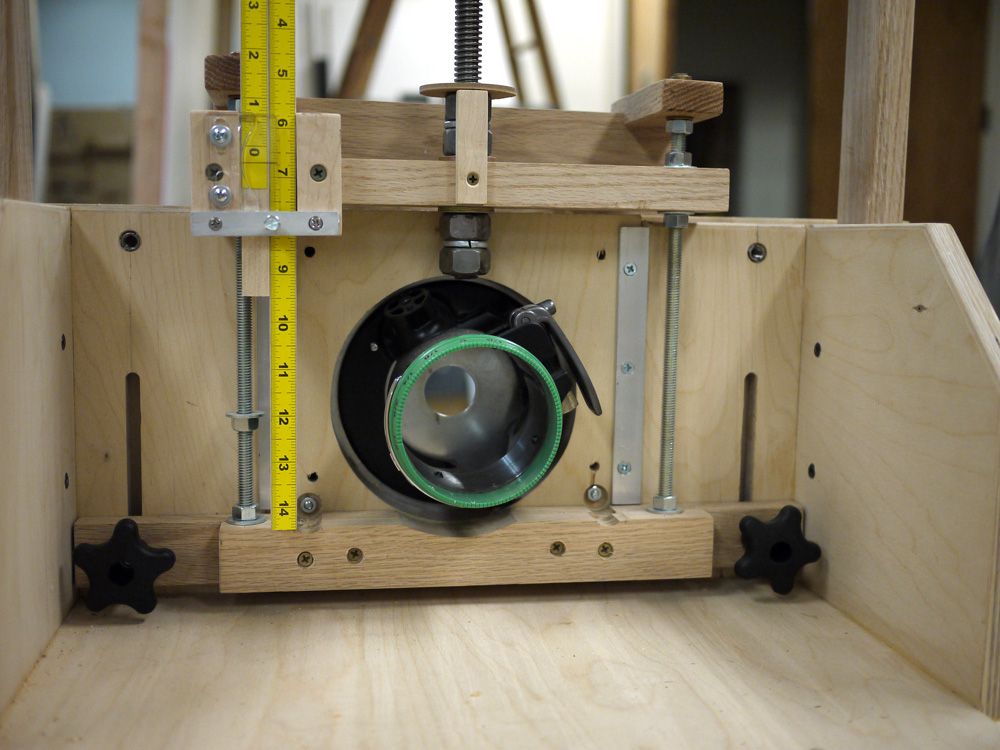
We get some unique mail here at Fine Woodworking, like carvings, miniatures, wood samples, and I once even got a block plane. But the most interesting thing I’ve gotten in the mail has to be the horizontal router table sent to me by a reader from South Carolina. He sent it to us so that we could test it out and consider it for the magazine. We’ve run articles on horizontal router tables in the past, but this one is a bit different. Typically, the table is made to slide on two axes and the router is stationary. The maker of this table switched that up. The router moves in three axes and the table (and workpiece) is stationary. To get a sense of how the table works check out this quick (and rough) video of me using it back in the shop.
Wanna Build It?
If you’re interested in building a rig like this, be sure to check back in the coming weeks for a link to the plans. We hear the inventor of this table will be putting his design onto paper!
More Details
 |
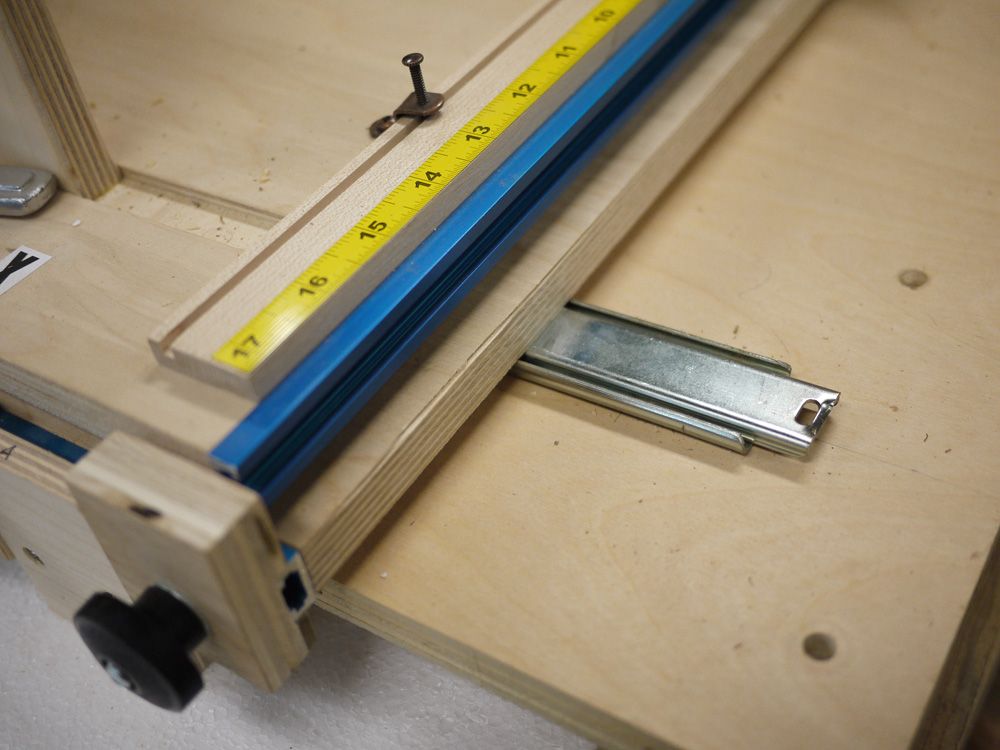
Router Glides on Slides |
 |
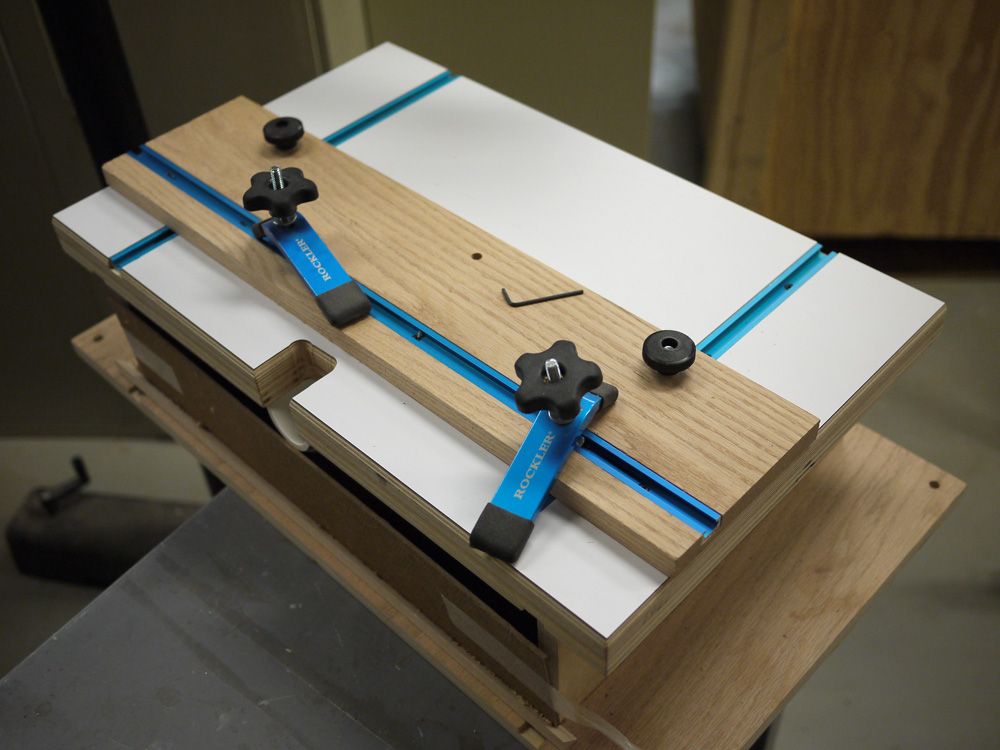
A Stationary Table |
 |
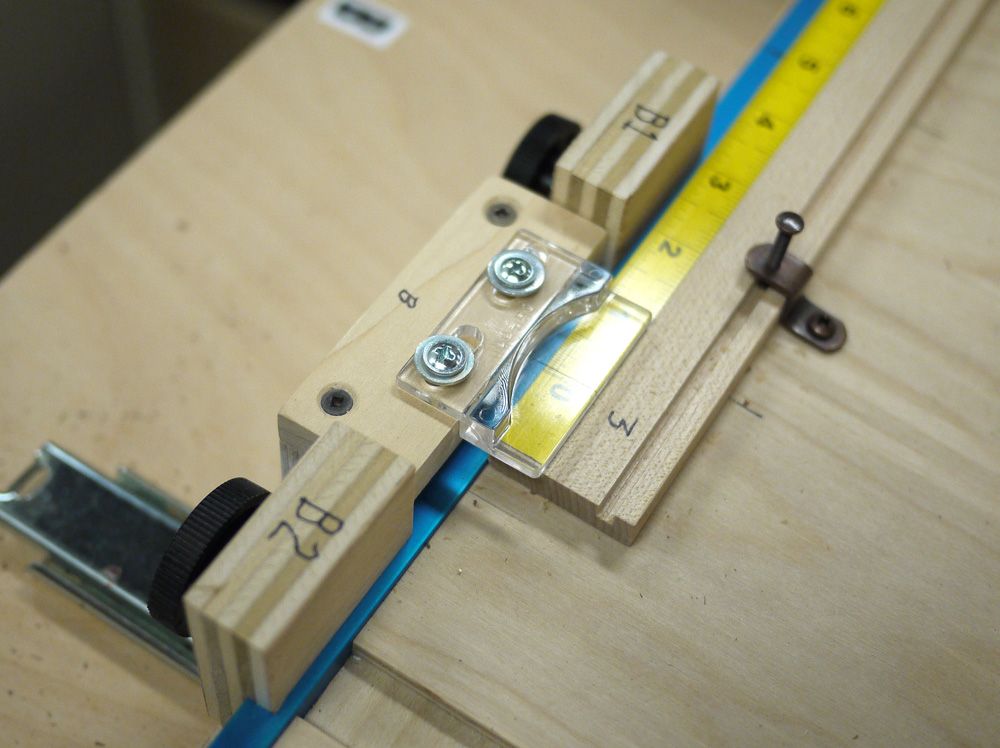
Precise Control |
| Looking to build your own horizontal router rig? • Homegrown Horizontal Router Table • Horizontal Router Table • Shop-Built Horizontal Mortiser |



Comments
Looks great! I am interested in building this horizontal router table. I will attempt to wait on on the design.
Nice - he should get a prize just for "cool" points alone! Double extra bonus because it works!
Indeed this is totatly cool! Why didn't I think of this? I've got a question though, wouldn't the drawer glides fill up with saw dust? I think these are ball bearing slides with greese. I wish I could make a verticle router with about 4 feet of travel.
This design is based on your standard horizontal CNC concept, and will work just fine. However, linear rails and bearings would be a much better choice than draw slides, also all down parts should be made on a CNC if accuracy is what you want from a setup like this, check McMaster-Carr. That being said...Nice Job!
Very interesting concept.. I just built a jig for horizontal boring on the Torque Work Centre.The Torque Workcentre already has the linear bearing movement on the X, Y and Z axis..
Mortices, tenons, sliding dovetails, loose tenon joinery.
.Just one of many functions of the machine.
Rip, Crosscut, Rout, Surfacing, Drill, Pin Rout, Copy Rout. Sign Making. the list goes on.
Looks interesting. I'm going to get my thinking cap on.
Seems someone 'stole' a crate from the PC Game of 'Half-Life 2'!!!
Nice going.
Jackoh
I use a Woodrat, moves the piece and router in three dimensions and also has the ability to move the router at an angle to the work piece. Its the best dovetailer I have found I can cut the dovetails on drawers of different depths
without having to reconfigure the set up, It's brilliant.
I already seen concept like this, made by Matthias Wandel (http://woodgears.ca/slot_mortiser/index.html).
My friend and I build one and it is working fine (little bit of machining was necessary because we have to convert it to metric).
Where does one buy the Woodrat machine mentioned?
Woodrat here as well...
@Jessen,
You can find more about the WoodRat at http://www.woodrat.com/. In the US, you can order directly from the manufacturer, or from Lee Valley Tools.
-Steve
4th Axis: That's an excellent point regarding the slides. In fact, we've gotten a couple of designs over the years that use sealed bearing movements.
Anyhow, I'm glad you folks got a kick out of this. We're looking into shooting more of these little video blogs - where appropriate. If you have any requests on the types of topics you'd like to see in these quick-form videos, please don't hesitate to list them here in the comments.
Cheers,
Ed Pirnik
Where is the duct collection point, if it is there I missed it.
Hi toych: Yes, it does have dust collection - although we didn't use it for the blog since the vacuum would have caused audio problems. There is a port on the right hand side of the stationary table, as you're looking at Matt head-on, standing behind the bench.
Cheers,
Ed
toych,
There are 2 dust collection ports, but you can't see either in the video or pictures. One is beneath the stationary table. The other actually does double duty as a guard. It slides over two vertical bars coming off the top of the router mount assembly. It works quite well, but we left it off for clarity's sake.
Matt
Thanks guys, appreciate the answers.
Darren
by the time I would gather the all the parts and build this professor Frid and I would have built a sofa table by hand chopping all the mortises and still had the time to get started on a new bed for my daughter = other than that my mortising tool works just great without even thinking about a router. If I was doing production work I would just buy a machine. As far as the other uses it seems that a few simple jigs take care of the matter without having to find a place in my shop for another tool.
Wow what wonderful gig! can't wait to see the plans to buid one! One request: I would love to see a way to integrate dust collection ont this as I am shure that others like me love woodworking and are alergic to wood dust! They say you don't choose your love....but you can choose how you can make it hapen!! Check out this guy's site (http://billpentz.com/) on dust collection I am shure he is well known but I just discovered him. Perhaps after reading his tons of research on the effects of fine wood dust one will find a way to integrate effective dust collection
genius!
I really hope the creator will make these plans available to you, because I'd build it today!
Thanks for sharing.
This machine looks superlative, small size and very accurate! I'd like to built it, so I hope the creator will make the plans available as soon as possible. Thanks in advance!
Thanks for the comments. I will try to log in frequently to answer questions and hopefully have plans available soon.
By the way folks, OTW is the screen name of the gentleman who made the horizontal router table.
Matt
This machine looks a lot like Matthias Wandel's:
http://www.youtube.com/watch?v=ciXplz3SrMk&feature=related
I have to ask, what are advantages and disadvantages of having the router half move instead of the workpiece half move?
I used drawer slides to build a box joint fixture, had some issues. Tell me how this guy keeps the sawdust out of the ball bearings?
A few replies: (1) I too was concerned that dust would foul the ball bearing drawer glides but, if you use the dust collection ports (one drafts down from the notch in the work table and the other is supported above the bit and has an integrated plexiglass guard-these are not shown on the video) they seem to keep the glides clean. I also have been using a baffle (also not shown) that protects them as well. Finally, I still periodically blow the dust that does find its way there (other sources in my shop) with my air hose. (2) Moving the router feels more natural than moving the work piece and I think it is safer than hands approaching a spinning bit. It is also easier to make repetitive cuts. Also, not shown, making tenons on long pieces is less difficult if the router moves. (3) I have not seen Mathias Wandel's You Tube clip but will check it out.
I think that a set of plans with construction details and an operating manual would answer a lot of your questions. I also have a home made video/power point presentation that may be of interest. Thanks again. I have never "blogged" before.
A unique idea to move the router instead of the workpiece. I've been using a horizontal router for about 10 years now. I'm on my second generation machine now. I learned enough about what I liked and disliked in the first one that I now have a second one.
The issue I see with this one, is the limitation of the workpiece size. I've cut long sliding dovetails and other sorts of edge detail of long stock (well not all that long, but longer than the rail travel of this machine).
That concern, plus what others have mentioned about dust in the ball bearing (that will eventually gum them up terribly) makes this machine a non-starter in my book.
It's better to stick with a stationary mounted router and 'slide' the workpiece across a fixed table (IMHO).
In response to LouieLovas: You can set the stops (X and Y axes) to lock the router in one place, usually with the bit within the notch on the work table, and move the workpiece across the table to make longer cuts. There is a down- drafting dust port located beneath the notch for this purpose and I have been using a baffle to keep stray dust out of the bearing slides. I looked into linear bearings but they add substantial $$ whereas Rockler has these slides for about $9 each and could replace them. I have not used it for very long and I may yet discover the dust problem.
This is essentially a horizontal slot mortising machine. There is a very good design by a German/ Canadian engineer that has plans for sale. You can view his mortising machine at http://woodgears.ca/slot_mortiser/index.html
Very cool machine!
Home made video and power point available to see? Would like to see the guards and bellows.
If you want to see some incredible homemade woodworking tools, you REALLY need to look at http://www.woodgears.ca. Matthias Wandel has plans for his version of a horizontal slot mortiser, which by the way, I just completed. His plans are in metric measurements, but I quickly got use to using centimeters. I spent about a month on this project but I am very pleased with the machine. Fine Woodworking should be contacting him for future articles!
I wish I had thought of this! I want to build one of these.
Looking forward to the plans... I really like the 3-axis movement and precision control.
The HRT (horizontal router table) is back home now. I have begun work on a set of plans (SketchUp) and a manual. This will take a bit as I am new to SketchUp but do have a resource. I have a link to an earlier homemade video which does show one of the dust guards in place (though we remove it to show the cuts). Hope to have a link, etc. soon for plans.
The video link is:
http://gallery.me.com/danny.byrd/100527
Any status update on the plans to build this great tool? Thanks.
Thanks for the interest. I am still working with SketchUp and making progress on the plans. I will post follow ups here and respond to questions/comments as well.
looks like a great table, how are the plans coming?
In reply to Natick64, thanks for your patience. I think that we are about 80% done with the drawings themselves. From these models in SketchUp will come the detail drawings of the component parts and I will develop a manual on construction (what I have learned, in case anyone needs it), set up, and parts list. I may check with Rockler to see if they would be interested in making a kit. I also want to complete a users' manual covering what I have learned from actually using the HRT, as I call it.
Are there plans available somewhere?
Thx Bill
In reply to GoneThinking2,
We are almost done with the plans with the help of a most venerable SketchUP guru and contributor to blogs. As soon as I have a solid timeline on the project I will post it. Thanks to all for their interest.
Looks great. When will the plan be available?
How the plans comeing?
Thanks for your patience. I am working with Dave Richards, of Design.Click.Build fame, on finalizing the illustrations and documentation. I have written the work table section of the bulding instructions with a few more items to add (part list with catalog #s)and Dave is preparing the illustrations. The instructions for the HRT itself are more complex but should flow well no that we have a system and the SketchUp model is complete. There is also to be a users manual. I am hoping that we are a few weeks away.
Where's the plans?
Any update on when the plans will be available. Thanks
I have finsihed the Buillding Instructions (text) and am working with Dave Richards to complete the illustrations. He is putting this together as a PDF document and it is looking good. We are also working on an Operating Manual and a web site to have animations, still shots, and videos. I plan to make all of this available as "donation ware" so that you can download and only make a contribution to the project if you feel it worthy.
It has taken much more time and effort to put all of this together than it did to build it. I have discovered more uses for it and they will be illustrated in the site.
Thank all of you for your interest and patience!
Looks like a great design! Has the link for the plans been posted? Thx!
Whats going on with the horizontal router table plans?
Status Report: I had no idea that it would take so long to put all of this together and can only apologize for the wait.
The PDF of the Plans which includes the drawings and detailed instruction, parts list and sources is done! I have nearly finished the Operating Manual and have set up a web site for all of this. The Operating Manual contains illustrations and instructions for a variety of applications including: edge trimming, raised panel, rabbets, round over, edge beading and restoration beading, bead board, sliding dovetails, stopped chamfers,...
Surely we can deliver the goods in a few weeks (I know I said that before).
Where's the plans or the website?????
Do you think it will ever happen!
FINALLY! The Plans and Manual are available..
After 18 months of work, lawyers' advice on liability, etc. and much help from the venerable Dave Richards, last week we got the web site up to order the plans and manual. Our approach is to generate a community of users that will share ideas for improvements and applications. It is still very much a work in progress (my first such attempt). We are developing videos, projects, etc. Please vist the site to obtain plans, operating manual, projects (SketchUp), etc. There is a Forum as well..
http://www.HRTProject.com
The web site is up and working. I have sent out five sets of plans this week. The Operating Manual is online on the site and you may want to look at some of the applications of the HRT. There are a few You Tube videos (just a start and rough now). I have begun to add projects with downloadable SketchUp models.
Any thoughts or suggestions?
I had the opportunity to see and use the HRT in person. I was building a craftsman style Deacons bench that needed 28 mortise and tenons joints. I don't own a bench-top mortiser, and actually I prefer to use a router. I looked at several jigs (shop made and purchased), OT offered to show me what he was working on. I took my bench parts to his shop and we cut all the mortises in less than 3-hours. Once the HRT is set for a cut, you can reproduce as many as you need with no additional set-up, great for table legs or other applications where you need the same set up on multiple pieces. I've got a set of plans and will build one for my own shop.
The plans and operating manual are up on the web site at http://www.HRTProject.com and there are links to videos as well. Plans have been sent to six countries so far.
Excluding the router, how much do you estimate it cost to build this?
Needs some serious dust collection otherwise it's ideally set-up to fling dust/chips right into your face. Otherwise great option to the table ,thanks for the video.
Log in or create an account to post a comment.
Sign up Log in