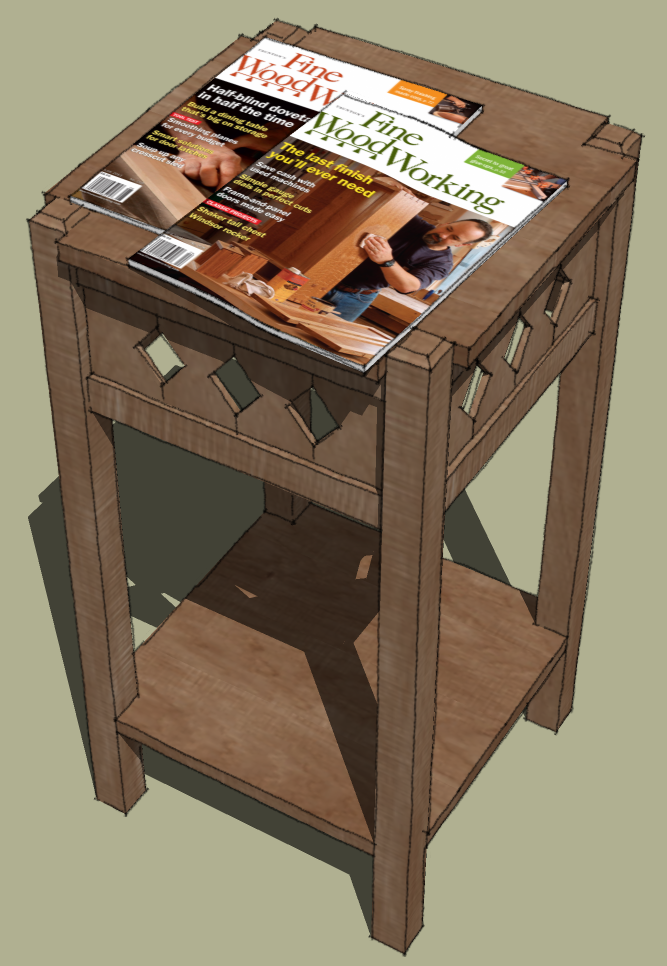
Last week I was asked to describe how I make wood grain materials for use in SketchUp. Here’s a bit of the discussion we had.
To start with, I find some useful images. For wood grain materials I prefer images of whole boards rather than the typical square or nearly square images you often find. Unless the wood is very straight grained and plain looking, images of short sections of the wood tend to work poorly in SketchUp because the image must be repeated. If there is any sort of grain features such as cathedral grain or knots, it quickly becomes obvious and I think distracting.
Many folks search for seamless grain patterns so they can repeat and not look like tiles. Wood doesn’t do that naturally and I figure if you want seamless, go with plastic laminate instead.


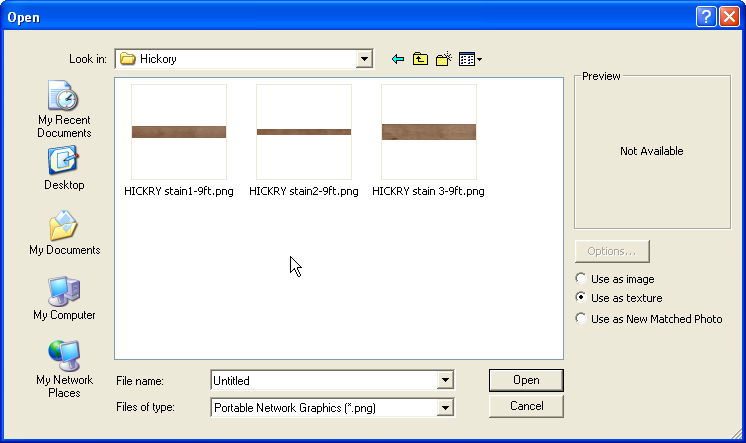
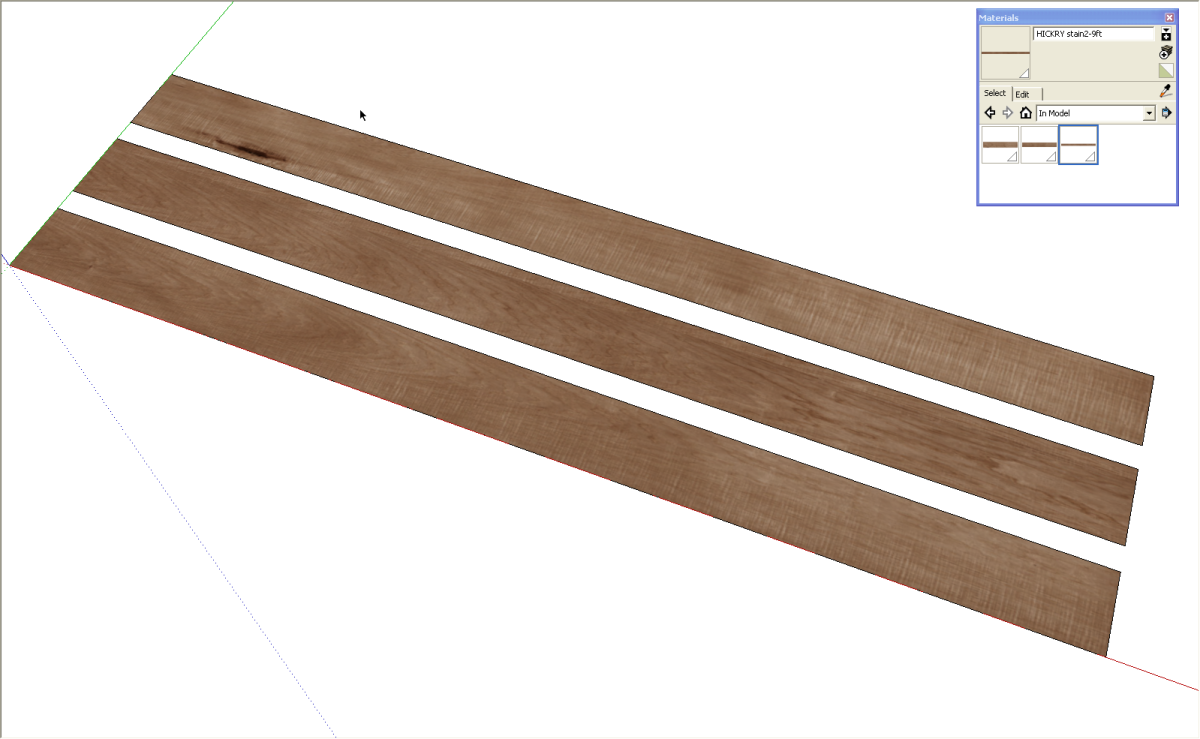
Here are images of three pieces of hickory. The original images were a bit longer and the natural edges of the boards as well as sapwood were visible. In an image editor I adjusted the color a bit to give it a finished look and I cropped the images down. The finished length of the images covers nine feet on all three boards and the width is whatever it turns out to be.
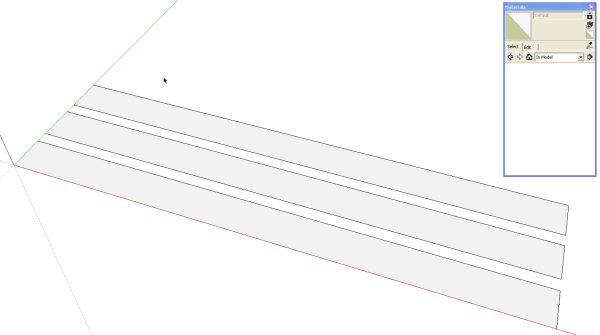
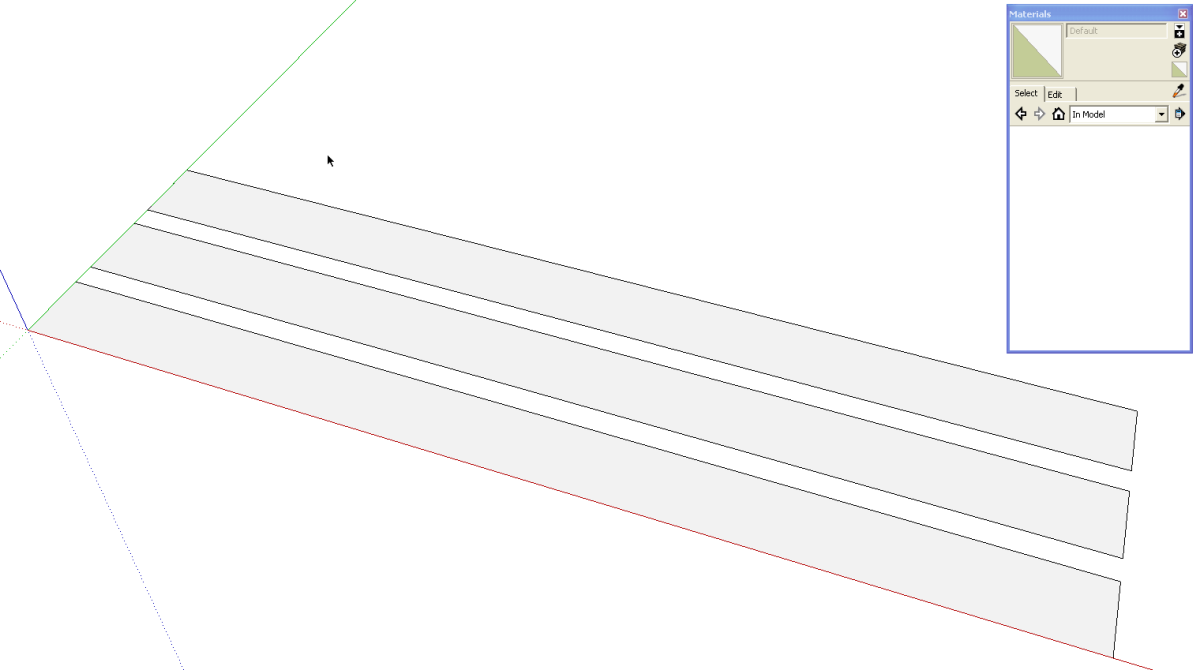
Now in SketchUp, I drew a rectangle nine feet long and of some arbitrary width. The length is the only critcial dimension in this case since the material length is known. I made a couple of copies of the rectangle. One for each material image.
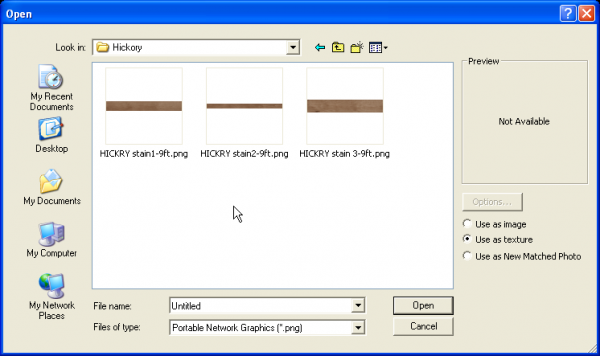
Under File>Import, navigate to the saved images. Select one and make sure Use as Texture is selected. Click on Open.
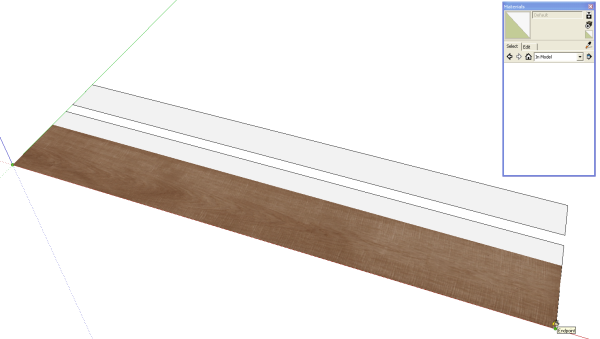
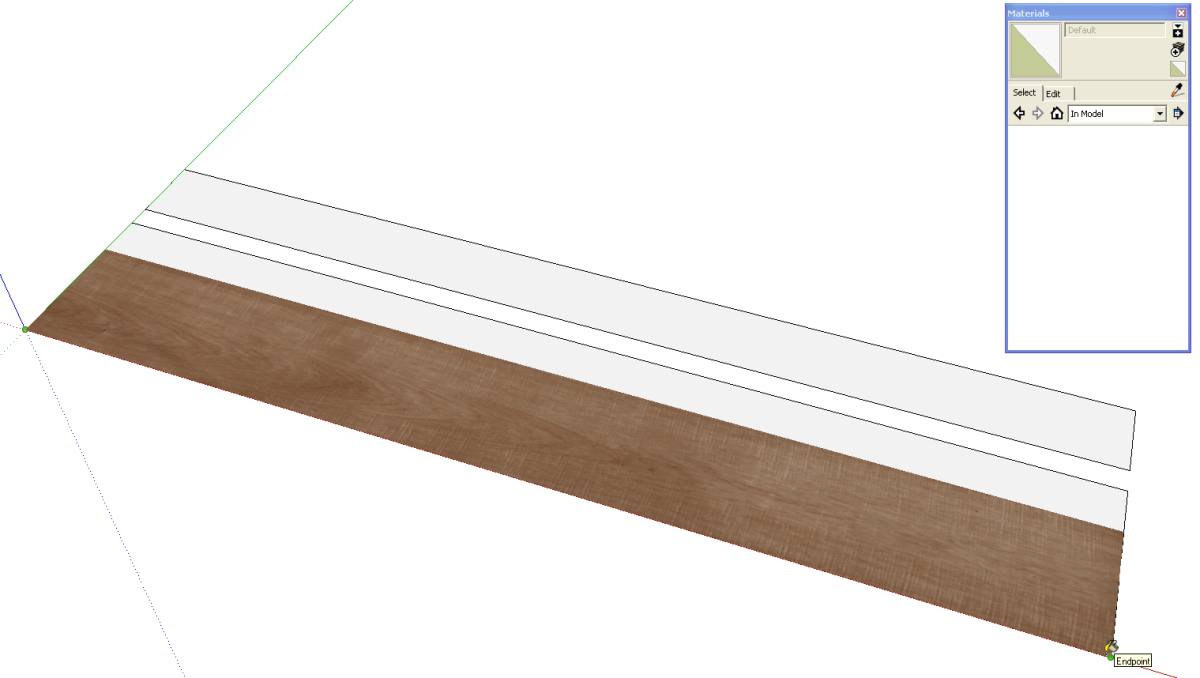
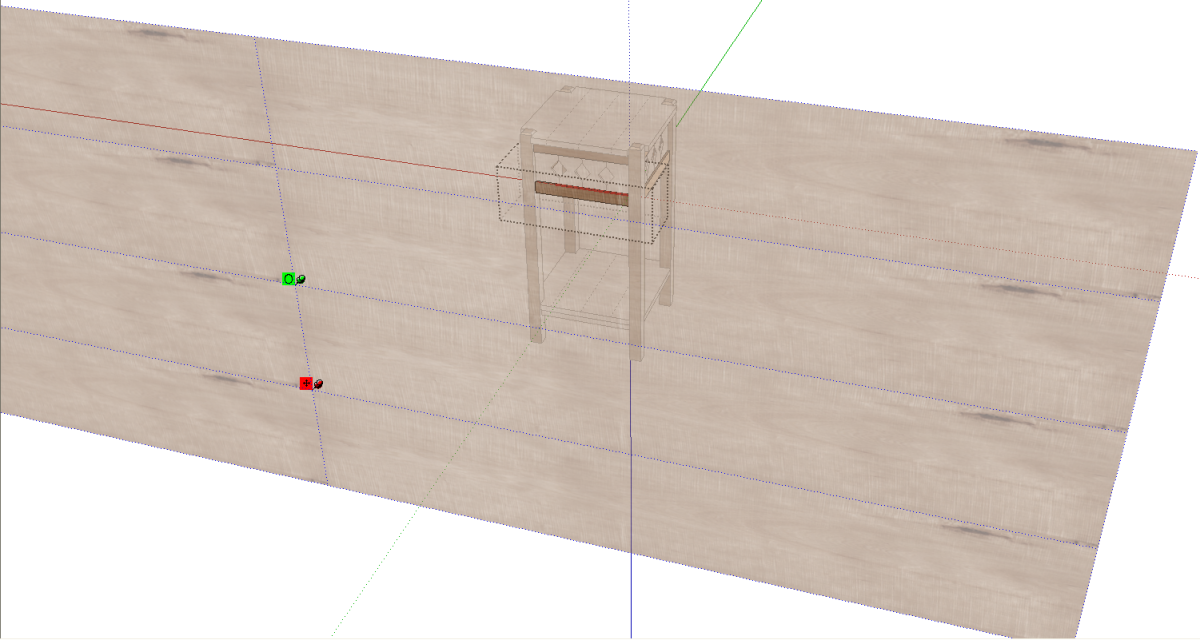
After clicking on Open you go back to the model. Click in one corner and drag the image out to the full length of the rectangle. In the example, above, the image is wider than the rectangle but that’s alright. By creating a face of the right length and dragging the material out to that length, the material is automatically scaled correctly.
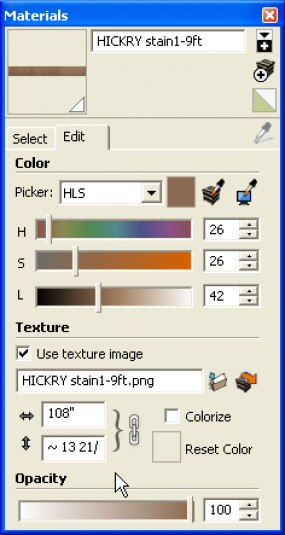
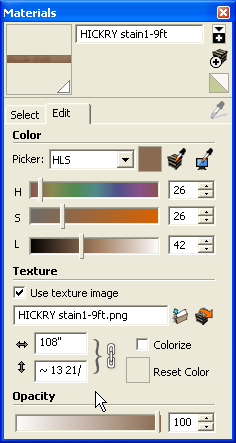
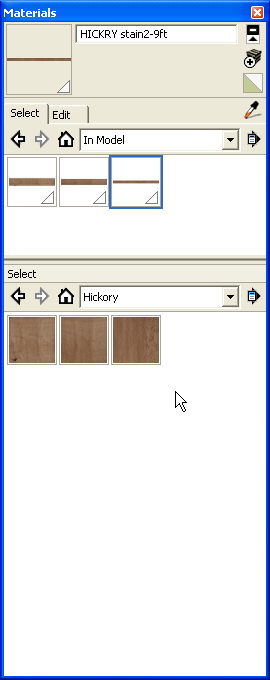
If you don’t make the face to match the known dimension of the material you can scale it afterward by editing the material in the Materials browser. You can see in the above image that the hickory material is 108″ long and 13 and something wide.
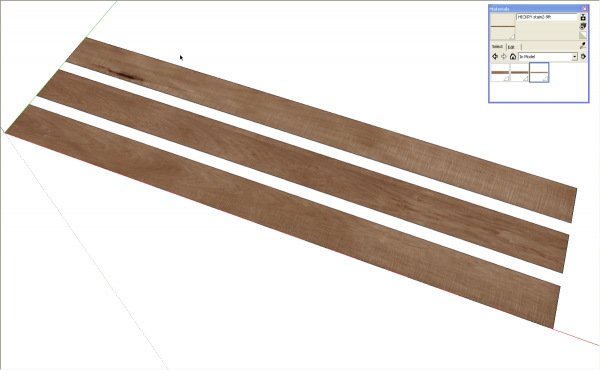
The process is repeated for the other wood grain images I’ve prepared. The materials are only in the In model library at this point. In order to make them available in other models we need to save them into a different library.
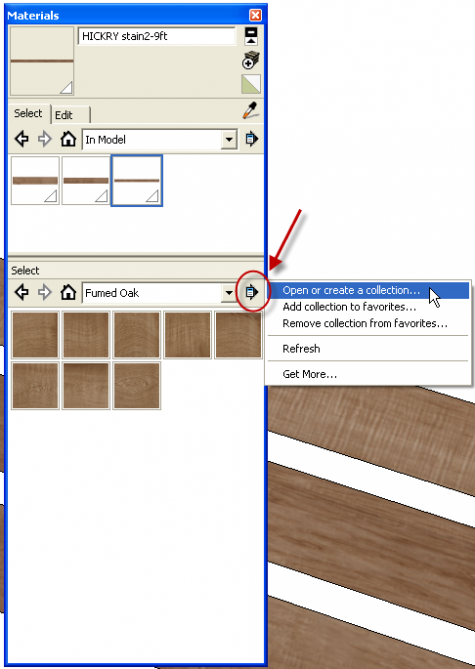
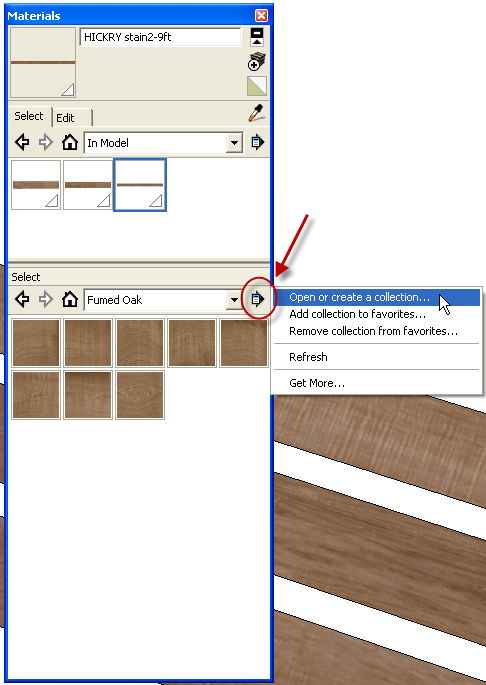
In the upper right corner of the materials box click on the little white plus sign on the black field. This opens the seconday pane. Choose the desired destination library or create a new one. I’m creating a new library for hickory so I click on Open or create a collection… and navigate to the location in which I want to create the new collection. I add a new folder called Hickory. With that new library shown in the lower pane, click on the arrow to open the Detail menu and choose Add to Favorites.
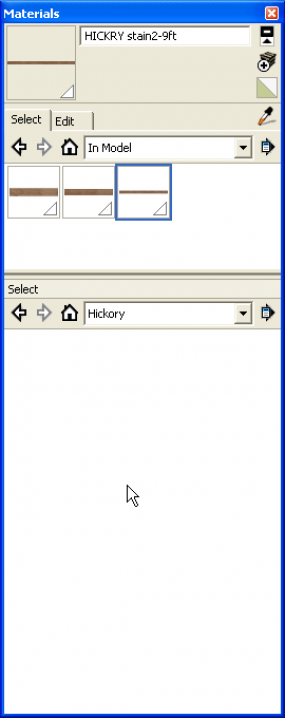
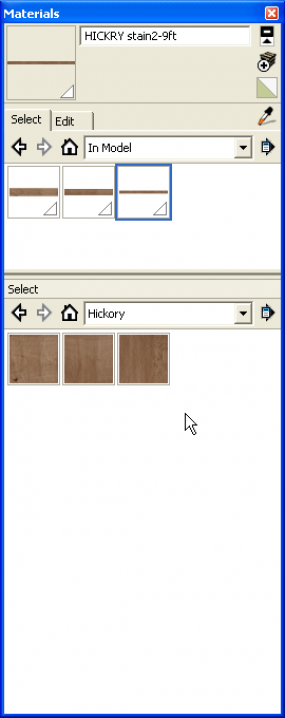
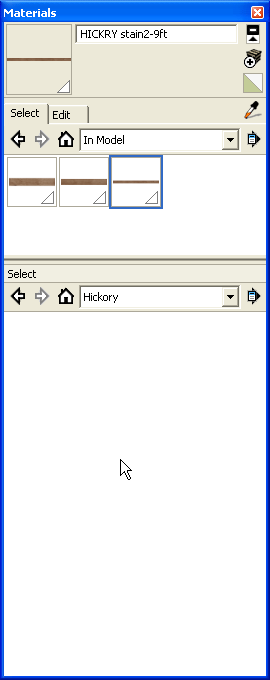
Now the bottom pane shows the empty library. To save the new materials into the desired collection, Click and drag the thumbnail from the top, In Model pain to the lower pane. Now they are available for use in various models.
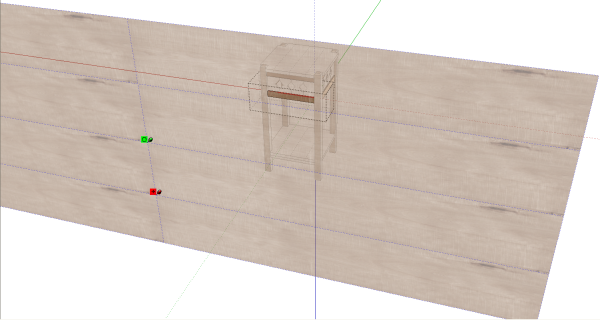
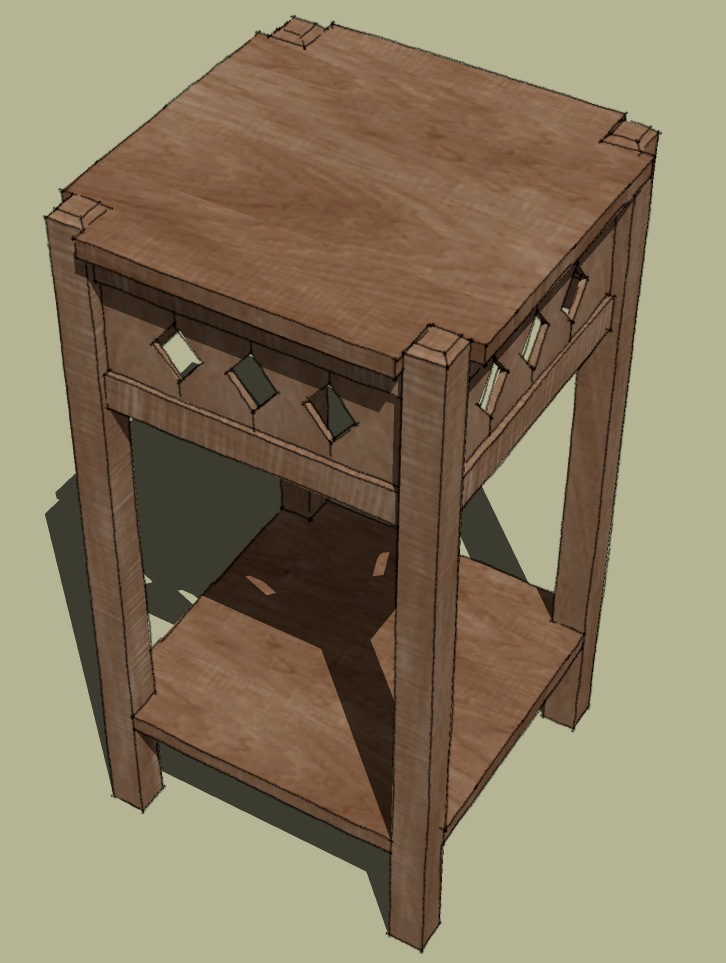
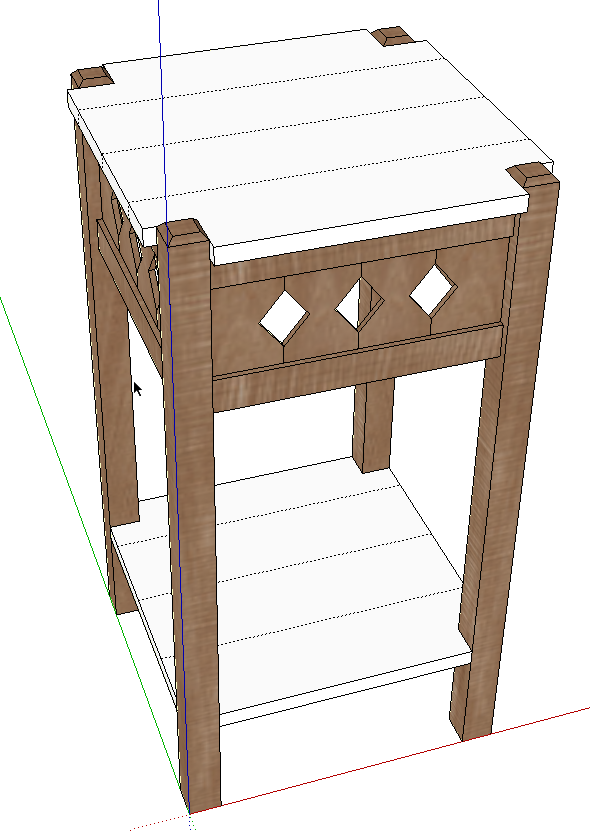
For this example I am applying the hickory material to the fern stand I drew some time ago. In this image I’ve applied the material to the front face of the lower rail. I then right clicked on the face and chosee Texture>Position to display the full size of the texture image relative to the rail. At this point the material can be moved around to select a likely portion for the rail. Doing the same thing for the legs, I can rotate the material 90° to make it vertical. The slats between the rails also get vertical grain. After applying the material to the faces of a leg components, the material’s orientation can be sampled and applied to the faces of the slats. By moving the material around, you can prevent repetition of the grain. With the image as large as this one is, the entire stand can be textured from it with no real apparent repetition.
It is important to note that inorder to have the option to adjust the postion and rotation of the material, you must use the method of applying the material to the faces which requires opening the components for editing. If you choose the method of applying materials to components instead of to the faces, you won’t have the option of making the adjustments.
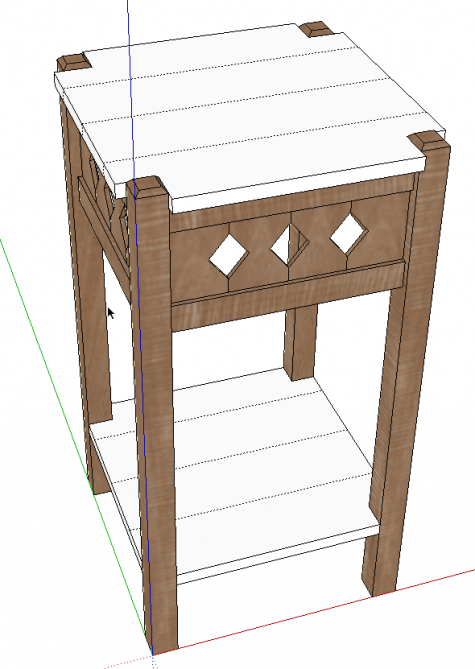
All that’s left is to paint the top and the shelf. The ribbon grain on the legs should probably be changed. It looks like the grain is running horizontally. I can select a different portion of the board or another of the three materials.
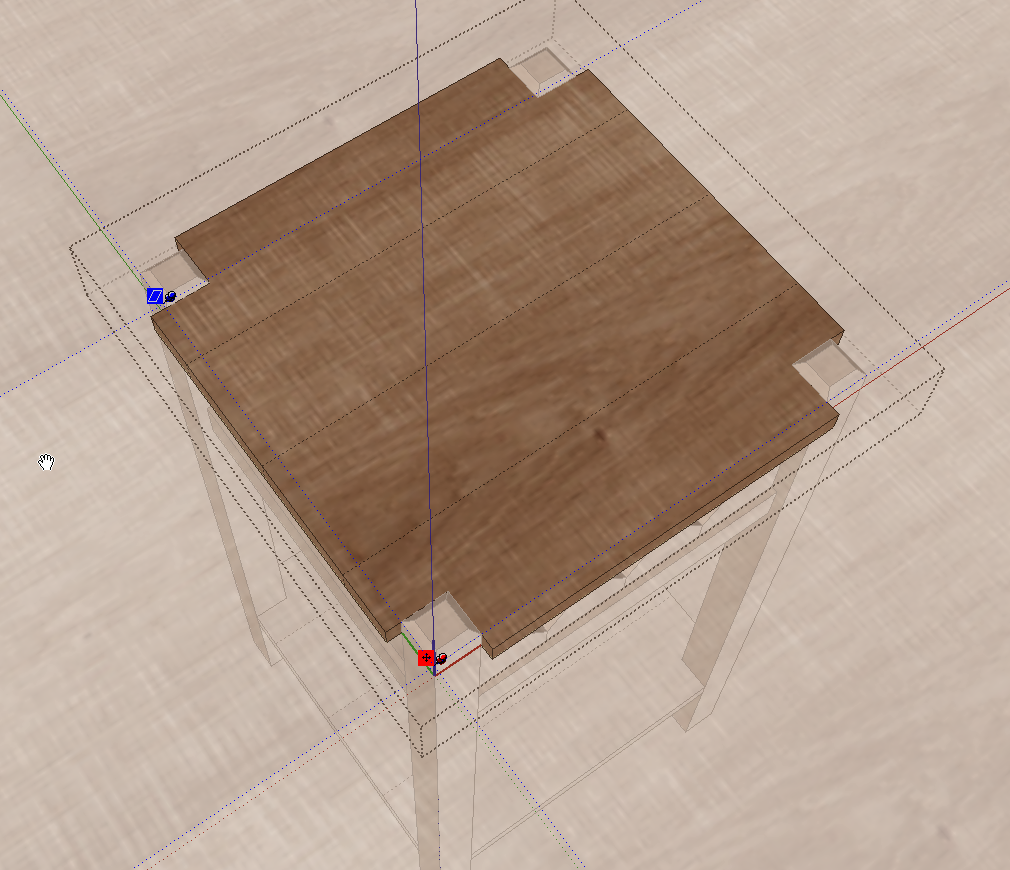
In the image above, you can see the hidden lines I’ve drawn on the top and shelf to represent the edge-glued boards. By hiding the lines they won’t be visible as edges but they allow the material to be split into narrower parts and each part can then be adjusted for material position.
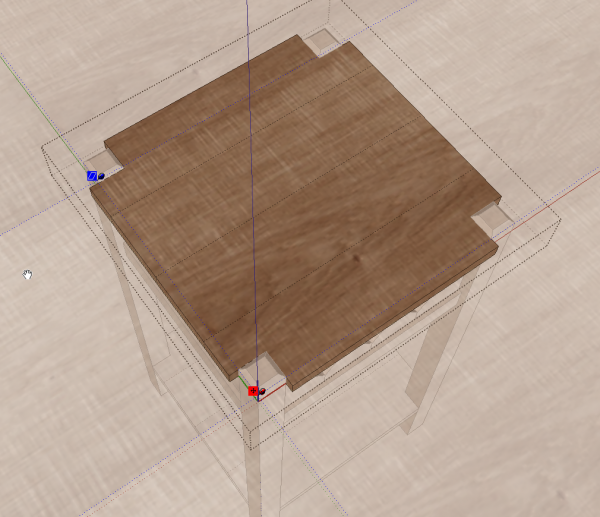
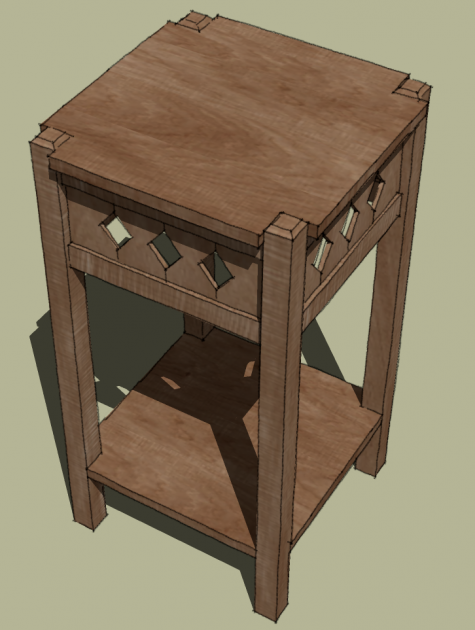
You can see now that the material appears to be from a single board but there’s no pattern of repetition on the top or the shelf and no need for a seamless material.
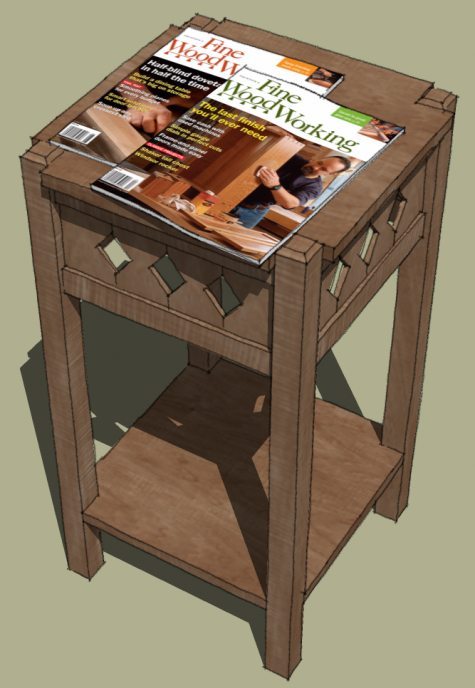
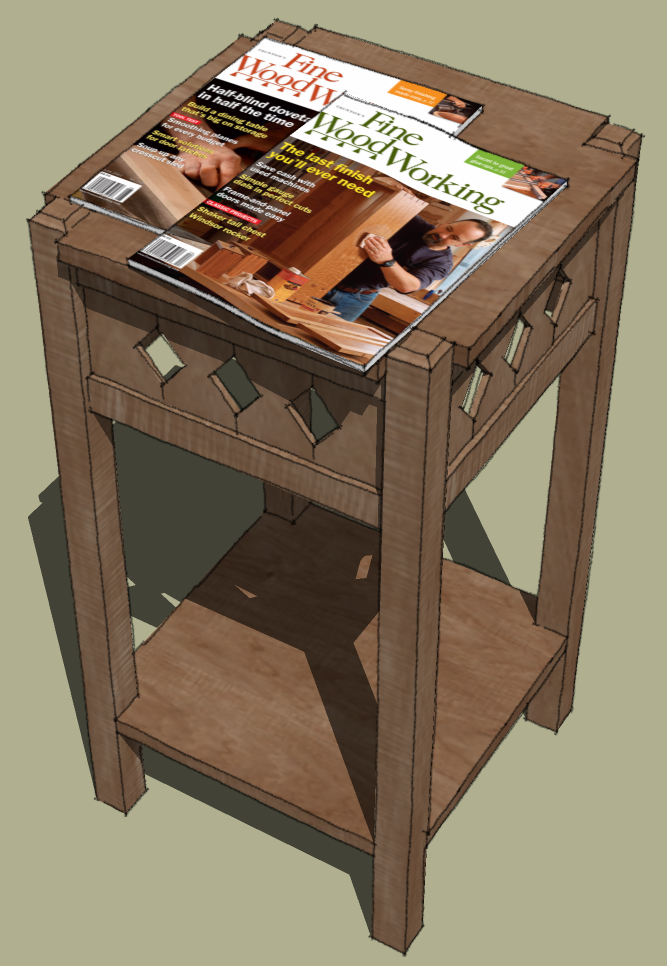
To create the magazines on the top of the stand, I used the same method described above. I drew rectangles to the actual size of the magazines and then applied those images as textures. In this case I saved the magazines as components and siince it is unlikely that I would need the cover images without the magazine components, I didn’t bother making a material library for them. I could save the magazines as components, though using essentially the same process as for saving materials.
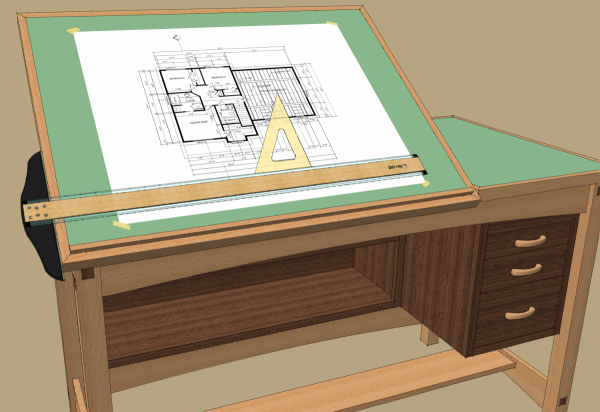
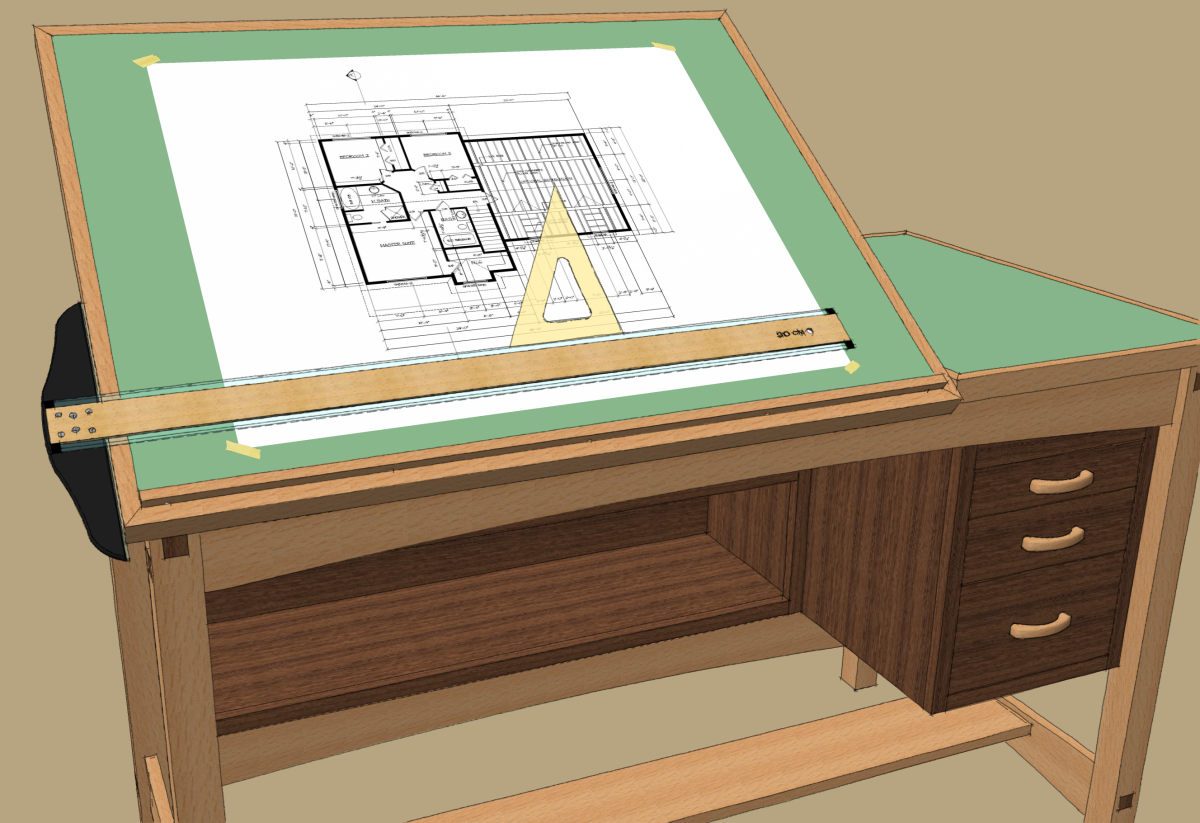
Here are a couple of additional examples of images used as materials. The drawing on the drawing board is a found image and even the bits of masking tape at the corners are images applied as textures to faces and used as components. In that case there are four different bits of tape





Comments
Very good post Dave, I like it! :-)
Luca
Such GREAT info! Thank you for sharing. Now comes the hard part of finding open source images of the wood itself. Aside from taking them yourself, do you have any brilliant recommendations?
Thanks!
Thank you Luca and PORC.
As to sources, I don't have any really brilliant suggestions but searching Google for images can yield good results sometimes.
Any suggestions on how to scan or photograph my own lumber?
Justin Lewis
Justin, it hadn't crossed my mind to scan a piece of lumber but I suppose you could if you have a large enough scanner. You would want to consider your sample size and how that would work in your model. For something small like a jewelry box, you could probably get away with a standard flatbed scanner.
Another thought that comes to mind but which I haven't tried is to scan a longer piece in sections and use stitching software to combine the images into a single image.
A scanner would make it easy to get even illumination.
As to photographing your own lumber, it would be important to consider making sure you have very even lighting. Daylight would probably be easiest. I would set white balance manually on a white card if the camera allows it. Consider the quality of your camera's lens. My wife's digital camera is a nice compact one but with the lens at its shortest focal length it tends to exhibit quite a lot of distortion. To use it for photographing boards, one would need to use a longer focal length which would require a greater camera to subject distance.
Although many problems can be fixed in editing, it is always better to create the best image you can at the camera. You want to make sure the camera's image plane film plane) is parallel to the surface of the wood. Even lighting and the use of a tripod will help. In most cases you don't need real high resolution images since SketchUp with reduce them some anyway.
Try making some images and have at it. Shoot as many different boards as you can. Although I didn't show it, you could further improve your materials if you also create end grain images. Sometime I just use a face grain image which I rotate and skew in SketchUp to give the effect of end grain.
Experimentation could give you some interesting results. And if the colors don't work, it isn't like removing stain from wood in your real project.
-Dave
Dave, Thanks for the suggestions. I've scanned knotty alder before and stitched it together like you were saying and it worked ok. But, I often draw large kitchen models and having the same set of knots showing over and over gets a little ugly. The idea of using multiple boards is excellent btw (why didn't I think of that before?)... Thanks again.
Justin Lewis
Thanks for sharing such an informative post. I figured it could be done, but hadn't gotten around to trying yet. I'm sure you saved me hours!
Bill
Hi Dave another great tutorial. Is the process any different on a Mac. I followed along and get the image back to sketchup, but can not get it to stay on the rectangle (hope that makes cense). When the image is on sketchup the icon moving it around is a circle with a line thru it, kind of like a stop sign but black. Any ideas on what I'm doing wrong?
Paul
@Rastus, the circle with the line through it indicates that SketchUp can't apply the material. Most likely it is because you are trying to apply the new material to a component or group. You need to open the component or group open for editing prior to importing the image.
If that's not the problem, e-mail the SKP file so I can take a look at it.
--Dave
Hi Dave, Thanks for your very helpful advise on the introducing of wood textures. This has solved a problem which limiting my application of Sketchup.
Log in or create an account to post a comment.
Sign up Log in