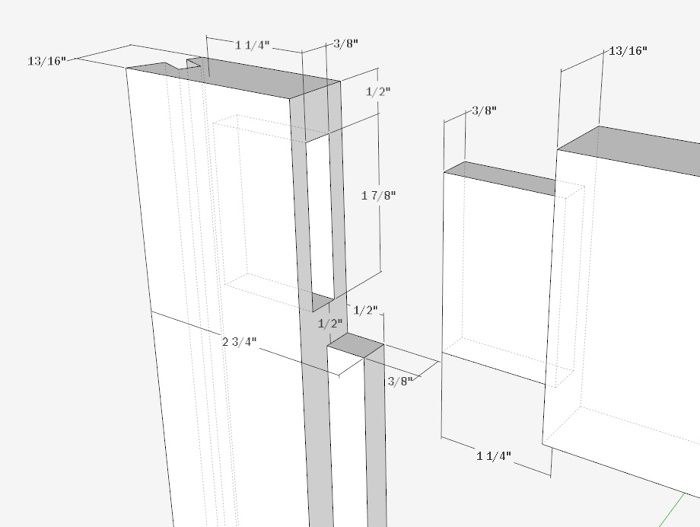
Making effective dimensioned drawings is an art. It’s not so easy to figure out what dimensions are needed and how they should be displayed. I’m always impressed by drawings done by John Kassay in his book, “The Book of Shaker Furniture” or Lester Margon in his book “Construction of American Furniture Treasures”. They produced works of art, while communicating the engineering design in an efficient and effective way.
In SketchUp it’s easy to splash a drawing with a bunch of dimensions, but they don’t always look that good. So I’m finding that it is taking me much longer to do dimensioning in an effort to improve. Getting the SketchUp model assembled is perhaps only 75% of the job. Another 25%, or maybe more of the time is making and editing dimensioned Scenes.
Although I use Layout to produce the final drawings, my dimensions are done in SketchUp. Layout can do orthographic dimensions, but it currently does not manage perspective dimensions. I think it is important to have both perspective and orthographic dimensioned views. Flat dimensioned drawings are easy to make, but aren’t sufficient for communicating work in the shop. The best drawings I see have both representations.
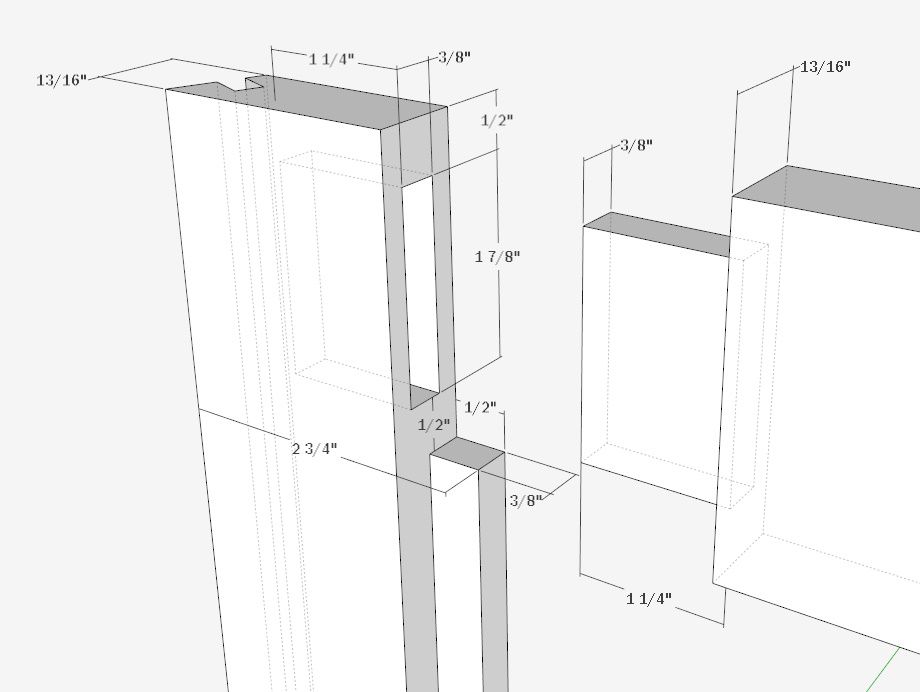
I’ll show you some of the things I’ve found helpful in placing dimensions. I’ll use this Stile and Rail with mortise and tenon joint as an example.
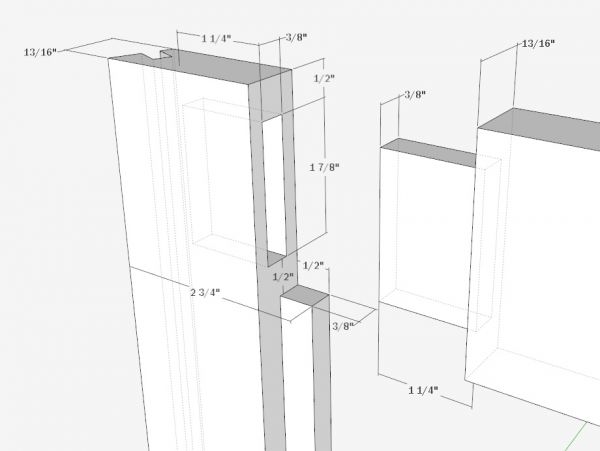
In the above picture I’ve used a dimension style that includes:
Endpoints – None (you could also use arrows, slash, or dot)
Align to Screen
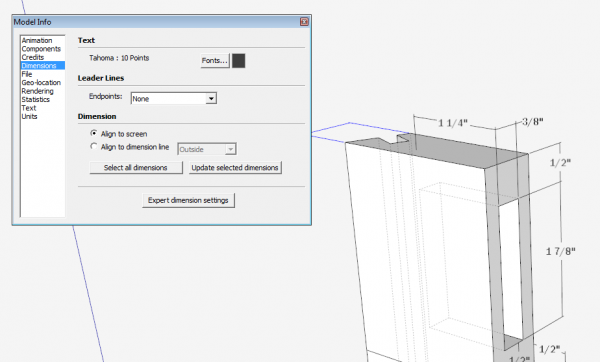
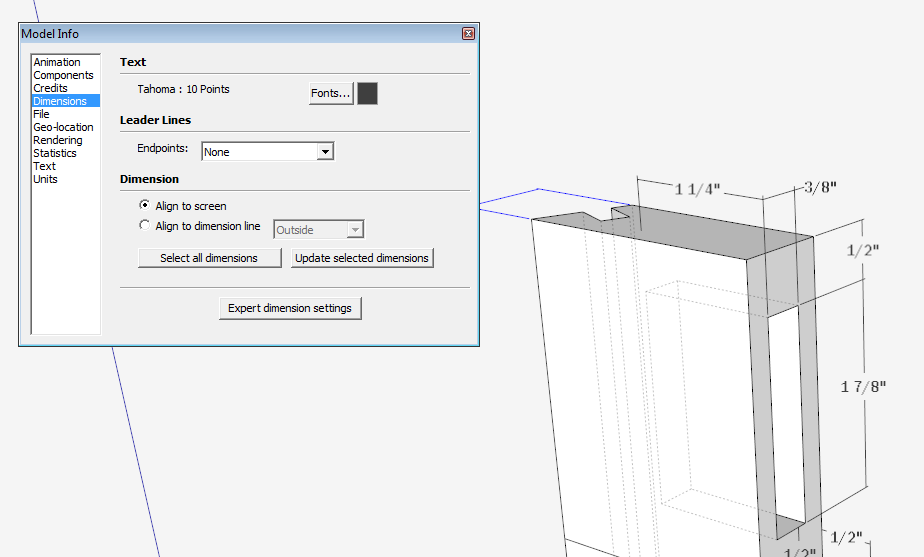
These options are found in the Model Info Dialog Box as shown below. To find this dialog box, click on the Window tab, pick Model Info from the list, and then click on Dimensions in the left panel.
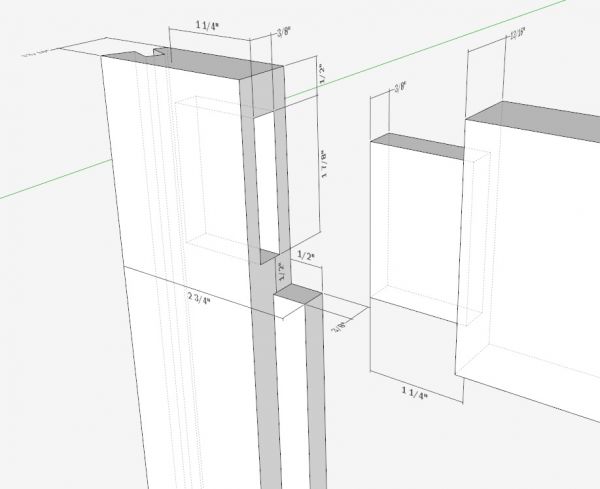
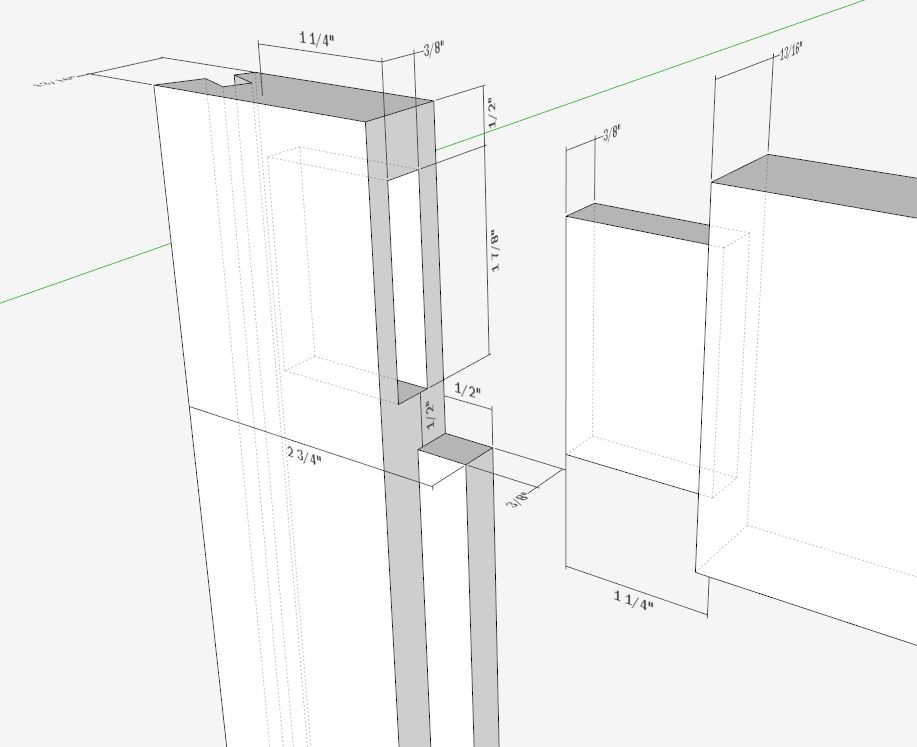
If you select the option “Align to dimension line” in the dialog box, the same drawing will have dimensions shown below. Note that some of the dimensions are now unreadable. Clearly, the “Align to Screen” setting is better in this case.
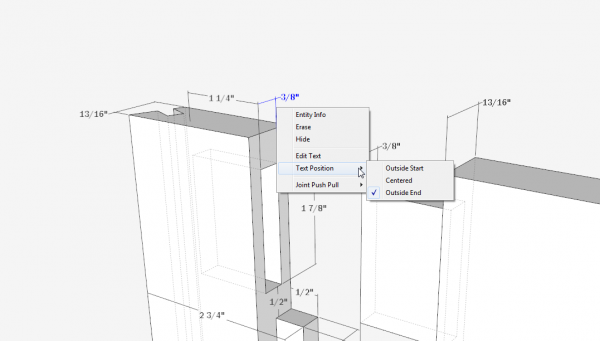
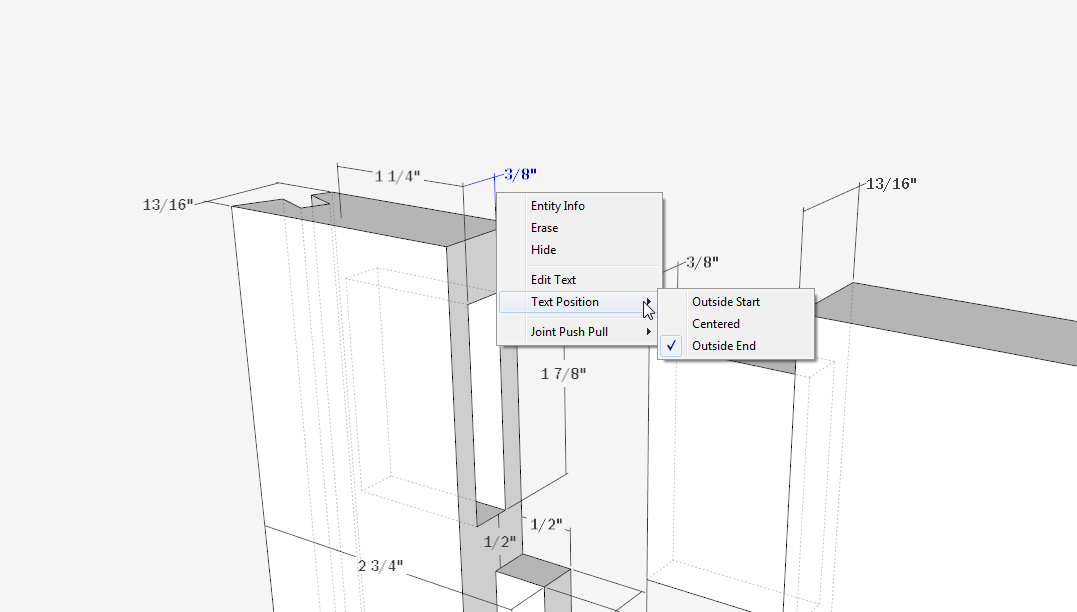
Also note that many of the dimensions are shown with the dimension text outside and at the end of the leader lines. I find that this option is used often because the dimension is smaller than the text. To make this setting, right-click on a dimension and a menu will pop-up as shown below. I’ve right-clicked on the 3/8″ dimension, then I move the mouse down to Text Position that opens up a fly-out menu with three settings. In this case I’ve used Outside End.
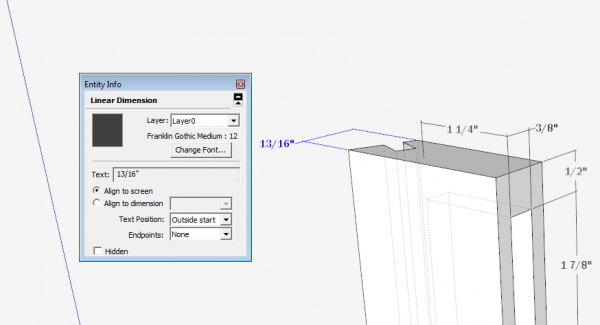
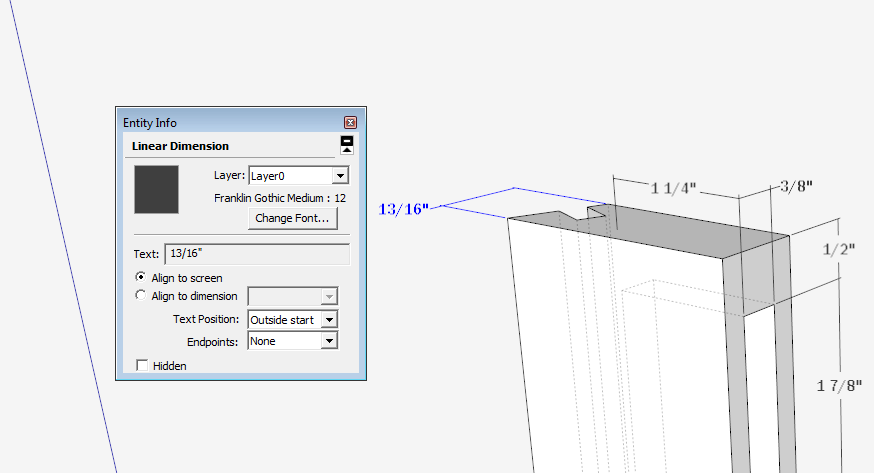
Often I need to change a setting for a specific dimension. After you click to select a dimension (13/16″ in this case), right-click on the dimension and pick Entity Info, and a dialog box will appear as shown below. Here you can change the setting for that particular dimension. I use this sometimes to switch the alignment or change a font.
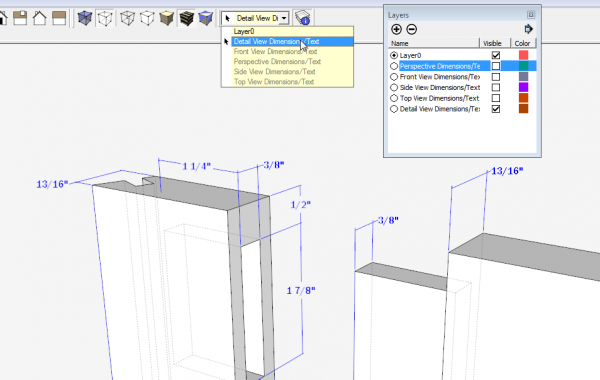
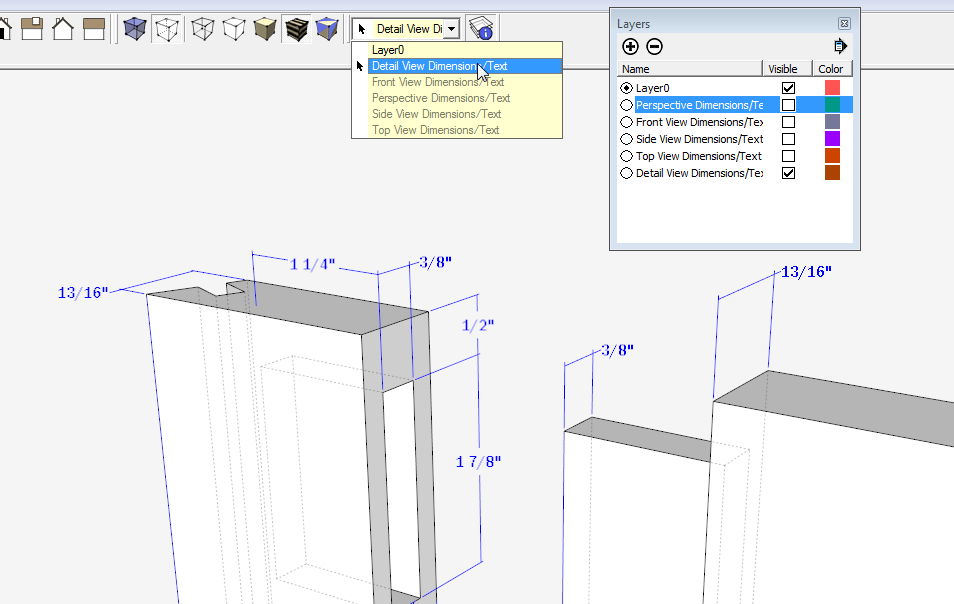
I place dimensions in layers for the flexibility of having only some dimensions showing in a scene. In this case I have a close-up detail perspective view of the stile and rail joint. The dimensions shown here should not display in a scene showing the entire stile and rail assembly. Therefore I select all the dimensions and choose Detail View Dimensions/Text in the Layers Toolbar. Also I set visible layers for that Scene as shown in the Layers Dialog Box to the right.
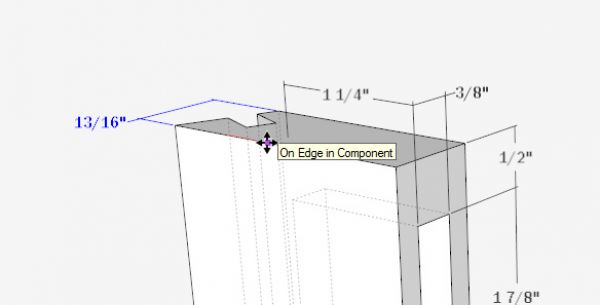
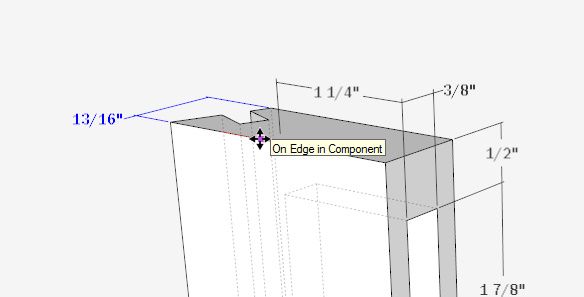
After placing dimensions, I often spend time nudging and moving them for best viewing. Choose the Move/Copy Tool and hovering over a dimension. It will turn blue (selected) and you can begin the move. However, sometimes the movement is very jerky and jumps further than you would like. To have more control on movements, I sometimes use the Select Tool to select the dimension, then click the Move/Copy Tool on an edge anywhere in the model (but along the axis of desired movement). Now when you move the mouse, the adjustment of the dimension is more smooth, incremental and controlled.
The following picture shows that I’ve selected the 13/16″ dimension and clicked the Move/Copy Tool on the top edge of the stile. Now a movement of the mouse along the edge will shift the dimension accordingly.


Comments
Great tips on dimensions
I really don't understand the proclivity for axonometric drawings. When counting on drawings for their dimensional information then orthographic projection 1:1 is the way to go. Plans, elevations and sections with the drawings related one to the other give all the information needed without further interpolation.
On a slightly different aspect. Is there a way to make SU default to 1/16 rather than 1/64. I change it every time I start a new drawing. Small problem but frustrating.
@tom8021, Open a new SketchUp file and change the Precision as desired. Then immediately go to File>Save as Template. Give it a name and make sure"Use as default" is checked. After that, you'll be working with less precision as you prefer.
Although I ever intentionally draw things with dimensions in 64ths, I do prefer to work with precision set to 1/64" If things are drawn accurately and your dimensions work out in 16ths, you'll never see 64ths anyway. if, when I run the culist, I get dimensions in 64ths, I know I need to go back and look at that componet to see why it is. As with the dimension tool, the precision of the dimensions in the cutlist comes from the Precision setting in Model Info. If precision is set to 1/16th, I'd never see the errors.
Dave
I guess you type in your dimensions. I usually do too. The 1/16 comes in handy when i am drawing a line to a dimension that I want to be in sixteenths. I think this is probably a hold over from other drawing programs I have used. I am lazy or frustrated by having to type in the dimensions all of the time. Mouse control isn't my strong suit. I do understand what you are saying and have found errors that way too, but if it is restricted to 1/16 wouldn't those errors be corrected?:)
If you want accuracy in drawing and for that matter moving, extruding or whatever, you should always enter those dimensions or distances rather than just trying to get it right with the mouse. Setting Precision to something coarse like 1/16" will not correct dimensions or move distances. It just masks the error. The problem with that is that you then open up the possibility for errors that might become cumulative over the entire model.
This wouldn't be a problem if you are only drawing the model to get an overall feel of the piece. But if you are actually going to make drawings you can use in the shop for constructing the thing, you'll find the more precisely you work, the better your drawings. I 'd bet if you bought a plan that i drew that wasn't precise, you'd be asking for a refund.
Although I find it annoying, you might want to enable Length snapping and set that to some coarse value so that things will naturally try to snap in incremental steps.
If you have seen any of the videos I've done demonstrating how I draw a piece of furniture, you'll see that it really isn't difficult to maintain high precision while working quickly. I tend to establish the foot print for a piece and draw everything to fit. If those first components are drawn precisely and then placed precisely, Everything else just falls into place.
Dave
I neglected to add the following to my previous comment.
There is an exception to "you should always enter those dimensions or distances rather than just trying to get it right with the mouse." That is when you can use existing elements in the model or inferencing instead of typing the dimensions or distances.
An example of that can be seen in the way I drew the fern stand. (See: https://www.finewoodworking.com/item/22911/a-fern-stand-demonstrating-my-drawing-process ) After placing the legs, there is no need to enter the Push/Pull distance for the length of the apron rails. The space between the legs is the length of the rails (minus the tenons, of course). The rails have to fit between the legs so if the legs are properly and precisely located, the length of the rails just falls into place.
Moving components is similar in that you can use other existing elements to determine the move distance.
D
Sounds like all you junior engineers out there are over-complicating things. It is doubtful that that you can consistently hold that type of accuracy during construction and 99.9% of projects do not need that level of precision anyway. Spend your time with the wood and the dimensions will work themselves out on their own.
Log in or create an account to post a comment.
Sign up Log in