A Small Elegant Box
Pinned lap joints and shaped sides refine a basic design
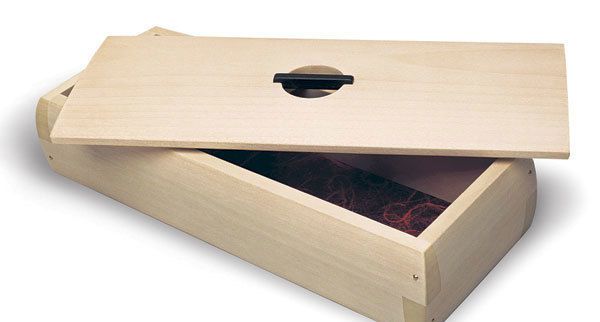
Synopsis: The idea for this small box comes from a Japanese sushi container; the construction uses lap joints, brass pins, and carefully rounded sides. This article covers cutting lap joints and rabbets, using polyurethane glue for the rice paper bottom, gluing up the box, and finishing.
Simplicity in design is often mistaken for having a simple mind or a lack of ideas. Accuse me of this innocence, but I still prefer shapes to be more modest than bold. Because of this inclination, I’ve always found Japanese design to be inspiring, especially traditional designs for packaging. When I wanted a new joinery project for students attending my woodworking school, I recalled a bamboo sushi container made with simple lap joints. I changed the design to use alder instead of bamboo and to include a bottom lined with rice paper. I left out the fish.
The first step in this project is to decide on the proportions of the box. It’s surprising how different a box looks when you change the proportions from, say, 2:1, to 5:2 and to 8:5 (the classic golden mean). Try some basic outlines on a piece of paper to see the difference. Then mill up some stock 1⁄2 in. thick and 2 in. wide.
Lay out the lap joints at half the height of the stock (1-in. in this case) and mark them with a square. Then lay out the depth of cut with a marking gauge set to cut just less than the thickness of the stock. Cutting the depth of the fingers to just less than the thickness of the stock enables you to clamp up right over the joint, making it much easier to glue up. The long grain rather than the end grain will be left proud so that it won’t get in the way of your clamp pad.
When it comes to arranging the lap joints at each corner, you can stagger the fingers around the box: For this box I placed one upper finger and one lower finger on each side piece, which looks good to me. Or you can cut both fingers on the upper or lower half of each side. It’s up to you, but bear in mind that when you stagger the joints, it’s a much tougher glue-up. Any clamping pressure on the sides tends to collapse them in toward each other, so it helps to glue up the box with the bottom in place to act as a spacer. The easier method aligns the sockets and fingers opposite each other so that each side is held in place by the other when pressure is applied.
For the full article, download the PDF below:
Fine Woodworking Recommended Products

Dividers

Compass

Sketchup Class


Log in or create an account to post a comment.
Sign up Log in