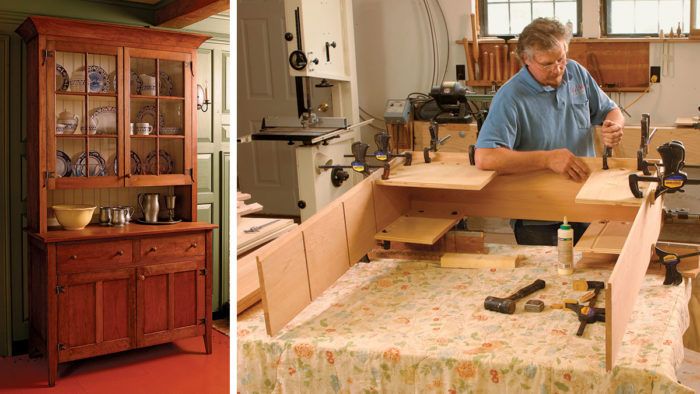
Build a Country Hutch
Router-bit set makes short work of traditional glass doors
Synopsis: Martin Milkovits designed this piece to store and showcase dinnerwear, so it had to be sturdy. The lower case consists of a frame-and-panel bottom, back, and sides. For maximum strength, the top and sides of the upper case are dovetailed together, and the shelves mate with the sides via tapered sliding dovetails. The glass doors are easy to make on the router table. The beaded, painted back slats add texture and contrast, while the hand-forged door hinges contribute to a classic feel.
Being self-employed as a furniture maker, it’s always tough to find time to build a piece for my own use. But my wife and I had always wanted a cupboard to store our collection of dinnerware, so I relented and spent what little spare time I had building a cupboard that fits not only the space available in our dining room but also the overall décor.
The design of this piece germinated while I was building a large cupboard for a client. That piece was twice as wide as this version, and was made of maple with a rather plain frame-and-panel façade. I wanted something a little smaller, with more flair. So I scaled down the size and revised a few details to enliven the piece.
This version is made mostly of cherry, stained to a deep reddish-brown for an aged look. You can leave the cherry natural, and it will darken over time. The glass doors showcase our prized plates and glassware, and are easy to make on the router table. The beaded, painted back slats add texture and contrast, while the custom hand-forged door hinges contribute to the classic feel.
Lower case is a complex assembly
The lower case of the cupboard consists of a frame-and-panel bottom, back, and sides. The legs do double duty as the stiles of the frame-and-panel assemblies. As such, there are a number of mortises and grooves to be cut into each leg, as well as mortises for the front stretchers. The legs also are notched for the bottom and the drawer guides. For strength, the shelf sits in grooves in support members that also are mortised into the legs.
Taken individually, the lower case assemblies are relatively simple to construct. After dry-fitting everything together, begin assembling the back of the lower case. Don’t forget to add the rear shelf support before gluing on the last leg. Set it aside to dry, then glue up the bottom frame-and panel assembly. Put together the front top and bottom stretchers and the drawer divider, and attach them and the lower front apron to the front legs. Check frequently for square.
After the glue in the front, back, and bottom assemblies is dry, make up the drawer-guide assembly and glue it to the bottom stretcher. Glue the case bottom to the apron. Place the back assembly on the bench, add the shelf and its side supports (glue the shelf to the rear support only), then glue in the top and bottom side rails and slide in the side panels. When these two assemblies are dry, drop the case front and bottom assembly onto the rear assembly using the dadoes in the bottom side rails as guides. Drive the parts home with a mallet, then lift the case onto its legs and add clamps.
From Fine Woodworking #189
For the full article, download the PDF below:

Get the Plan
CAD-drawn plans and a cutlist for this project are available in the Fine Woodworking store.


Comments
how do I build the shiplapped back with the bead?
Log in or create an account to post a comment.
Sign up Log in