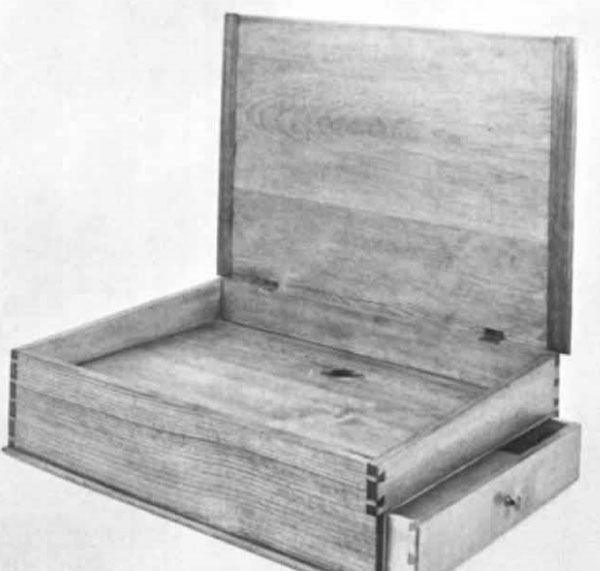
Synopsis:The Shaker lap desk may be considered the predecessor of today’s briefcase, writes Brian Considine. Lap desks are fine examples of the thought, care, and skill the Shaker woodcrafters put into the smallest piece, and the variety and detail of the joints make it a challenging project. Considine explains in this succinct article how to make and assemble the four sides and shelf, then the bottom and top, and finally the drawer.
The Shaker lap desk may be considered the predecessor of today’s briefcase. Like modern briefcases, lap desks were convenient for carrying papers. In addition, one can write on either the slanted top or on a special surface inside the desk.
These desks are fine examples of the thought, care and skill the Shaker woodcrafters put into even the smallest piece. The variety and detail of the joints in this piece make it a challenging project for the modern craftsman.
The general procedure for making these is to make and assemble the four sides and shelf, then the bottom and top, and finally the drawer.
First make patterns of the large and small ends on pieces of manila cardboard and lay out and cut the dovetails’ outline on these patterns. (In making dovetail joints, I like to make the tails first.) Next, size and plane the stock from the cutting list. Cut the pieces for the front, back and ends 1/8-inch over in width so that you can plane down the top edges when it’s together. Cut the angle on the top of both the ends and leave a little over.
With a marking gauge, scribe the depth lines of the dovetails on the end pieces. Now align the patterns along the bottom of the end pieces and transfer the dovetails with a scribe or awl. Then cut and clean them. Now position the four sides as they are to be and code the corners that are to be dovetailed together. Then one by one mark the lines for the pins from the tails and proceed to cut them out. To help in the chiseling process, I like to make relief cuts with a bandsaw into the waste sections of the pins. But take care to place the piece on the saw table with the wide part of the pins up so that you don’t cut into them by accident. Then fit the dovetails together, carefully paring down the pins where necessary.
Size the shelf and lay out the grooves to hold it on the inside of the four sides. The bottom of the shelf should line up with the bottom edge of the small end. Cut the groove for the shelf with a router or with knife and chisels, but be careful not to go to the outside edge and cut through the dovetails. Then glue the sides together, placing glue blocks just beyond the dovetails so that they can close all the way. Clean any dried glue off with a chisel and smooth the corners with a block plane. Plane the bottom edges so that box sits flat. Plane the top edges so that they all lie on a plane.
Size the bottom piece, round the edges and glue it on. Size the top.
From Fine Woodworking #2
For the full article, download the PDF below:
Fine Woodworking Recommended Products

Stanley Powerlock 16-ft. tape measure

Dividers

Estwing Dead-Blow Mallet


Log in or create an account to post a comment.
Sign up Log in