Teach a Skateboarder to Woodwork, or Vice Versa
Kit to build a skateboard deck is well engineered and a great project for getting started in woodworking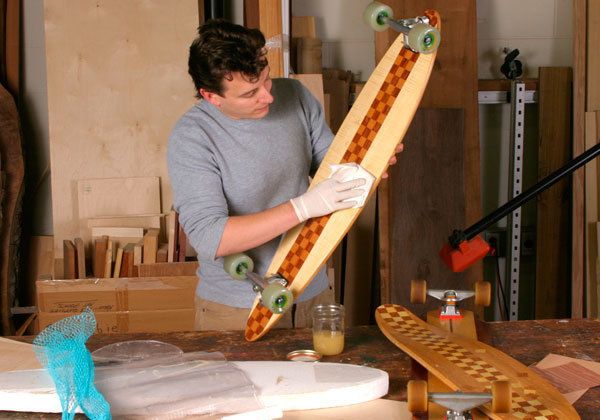
I learned to ride a skateboard when I got inspired to build one from scratch in my college woodshop. With some basic woodworking skills under my belt I developed a clamping press for laminating several layers of hardwood veneer and 1/8 in. plywood into a sturdy longboard skateboard deck.
I went to school in the beach town of San Luis Obispo, Calif., where skateboarding was a favorite pastime, and my handmade boards, affectionately known as the Berger Board, became an underground hit. I experimented with pin strips of exotic hardwoods to emulate the old-fashioned balsawood surfboards from the 1950s, and developed my favorite design, a checkerboard pattern. Fifty decks later, I graduated from college and retired my clamping press.
The skateboard revival starts with a kit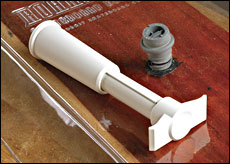 Fast forward to 2005 when I found out about a company called Roarockit Skateboard Company, which sells a kit with all the tools and materials to build a genuine skateboard deck. Based in Toronto, Ontario, Canada, the mom-and-pop operation is founded on its hand-pump vacuum bag known as the Thin Air Press. Fine Woodworking reviewed the Thin Air Press in 2004 for its use in furniture veneering. After it was run through its paces in our shop, I decided to dust off my skateboard designs and see how it worked for its other intended purpose.
I called the company and ordered one of is longboard skateboard kits. It also sells a short board kit that is popular with the young and daring skate-park set, but those boards would likely kill a big kid like me. Longboard skateboards use large bouncy wheels that can roll over virtually any crack, bump, or road block, whereas the small wheels on short boards are known for getting stuck easily and sending the rider flying through the air.
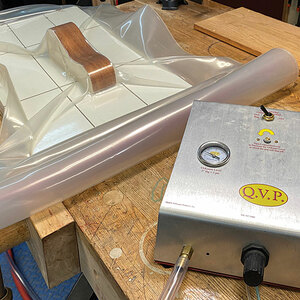
The kit arrived a week later nicely packed in a large cardboard box. It included seven sheets of hard Canadian maple veneer (five long grain and two cross grain for true plywood construction), a Styrofoam bending form, a 20-mil thick plastic veneer bag with a simple valve, and a plastic hand pump similar to the ones you can pick up at a wine shop for removing the air from opened wine bottles. It also came with glue and a roller, rubber gloves, sand paper, and a file, which meant I had everything I needed to build the deck from start to finish. I also ordered four extra packs of veneer so I could experiment on a few extra boards.
Assemble the plies in stages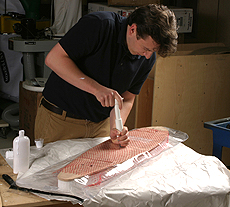 Directions for making the skateboard deck fit on a single piece of paper, which is a clear indication of how easy this kit is to assemble. In three stages, the maple veneers are laminated against the foam bending form in the vacuum bag, giving it a concave shape along its length and width. When all the layers are laminated, it takes some basic shaping with a sanding block and file to achieve a finished deck.
The company recommends only laminating three layers of veneer at a time, so it took three days of vacuum veneering to finish the board, counting the time it took to watch the glue dry.
Troubleshooting along the way
After successfully building my first board by the book, I tested the vacuum bag’s limits and laminated a second board in one pass. It was a struggle to apply glue to all seven layers of veneer and get them in the bag before the glue set. And the finished deck had a few large air bubbles in the inner veneers, making it suitable for the scrap bin.
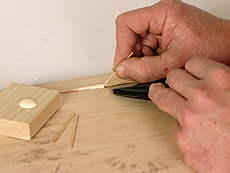 Even when laminating three layers of veneer, small air pockets can get trapped in between layers. But these can be easily fixed by slicing open the pocket with a utility knife and injecting glue, then pressing it back together with a clamp or in the veneer bag. However, if you closely follow the directions for glue application, air pockets can be avoided.
To laminate the maple veneers for the second board, I chose not to use the supplied glue and instead used TiteBond III, a water-proof PVA (polyvinyl acetate) wood glue, which actually has its roots in the skateboard industry. According to Franklin International, the company that manufacturers TiteBond III, that product is based on its industrial-grade adhesive, MultiBond SK-8, which it sells to skateboard manufacturers (sound to SK8 and you’ll understand why). Skateboard decks constantly undergo stress as the rider shifts his weight on the board and the flexibility of PVA glue keeps the board from literally cracking under pressure.
Get rolling with hardware For those new to skateboarding, the shocking part of this project comes when it’s time to purchase the hardware to turn your deck into a full-fledged skateboard. The hardware doesn’t come supplied with the kit, so you’ll need to buy trucks, bolts, risers, bearings, wheels, and grip tape, which combined can cost upwards of $100. These can be purchased online or at a local board or sporting good shop. If you’re a first-time buyer I suggest you consult with the store when placing your order.
When installing the hardware, there is only one real requirement: that the trucks and wheels line up. On the Roarockit kits, this isn’t a problem because the company pre-drills the four-hole pattern for the trucks in each sheet of veneer. However, if you’re making a deck with aftermarket veneers, you have to drill the holes yourself. And just like a car that’s out of alignment, if the wheels on a skateboard don’t line up you’ll never be able to ride in a straight line.
When building the boards with aftermarket veneers, I assembled them before drilling the four-hole pattern at each end. To get all the holes to line up, I used an actual set of skateboard trucks to make a simple template. With my handheld drill, I bored holes using the template as my guide. If you have a drill press, that’s even better.
Customize your deck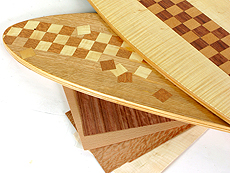 For most skateboarders, the graphics featured on the underside of their deck is a personal statement. Roarockit offers a variety of graphics with their kits that the kids will surely endorse, but I decided to create my own with a decorative marquetry design that would show off my other hobby. Marquetry is an image or design in wood that is comprised of colorful veneers taped together like puzzle pieces. Once taped into a single sheet, the marquetry veneer is laminated to the underside of the skateboard deck using the same vacuum bag technique described above. With some final sanding and several coats of an oil/varnish mix, the board was ready to ride.
Introduce a skateboarder to woodworking
Over the last decade I’ve met several people like me who enjoy woodworking and making custom skateboard decks. I’ve also seen how this project can turn an unwitting young skateboarder into a woodworker. Roarockit sponsors deck building workshops around the U.S. and Canada and has introduced woodworking to a lot of young people.
I have a special appreciation for this when I think about the decreasing number of industrial education programs in public schools, which used to play a huge role in getting the word out about woodworking. So even if you’re not ready to hop on a skateboard, you might consider trying out a Roarockit kit with someone who is and introducing a skateboarder to woodworking.
Matt Bergeris managing editor of FineWoodworking.com. When the weather is warm you can find him cruising the roads of Connecticut on one of his custom longboards.
Photos: Kelly Dunton, Matt Berger and Charlie Reina
Fine Woodworking Recommended Products

Suizan Japanese Pull Saw
Whiteside 9500 Solid Brass Router Inlay Router Bit Set
Ridgid EB4424 Oscillating Spindle/Belt Sander







Log in or create an account to post a comment.
Sign up Log in