Build a Torsion Box Assembly Table
Build a torsion box for a flat and rigid workshop tabletopA flat worksurface is an essential fixture in any shop. Follow along with FineWoodworking.com contributing editor Marc Spagnuolo as he builds a dead-flat assembly table with a torsion box tabletop and sturdy base.
Download and print our measured drawings for a comprehensive list of dimensions.
Videos in the Series
 |
Build a Torsion Box Assembly Table: TabletopThe strength of a torsion box comes from the connection between the edges of the outer frame and inner grid and the top and bottom skins. It’s not critical that the inner grid is perfectly spaced. However, it is critical that it is flat and true to ensure a perfect bond with the skins. |
 |
Build a Torsion Box Assembly Table: Sturdy Base with StorageThe base for my assembly table is made of two plywood cabinets that are joined with three stretchers on top and two toe kicks on the bottom. Four doors offer access to shelves inside each cabinet, and a stack of drawers fits in between the two cabinets on both sides for a total of eight drawers. |
 |
Build a Torsion Box Assembly Table: Euro-style HingesEuro-style cup hinges are a great choice of hardware when installing cabinet doors in kitchens, shop furniture, and built-in cabinetry. |
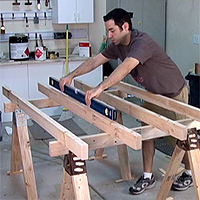 Start with a flat surface
To ensure that the finished torsion box is flat, you need to construct it on a surface that is flat. I use a pair of sawhorses with a temporary worksurface made of 2x4s and a sheet of medium-density fiberboard (MDF).
Start by setting up the saw horses about 4 ft. apart and shim the feet as necessary so that the tops of the sawhorses are level in every direction. Next, joint and plane the edges of four 2x4s and place them on top of the sawhorses. Again, check for level and shim as necessary. Finally, lay a sheet of MDF on top to serve as your worksurface.
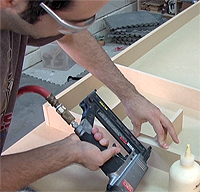 Assemble the Grid
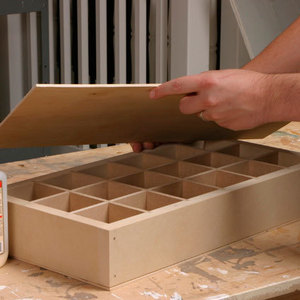
A torsion box is lightweight but extremely strong, which is why the construction technique is used to make airplane wings. The strength of a torsion box comes from the connection between the edges of the outer frame and inner grid and the top and bottom skins. It’s not critical that the inner grid is perfectly spaced. However, it is critical that it is flat and true to ensure a perfect bond with the skins.
Begin by assembling the 3/4-in.-thick MDF frame with brads and glue. To install the inner grid, attach a row of short grid pieces followed by the long grid piece, and work your way to the other end repeating this process.
The last row might not match the plan dimensions precisely, so the final row of short grid pieces should be cut to fit once you get to this step of the process.
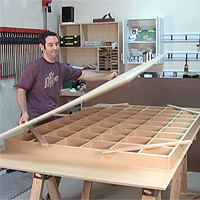 Attach the skins
The top and bottom skins are attached with glue, brads, and a few screws. Begin by applying glue liberally to the top edge of the outer frame and inner grid. Then place four scraps at each corner to elevate the heavy MDF skin until you have it positioned properly. Then remove the scraps.
Draw lines on the skin that follow the inner grid to use as a guide as you shoot brads and drive a few screws. Use a flush-trimming router bit to cut the oversize MDF sheet to the exact size of the outer frame. Flip the torsion box over and follow the same process to attach the second skin.
Finally, attach the hardboard top with the shiny side up. Because the hardboard top is designed to be replaced after heavy use, I use just a few screws to secure it in place. Again, use a flush-trimming router bit to cut the hardboard top to size.
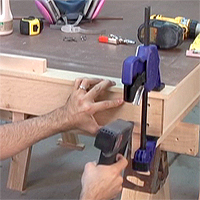 Add the hardwood trim
With the torsion box assembled, I added hardwood trim to the edges to help it stand up to wear and tear in my shop. I used 3/4-in.-thick white oak, but any hardwood will do.
After milling the hardwood trim to size, pre-drill holes for your screws and countersink the holes so the screws are buried in the trim. To ensure that the trim goes on flush with the top surface, clamp a board to the tabletop and register the trim against it. Then apply glue to the trim and torsion-box edge and attach the trim with a few brads. After driving the screws, you can plug the countersunk holes with hardwood dowels and cut them flush.
Apply a finish
There are a few options for a finish. At the least, apply a paste wax or boiled linseed oil to prevent glue from sticking to the table. I opted for extra protection and applied five coats of General Finishes’ Arm-R-Seal polyurethane.
Marc Spagnuolo is a furniture maker near Phoenix, Ariz., and host of The Wood Whisperer video podcast. To watch an extended-length version of this project video, visit www.TheWoodWhisperer.com
Series Editor: Matt Berger
More from FineWoodworking.com:
- From FWW # 32 – Ian Kirby writes about The Torsion Box
- Here’s a drafting table with a torsion box top
- How to Make Thick, Light Tabletops by Brian Sargent
- Make a torsion box kitchen table top






Log in or create an account to post a comment.
Sign up Log in