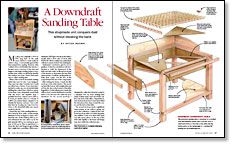
A Downdraft Sanding Table
This shopmade unit conquers dust without breaking the bank
Synopsis: Find an affordable, safe way to manage sanding dust. Peter Brown, an engineer who develops repairs for jet engines, designed and built a downdraft sanding table that uses a motor and impeller from a portable Dust Boy, which he adapted to an Oneida Air Systems cyclone. Get a detailed drawing of his 24 in. by 36 in. deep shopmade system so you can build one too.
My shop was originally a 20-ft. by 40-ft. hog barn. In the early years, before it could really be called a shop, I conveniently ignored the dust created from sanding. However, after I added a floor and finished the interior, I became more conscious of the dust and began to take large sanding projects out to another barn, where I could let the dust fly. The solution was clear: I had to find some way to collect sanding dust.
When I first noticed downdraft sanding tables that were for sale, I was intrigued. They were just what I needed, but I could not afford any of them. It was then that I decided to make my own downdraft table utilizing the central dust-collection system in my shop. I use a shopmade system built with the motor and impeller from a portable Dust Boy—rated to move 1,100 cu. ft. of air per minute (cfm) at a velocity of 5,400 ft. per minute (fpm)—adapted to an Oneida Air Systems cyclone. I was confident that by locating my 2-hp Dust Boy close to the downdraft table, my system would do the job.
I based the size of the sanding tabletop— 24 in. deep by 36 in. wide—on the average dimension of my workpieces. I then calculated the area of the tabletop (864 sq. in.) and subtracted the area taken up by the grid material (330 sq. in.), leaving an open area of 534 sq. in. This is equivalent to a 26-in.-dia. duct, and I began to get a feeling that I might have a problem. With even a minimum 3,000-fpm velocity at the table, I would need a flow rate of more than 10,000 cfm. All of a sudden my central dustcollection system looked very inadequate.
Undaunted, I resolved to give it a try regardless of what the calculations told me. I decided to build the framework of the table and then make cardboard mock-ups of the interior to determine the best flow characteristics. I built the sanding table entirely from scraps, and the size of the scraps dictated the size of the components.
After making the frame, I made the first mock-up of the table interior. The mockup had a flat bottom with straight sides and an 8-in.-dia. duct at the bottom of the table. Regardless of what adjustments I made, the airflow wasn’t evenly distributed across the table: It was fair near the outlet but poor elsewhere.
From Fine Woodworking #153
For the full article, download the PDF below:
Fine Woodworking Recommended Products

Ridgid EB4424 Oscillating Spindle/Belt Sander

Bosch 12V Trim Router

Stanley Powerlock 16-ft. tape measure


Log in or create an account to post a comment.
Sign up Log in