Hand-Cut Dovetails
In this classic article from 1976, Alphonse Mattia explains how to cut through and half-blind dovetails by hand; not much has changed!

Synopsis: Dovetails can be cut much faster by machine, writes Alphonse Mattia, but there are certain disadvantages to doing them this way. With hand-cut dovetails, the craftsman has no limitations. You can tailor the shape, size, and pattern of your dovetails to suit the piece you’re building. Mattia details the steps for cutting through and half-blind dovetails, advising that practice and patience will be your best virtues as you proceed. He suggests using a marking gauge and how to lay out the pins on the end grain. Photos illustrate various steps he discusses, and he offers time-saving tips, too.
Dovetailing is one of the strongest and most attractive methods of joining the ends of boards together. Traditionally, handcut dovetails consist of a series of alternating pins and tails beginning and ending with a half-pin, with the tails usually about twice as large as the pins.
 Nowadays, dovetails can be cut much faster by machine, but there are certain disadvantages to doing them this way. The pins and tails are the same size because they are cut together in one step. This makes the joint look very confusing and without character, as it is hard to tell the difference between the pins and tails. Machine dovetails also have a size limitation because there are only two sizes of dovetail router bits generally available. And, when machine cutting half-blind dovetails, there is no guarantee that the series will end with a pin. Taken together, these may not seem like serious points to consider when time is critical, but they do affect the quality of a fine piece of furniture.
With hand-cut dovetails the craftsman has no limitations. He can tailor the shape, size and pattern of his dovetails to suit the piece he is building. There are many types: through, half-blind (only visible from one side), hidden, and mitered dovetails. Simple and compound-angled are also possible.
In this article, I will go through the steps for cutting the through and half-blind dovetails. The most important thing about cutting dovetails is patience. You must be as precise as possible with each step, especially sawing. It takes practice, but in time you will find that they are not at all difficult.
The pieces to be joined should be dressed to the same width and thickness and the ends cut square. The surfaces that will be inside should be sanded and so marked.
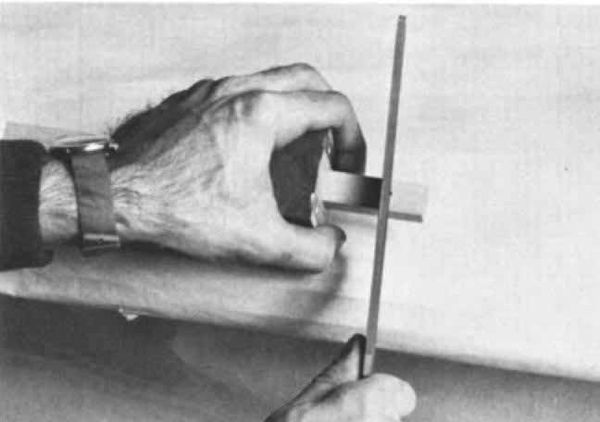
It helps if you have a marking gauge. Sharpen it with a file not quite parallel to the movable block. If angled in the right direction, this slight bevel will tend to draw the gauge tightly against the board being worked. (If the angle is reversed, it will tend to push the gauge away from the board.)
With the marking gauge set to the thickness of your boards, scribe a line all the way around the ends of your boards (front, back and edges). It helps if you set your marking gauge at a little more than the thickness of the wood (maximum 1/32). This will cause the pins and tails to extend above the surface of your boards when finished, so that after gluing, a little sanding will give a perfect corner.
For the full article, download the PDF below:
Fine Woodworking Recommended Products

Suizan Japanese Pull Saw

Starrett 12-in. combination square

Marking knife: Hock Double-Bevel Violin Knife, 3/4 in.


Log in or create an account to post a comment.
Sign up Log in