Synopsis: Alastair A. Stair takes you on a journey across cultures in this history of the ball-and-claw foot and its regional variations, in terms of how the muscles are carved, how the claw is angled or curved, and the overall tension shown in the piece.
When combined with a cabriole leg, the ball and claw foot is a well-known furniture support dating back to ancient times. The industrial version is hardly recognizable—reason enough for every interested craftsman to develop his own.
Few amateurs are satisfied with their ball and claw carvings. To illustrate the process, I’ve chosen cabriole legs with ball and claw feet made for a wing chair. To many craftsmen, shaping cabriole legs is an uncertain process, but this step-bystep procedure should be simple to follow. The ball and claw foot on a tripod table requires the same basic carving cuts, but the claw placement is different—the claws come in over the ball horizontally for a more natural look.
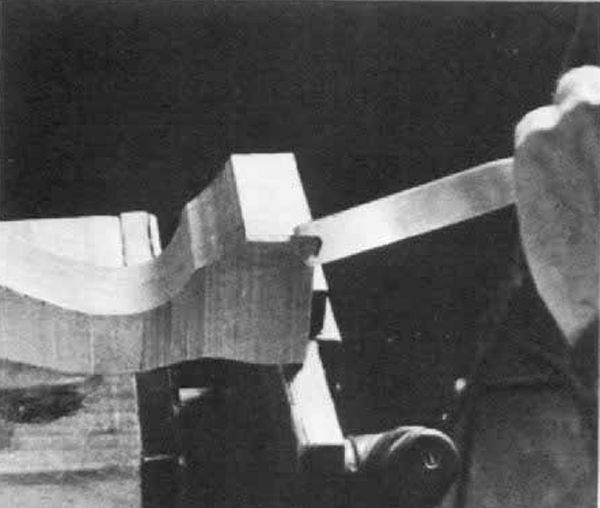
The average blank size for a cabriole leg, regardless of length, is 2 3/4 in. by 2 3/4 in. To make a pattern, follow the line drawing, which is laid out in 1-in. squares. Place the pattern on a blank, as shown in the drawing and the photo at right. Keep the front knee curve toward the rightangled front corner and outline in pencil.
Shaping a cabriole leg can be quite simple when done on a band saw. Saw the first surface as shown at right, ending the cut before the waste piece is completely severed. This keeps the second or rightangled surface in place for the second cut. After the second cut has been made, turn the block back to the first surface and finish sawing the short, uncut portions of each curve.
The next step is physically a minor one, but of major importance. Without it, the side claws look like wings sticking out. The line drawing shows three full bottom views of a leg as it is shaped. The first view shows the leg as it comes from the band saw. In the center drawing, a 3/8-in. wedge has been removed from each side claw to lessen the total width and give a more pleasing and realistic appearance to the finished foot. In the photo, a 3/4-in. #3 gouge is used to chip away the wedge of wood. The third drawing adds the contour of the ball and the veiner cuts made in the next step.
More on FineWoodworking.com:
- Making Ogee Bracket Feet – Templates and jigs make neat feet for a box
- All About Legs, Feet, and Bases – Whether you’re constructing feet or legs, there are a number of options to consider
- Where Furniture Meets the Floor – These four traditional bases change the look and style of the same chest
From Fine Woodworking #10
For the full article, download the PDF below:
Fine Woodworking Recommended Products

Dividers

Estwing Dead-Blow Mallet
Bessey EKH Trigger Clamps







Log in or create an account to post a comment.
Sign up Log in