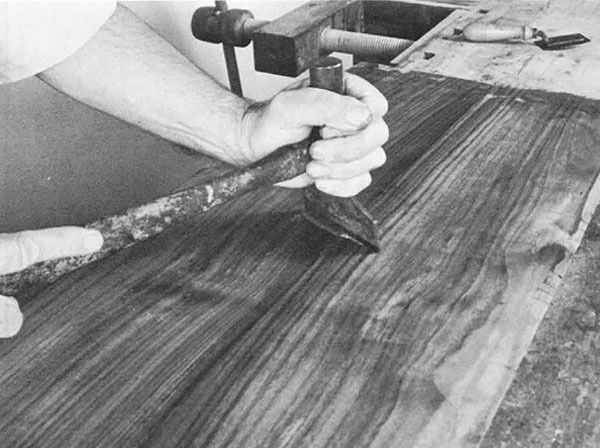
Synopsis: Hammer veneering is usually the easiest way to fix old furniture with missing or broken veneer, or air bubbles under the veneer, writes Tage Frid. He shares tips on the basics, outlines the equipment needed, explains how to veneer edges and large surfaces, how paper helps hold seams closed, scraping, and how to do all this without clamps.
From Fine Woodworking #10
Hammer veneering is the old way of applying veneers to solid wood or to a plywood ground. The main tool is a veneer hammer, which is not used for hammering at all, but for applying pressure. The hammer has a very narrow face, so you can transmit the strength of your arms and the weight of your body to a tiny area of veneer. The veneer is held down by hot hide glue, which sticks as soon as it cools. You spread the hot glue on the ground surface and the veneer, then you use the hammer to squeeze it down tight before it cools. You can reheat the glue, and soften it, with an iron. Hammer veneering is usually the easiest way to fix old furniture with missing or broken veneers, or air bubbles under the veneers.
Hammer veneering is very fast to do, but the big advantage is that you don’t need a veneer press or cauls or clamps. In regular methods of veneering, the size of the work is limited by the size of the veneer press or of the clamps. But with hammer veneering you could veneer the whole world if you wanted to. The same rules apply, however: When you veneer one side of a piece of wood, you have to veneer the other side too, or else the piece will be pulled concave toward the veneered side as the glue dries.
When veneering plywood, always cross the grain direction of the face veneer and of the ground layer. You can use some angle other than 90°, as long as the grain of the veneer and the grain of the top layer of plywood don’t run parallel. If they are parallel, the veneer will crack later on. If your veneer is applied to solid wood, be sure the grain does run parallel so the two layers of wood can move together.
Equipment: You will need a veneer hammer, a veneer saw, a hot glue pot (or double boiler), animal glue, a brush and an iron. Veneer hammers vary in design, but usually have a long handle and a hardwood wedge for a head, with an inset aluminum or brass strip, which is the working face. The face must be straight and about 3 1/2 in. wide, with a rounded profile to squeeze the veneer along a thin line. If you make your own hammer, follow the dimensions in the sketch and use a hard, heavy wood such as maple. Don’t use steel or iron for the face, because it would react with the tannic acid present in most woods and cause a stain. Before using a new hammer, soak it in raw linseed oil so the glue won’t stick to it.
For the full article, download the PDF below:
Fine Woodworking Recommended Products
Veritas Micro-Adjust Wheel Marking Gauge

Veritas Precision Square
Whiteside 9500 Solid Brass Router Inlay Router Bit Set




Log in or create an account to post a comment.
Sign up Log in