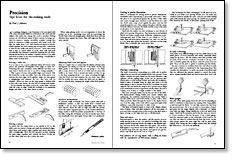
Synopsis: It pays to watch others at work, and Fred J. Johnson learned from die makers a number of ways to be safer and more accurate in his woodworking. Here, he shares some of their tips, including checking your tablesaw to see if it is cutting squarely, proving jointers, adjusting bandsaws and jigsaws, using a draftsman’s pricker to measure, cutting to precise dimensions, ice-pick technology, and more. Each craft and each woodworker has distinctive methods of getting the job done, he says, and this article should help many others.
As a package designer, I am fortunate to be associated with some extremely skilled woodworkers—the steel-rule die makers who make the cutting dies used to produce folding cartons out of boxboard. Many of these cartons, beverage carriers for instance, require incredibly complex cutting dies made to tolerances usually associated with metal work. The dies are made from 3/4-in. thick hardwood-plywood blocks, which separate the steel cutting and scoring rules. Solid birch is used for the really tiny pieces of wood. I have discovered that it pays to watch others at work. Each craft and each woodworker has distinctive methods of getting the job done. Having learned from die makers a number of ways to be safer and more accurate in my own woodworking, I would like to share some of them here.
Proving a table saw
It is so easy to be a good craftsman when all of your sawn pieces are perfectly rectangular—every edge an exact 90°. Achieving this state sometimes seems difficult, but here is an easy way to check your saw to see if it is cutting squarely.
Take a piece of scrap with parallel edges and crosscut with the board flat on the saw table. Turn one of the pieces over and put the sawn edges back together. Align one side against a straightedge and examine the cut. Any error will be doubled. When you have set the miter gauge or sliding table so that only a line shows, the saw will be cutting truly square.
To see whether the blade is set at 90° to the table, crosscut with the scrap on edge. Crank the sawblade to its maximum height and make a cut, then check as before.
Proving a jointer
To prove that the jointer fence is set exactly at 90° to the table, joint two pieces of scrap and mark the machined edges. Stack them with jointed edges together and check their faces with a straightedge. Then turn the top piece around, keeping the same edges together, and recheck the faces. If they are not flat, then what you see is twice the error.
When edge-gluing stock, it is not imperative to have the jointer set at 90°. Anything close will do—providing the boards have relatively straight grain. Mark their faces and run alternate faces against the fence. They will edge-join flat; the error cancels.
From Fine Woodworking #17
For the full article, download the PDF below:
Fine Woodworking Recommended Products
Fein Turbo II HEPA Wet/Dry Dust Extractor

Festool Cleantec CT 26 E HEPA Dust Extractor
Ridgid EB4424 Oscillating Spindle/Belt Sander




Log in or create an account to post a comment.
Sign up Log in