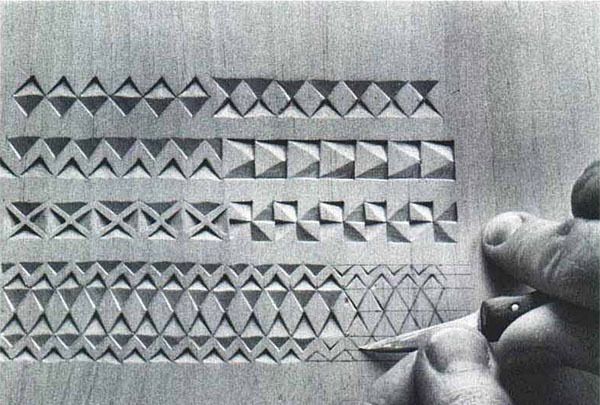
Synopsis: Chip carving is one of the oldest forms of decorative woodcarving, and it’s also one of the simplest, according to Rick Bütz. He explains how to sharpen a straight-edged knife, a skew-ground knife, and a knife with an offset blade, how to mark out a pattern, and make a traditional triangular chip using three cuts. He shows how and describes the six-cut chip, and how simple designs, when combined, make for an intricate finished look. Extensive photos show a variety of designs and some work from about 1900.
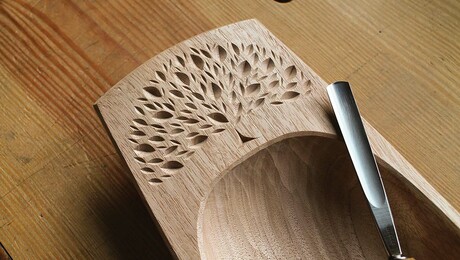
Chip carving is one of the oldest forms of decorative woodcarving and also one of the simplest. A straight-edged knife sharpened to a fine point is all you really need, though a skew-ground knife and a knife with an offset blade are useful. Complicated geometric patterns are formed by arranging dozens of small triangular incisions.
The simplicity of technique and the personal satisfaction chip carving offers caused it to flourish well over 1,000 years ago. It seems to have developed simultaneously among peasant communities in many lands, including Scandinavia, Germany, Switzerland and Russia. As the centuries passed, many of the patterns and designs were freely exchanged, and in time it became impossible to identify which motif was developed by which nationality.
In its heyday, chip carving was used primarily to decorate household items. Many elaborately decorated objects were carved during the long winter and later given away as gifts. However, as the slow pace of country life was hastened by the pressures of industrialization, fewer evening hours were spent carving at the hearth. Eventually, chip carving faded into obscurity and was continued only in remote parts of Switzerland and northern Europe. In America, the tradition was carried on by the Pennsylvania Dutch.
Traditional chip carving was also used as a training device for woodworking apprentices—it remains a good test of self-discipline and sharp tools. Mistakes and overcuts, once committed, are not easily corrected or concealed.
To start chip carving, first make sure your tools are razorsharp, because the final appearance of the work is judged by neat cuts and crisp, clean lines. In addition, a sharp knife will be less likely to slip while you are carving, minimizing injuries and the unnecessary frustration of spoiled work.
Test the sharpness of your knife by lightly, carefully scraping the edge across your thumbnail. If you can feel the edge grip and hold, then the blade is razor-sharp. If the edge slides and skips, it is dull. If the edge is dull, use a medium-fine Washita or fine India stone and a leather strop for sharpening. Lubricate the stone well with a lightweight oil to prevent clogging, and hold the blade at a fairly low angle. Sharpen one side at a time, using a circular motion until a fine wire burr forms on the cutting edge, indicating that the metal has been brought to as fine an edge as that particular stone will allow. This wire edge is difficult to see, and you can best check for it by lightly dragging your fingertip across the blade away from the cutting edge. Check both sides. The burr edge will feel rough, as though it is catching on the ridges of your fingerprint. When you can feel the wire edge along the entire edge, the blade is ready for the strop.
From Fine Woodworking #19
For the full article, download the PDF below:








Log in or create an account to post a comment.
Sign up Log in