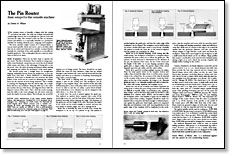
Synopsis: The overarm router is basically a shaper with the cutting tool above the table. Not only can it shape and mold the outside edge of stock, it can also plunge-cut, groove, bore, and excavate for inlay. It can cut mortises, tenons, and rabbets, and is good at making identical parts. In this article, Dennis R. Wilson explains six basic ways of operating the router, which cutters are best to use, and how to use one safely. Side information covers homemade overhead and pin routers.
The overarm router is basically a shaper with the cutting tool above the table. Not only can it shape and mold the outside edge of stock, but it can plunge-cut, groove, bore and excavate for inlay. The overarm router can also cut mortises, tenons and rabbets. It is especially valuable as a production machine for making identical parts, using jigs and templates.
The basic machine (right) consists of a C-shaped frame, a top-mounted spindle chuck and motor, and a movable table that can be raised and lowered by a treadle. Located directly beneath the centerline of the cutter spindle is a vertically adjustable guide pin. This is what gives the pin router its versatility as well as its name.
Modes of operation—There are six basic ways to operate the pin router. The first is freehand. This is similar to using a portable router freehand, except that you move the stock instead of the router, and there is the advantage of being able to see the work. Also, the table-elevating mechanism makes starting and stopping cuts within the perimeters of the stock easier.
The second mode uses a straight fence for straight-line shaping. Adjustable factory fences are satisfactory, or you can make your own from a dense hardwood or cabinet-grade plywood. If the fence is divided into two sections, the entire surface of the stock can be routed by offsetting the outfeed fence by the amount of stock being removed. This is similar to jointing. For shaping less than the whole edge, use a single fence and set it up as follows: Bring the table up so the cutter just touches the top of the fence, and align the fence with the deepest contour of the cutter. Then, with the router running, raise the table so the cutter plunges into the fence until you reach the depth of cut you desire.
For the full article, download the PDF below:
From Fine Woodworking #29
Fine Woodworking Recommended Products
Veritas Micro-Adjust Wheel Marking Gauge
Dustopper Pro
Rockler Deluxe Panel Clamp




Log in or create an account to post a comment.
Sign up Log in