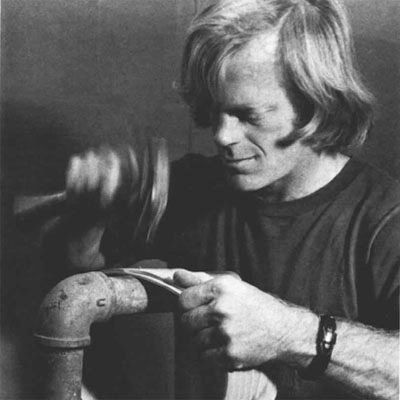
Synopsis: Though he started off studying Shaker oval boxes, Tom McFadden makes his of a variety of woods and he leaves the outside overlapping end square, instead of cutting fingers on it. Here, he explains how to select wood for steaming, how to steam it, how to crosscut each board and joint, plane, and rip them for making the boxes. He talks about hardware choices, how to sand the endgrain, and how he hand-planes the inside overlap. Side information by John Kassay talks about making a hand-cut, through-dovetail box with a sculpted, steam-bent handle, or bail.
I designed my oval boxes and carriers after studying Shaker examples. Typically, the sides of Shaker boxes were made of maple and splayed into three or more tapered fingers in the area of the scarf joint, where the two ends overlap. In my boxes the sides are of cherry, maple, madrone, mahogany, oak, ash or walnut, and I leave the outside overlapping end square, instead of cutting fingers on it. All these woods steambend easily in a thickness of 1/8-in. Before bending, the inside end involved in the scarf joint is tapered to produce a smooth surface when assembled. I fasten the joint with copper tacks and yellow glue, and attach the handles on carriers using the same. (The tacks are available from Fasco Fastener Co., 2023 Clement Ave., Alameda, Calif. 94501.) The pine tops and bottoms fit into the bent sides of the box and rim, and I secure them with round-head brass brads. The completed pieces are finished with two coats of polyurethane followed by an application of paste wax. I make the boxes in seven sizes and the carriers in five sizes.
When selecting stock for bentwood boxes, you should use only straight, even-grained wood for the side pieces. Imperfections such as curl, knots (sound or otherwise) or slanting grain may cause the pieces to break or to bend unevenly. You can use kiln-dried stock, but lumber that has been air-dried to 10% or 12% moisture content will respond to the steam more readily and produce more consistent results. Resawn, a good 4/4 board will yield three side pieces.
Before resawing, crosscut each board to within 3 in. or 4 in. of its finished length; then joint one face and edge, and plane the unjointed face. Now rip the boards to width, then resaw and plane them to produce blanks 1/8-in. thick. Take ten of the 1/8-in. blanks, align and stack them one atop another and tape them together with masking tape. Mark out the narrow part of the outside end of the scarf joint and the location of the tacks by laying a pattern on top of the bundle. The ends of the pieces can now be stack-sawn to shape and the 1/16-in. dia. pilot holes drilled for the copper tacks. Smooth the end-grain edges with a stationary belt or disc sander.
Next separate the pieces and with a hand plane taper the inside end of each overlap down to 1/64-in. over the last 6 in. After tapering, sand each side piece inside and out with a 100-grit belt in a belt sander, and round the edges by hand slightly with 120-grit paper. Mark the inside of each piece with a pencil so you’ll know which way to bend it after it comes out of the steam box. The completed side pieces are again taped into bundles to await steaming.
From Fine Woodworking #32
For the full article, download the PDF below:
Fine Woodworking Recommended Products

Ridgid EB4424 Oscillating Spindle/Belt Sander

Dividers

Circle Guide


Log in or create an account to post a comment.
Sign up Log in