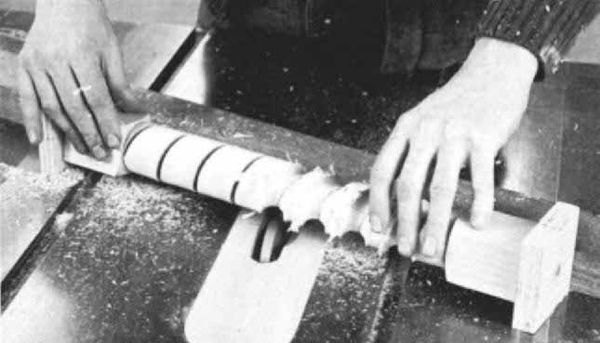
Synopsis: Mostly used in reproduction and repair and for Mediterranean-style furniture, spirals are not truly turnings because most of the work is really carving, writes furniture designer and maker Eric Schramm. He offers tips for ensuring strength as well as aesthetic beauty in balancing pitch and depth of the cuts. He explains how to lay out the spiral by dividing the cylinder’s circumference into four equal parts and the length into spaces equal to or slightly less than the cylinder diameter. He explains how to lay out double spirals and how to cut them using a saw, lathe, and files. He discusses making tapered spirals for flame finials, too. Side information shows examples of spirals, and an accompanying article by Larry Green explains how to use your tablesaw to start cutting a spiral piece.
From Fine Woodworking #33
Spiral or twist turning was introduced in Europe during the 16th century and was used widely for chair and table legs in 17th-century England. Today, the technique finds uses in antique reproduction and repair and for the Mediterraneanstyle furniture popular in the Southwest and West.
Spirals, solid and hollow, are not turnings in the true sense of the word because most of the work is really carving. A spiral resembles a screw thread; it has pitch and lead. Pitch is the distance from center to center of consecutive ridges or bines. Lead is the distance the spiral advances along the cylinder in each revolution. In a single-twist spiral, pitch and lead are the same. A spiral with a short pitch and great depth will be weak because much of the long-grain wood has been removed. A longer pitch will be stronger but less pleasing to the eye. I find that a pitch about equal to or slightly less than the cylinder’s diameter produces the nicest effect. The precise pitch, however, is governed by cylinder length, if the spiral bines are to be spaced equally and are to start and finish their lead symmetrically.
To lay out a single spiral, you must divide the cylinder’s circumference into four equal parts. A quick method is to wrap a strip of paper around the circumference and trim it so the ends just meet. Remove the paper and fold it in half once, and then in half again. The fold marks, which will quarter the cylinder, can be transferred directly to the workpiece with a pencil. With the cylinder on the lathe and the tool rest acting as a straightedge, draw four lines along the length of the workpiece passing through these marks (figure la).
Next divide the cylinder’s length into spaces that are equal to or slightly less than the cylinder diameter (figure 1b). These marks are the pitch lines and represent the distance between the spiral’s ridges. Pitch lines drawn, divide the space between them into four equal spaces. You can now sketch the spiral ridge by drawing a continuous line diagonally through one after another of the quarter spaces between the pitch lines. A scrap of sandpaper makes a good straightedge (figure 1c) for drawing the diagonal lines. If you’ve done things properly, the ridge line will cross a pitch line with each revolution. With the ridge line completed, draw in another line parallel to it to roughly locate the spiral’s groove. The ridge line will remain intact through the carving process.
A double spiral, the most popular form, is layed out similarly.
For the full article, download the PDF below:
Fine Woodworking Recommended Products

Blackwing Pencils

Stanley Powerlock 16-ft. tape measure

Makita LS1219L Miter Saw






Log in or create an account to post a comment.
Sign up Log in