How to make drawers
Design for drawing table illustrates the principles
Synopsis: Tage Frid’s drawing table offers an exercise in building drawers. First, he suggests deciding what will be put in the drawers; that helps determine the carcase, drawers, and materials. Frid based his design on the standard sizes of drafting paper and parallel rulers. There are three ways to make a carcase that will contain drawers: glued-up solid wood, frame-and-panel systems, or cabinet-grade wood. He explains the best uses of each method and ways to hang a drawer before talking about how to build the carcase he designed, and fitting and assembling the drawer. He offers tips on how to fit the the hand-dovetailed joints on the drawer, depending on the season you’re working in. He shares tips on correcting problems and alternatives to dovetailed joints. A quick side article presents three woodworkers’ ideas on drawer-stops. The article is liberally illustrated with photographs and detailed drawings to help show how to proceed with each step.
About twenty years ago, when I first started teaching at the Rhode Island School of Design, I was commissioned to make drawing tables for the school dormitories. The tables were to be plain and inexpensive, yet sturdy and able to withstand abuse. Because dormitory rooms are small, each table had to be space-efficient. This last requirement made the tables a good exercise in an important cabinetmaking skill— designing and building drawers.
When I design a piece with drawers, I first consider what will be put in them. This helps determine how I will build both the carcase (the body of the cabinet into which the drawers go) and the drawers, and of what materials. The overall size of the drawing table described in this article, which is an improved version of the one I made twenty years ago, is based on standard sizes of drafting paper and parallel rulers. For storing big sheets of paper and finished drawings, I wanted an open compartment below the adjustable drawing surface. For odds and ends, I added a drawer to the right of the space where your knees go. For instruments, pencils and pens, I also included some shallow trays that slide in grooves milled inside the carcase.
Once I had decided on the drawer and trays, I worked out the construction details for the carcase. There are three basic ways to make a carcase that will contain drawers: with gluedup solid wood, or with a frame-and-panel system, or with cabinet-grade plywood. I used plywood for my drawing table because it’s good for knockdown joinery, and because it’s simple and fast to work with. Lately, though, I’ve been using more and more solid wood for my furniture because I can do more with it, such as shaping, carving and bending. Of course, solid wood shrinks and swells with the seasons, so you must account for this in your drawer-hanging. A frame-andpanel carcase, with a solid or plywood panel, isolates most of the wood movement, but it limits your shaping choices, and complicates the joinery and drawer-hanging.
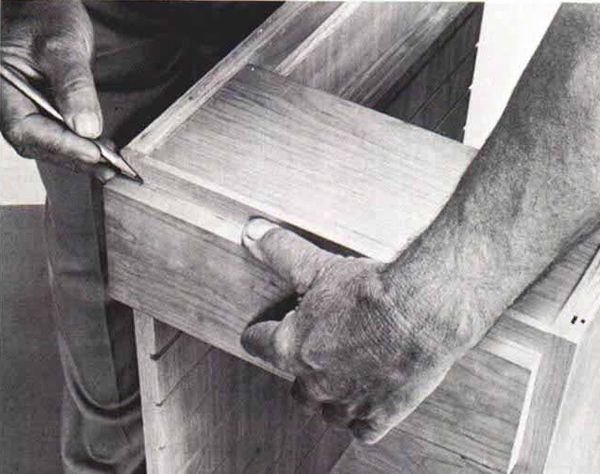
There are several ways to hang a drawer. When I was an apprentice in Denmark, I learned the method shown in figure 1, which is the one I used for the top drawer of my drawing table and in all of my best furniture. The drawer slides in and out of the carcase on two horizontal members called runners, which fit into grooves milled in the sides of the carcase. At the front of the carcase, the drawer rests on a stretcher or a rail, which also ties together the front edges of the carcase and provides a surface to which drawer stops can be glued. For a drawer to work correctly, it must have some sort of guide to keep it from tilting down when it is pulled out.
From Fine Woodworking #45
For the full article, download the PDF below:
Fine Woodworking Recommended Products

Jorgensen 6 inch Bar Clamp Set, 4 Pack

Stanley Powerlock 16-ft. tape measure

Bessey K-Body Parallel-Jaw Clamp


Log in or create an account to post a comment.
Sign up Log in