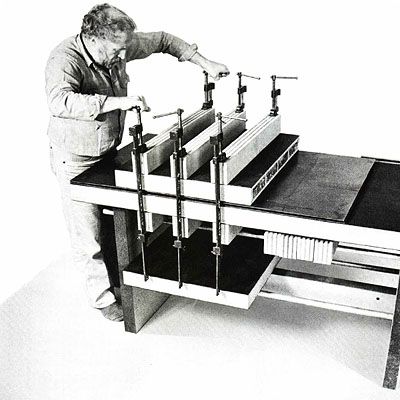
Synopsis: Making furniture out of veneer is just the opposite of making it from solid wood: you build it up as you go, instead of whittling it away. The work itself (the techniques) is well within the skills, tools, and budget of the small-shop woodworker. And it has three advantages: you can make panels of any size, you can use woods of rare beauty, and you don’t have to allow for moisture-related wood movement as you do with solid wood. Ian J. Kirby explains how veneer is assembled, what tools you need to work it, and how to plane it. He uses veneer tape to put veneers together and offers tips on gluing it to your substrate and finishing it. A side article addresses bench-pressing veneer.
Furnituremaking with solid wood is like whittling: you chip away at the tree until you end up with the pieces you need. Working veneer is just the reverse: you stick the bits together to build up furniture elements of the exact size and shape you want. This means you have to think about the work in a different way—you have to plan ahead instead of making dimensional decisions as you go along.
This difference in thinking is in fact the most difficult aspect of veneering. The work itself, the techniques, is well within the skills, tools and budget of the small-shop woodworker. And, you’ll find that veneering has three distinct advantages for furnituremaking: you can make panels of any size; you can use woods of rare beauty; and, a design bonus unique with veneered panels based on dimensionally stable substrates, you don’t have to allow for moisture-related wood movement, as you would with solid wood.
Any veneered panel is assembled from three components: a substrate or base material, some lipping or edge treatment, and the veneers themselves. Preparing the substrate is the first step, but this is relatively easy with ordinary woodworking tools and dimensionally stable medium-density fiberboard (MDF) or furniture-grade particleboard. For the photos to illustrate this article, I used a piece of in. MDF about the size of a cabinet door or small tabletop, and glued a mitered lipping of solid wood onto its edges. This way, the edges can be radiused or shaped in some way, and the finished piece will have the look and feel of solid wood. Once you’ve glued on the lippings and planed them flush with the surfaces of the substrate, you’re ready to apply the veneers.
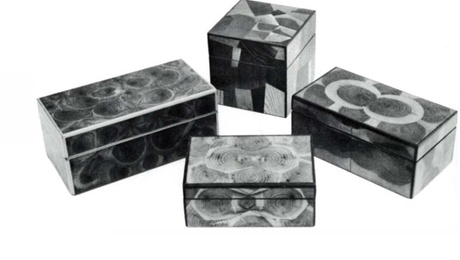
Normally pieces of veneer are taped together to make sheets as wide as the panel. Veneers commonly are available in lengths up to 8 ft., so usually it’s not difficult to find pieces as long as your panel. For very long panels or for special effects, you can join several pieces to make strips as wide as the panel, then end-join the wide strips to make one long sheet. Veneers are easy to cut and join, so you have considerable design freedom here. Books on traditional veneering usually illustrate a variety of patterns, such as bookmatched mirror images or herringbone patterns, but these patterns are somewhat old hat and unnecessarily restrictive. You can match and join veneers in any way you like to create any type of pattern that appeals to you. The only rule for joining veneers is visual—what does it look like? Use your imagination. Experiment with combinations of grain directions and angles, with different species, and with bands, circles and other shaped inlays.
From Fine Woodworking #47
For the full article, download the PDF below:
Fine Woodworking Recommended Products

Bahco 6-Inch Card Scraper

AnchorSeal Log and Lumber End-Grain Sealer

DeWalt 735X Planer


Log in or create an account to post a comment.
Sign up Log in