Starting Out: Cutting a Bridle Joint
Find out how to make this a simple version of a mortise and tenon, in this second of four articles on starting out as a woodworker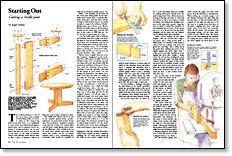
Synopsis: In this second of four articles on starting out as a woodworker, Roger Holmes explains how to make bridle joints, or a simple mortise and tenon, for a simple table. This joint requires accurate, organized marking out, and he explains how to do that and how to cut the cheeks and shoulders. Most joints need a little trimming to fit snugly, which he talks about, before he addresses chamfering.
The mortise-and-tenon is one of the most basic and versatile woodworking joints. It can be as plain as the rung-to-leg joints in any stick chair, or as complicated as some of the three-dimensional, jigsawpuzzle joints used in Japanese house carpentry. A mortise-and-tenon can be used almost any time you need to join the end of one piece to the edge of another. They’re such effective joints that it’s hard to find a piece of furniture without at least one, even if only a dowel in a hole.
The bridle joint (shown above) is one of the simplest garden-variety mortiseand-tenons. Its open-ended mortise doesn’t have the mechanical (unglued) strength of an enclosed mortise, but modern glues and the joint’s ample gluing surface make up the difference. And a bridle joint can be made more quickly and easily. Both tenon and mortise can be cut almost entirely with a saw, eliminating the excavation that would be required to clear out an enclosed mortise.
When I was figuring out the base for the round pine dining table shown here, bridle joints seemed ideal. A pedestal eliminates obstruction under the table, and the C-shaped, bridle-jointed frames are sturdy enough to support the tabletop, Thanksgiving turkey and a dozen or so elbows. And the six bridle joints are all the joinery needed for the entire base.
I cut the bridle joints with a bandsaw and backsaw, then used a chisel and shoulder plane to clean up and fit them together. If you don’t have a bandsaw, you can do all the sawing with a backsaw and a bowsaw or handsaw. A shoulder plane is a handy tool, but if you’re reluctant to dish out $40 or so for one, you can trim the shoulders with a chisel.
When I knew roughly what sort of table I wanted, I designed it on the workshop floor with a piece of chalk. I drew an elevation (side view) of half the top and one frame full-scale, then fiddled with the proportions until they looked good. If you start with the drawing shown here, sketching a full-scale elevation will help fix the project in your mind. You can change the dimensions and shapes, but I think you’ll find the table too shaky if you make the arms, legs or feet much less than 4 in. wide or 1 in. thick. The feet will get in the way if they extend beyond the top’s circumference. I made the top 4 ft. in diameter, but I think the table would look better with a 5-ft. top.
When your plans are chalked out, cut three sets of arms, legs and feet for the C-shaped frames.
From Fine Woodworking #49
For the full article, download the PDF below:
Fine Woodworking Recommended Products
Veritas Standard Wheel Marking Gauge

Olfa Knife
Leigh D4R Pro







Log in or create an account to post a comment.
Sign up Log in