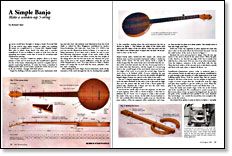
Synopsis: Richard Starr’s wooden soundboard banjo doesn’t have as brilliant or as loud a sound as those with skin or plastic drum heads, but it has an appealing ker-chunky sound that is lovely for mountain-style clawhammer playing. The banjo’s structure is simple and it doesn’t require tensioning hardware. Start by drafting a pattern for top and side views of the instrument, and mark out the extension of the neck through the rim by drawing lines parallel to the centerline starting where the neck intersects the rim. This defines the width of the neckpiece and the shape of the rim halves. Starr goes on to explain how to make the frame, the soundboard, and the fingerboard; and how to carve the neck, make the fretting, and set up the banjo. He closes with advice on a good book to buy to learn to play!
I never would have thought to design a banjo if several kids in my school shop hadn’t wanted to make one (nothing seems too complicated to a 12-year old). Regular banjos have skin or plastic drum heads, but mine uses a wooden soundboard. It isn’t as brilliant or quite as loud, but it has an appealing ker-chunky sound that is lovely for mountain-style clawhammer playing.
This banjo’s structure couldn’t be simpler. There is no fancy joinery or bolts and no bent wood. The soundboard is glued to the rim of the banjo, eliminating the need for complex and expensive tensioning hardware. To make the banjo, a bandsaw is indispensable and a power jointer speeds the work, but you can, as do my students, manage with hand planes.
Begin by drafting a full-size pattern for your instrument, both top and side view. My students used dimensions from the book Foxfire 3, edited by Eliot Wigginton (published by Anchor Press/Doubleday, 245 Park Ave., New York, N.Y. 10167), but you can use the dimensions shown in figure 1, or copy an existing instrument. If you have such a model, be sure to note the following dimensions: length of the neck; width of the neck at the nut, fifth fret and where it joins the rim; height of the strings above the last fret and at the nut. Measure the positions of the frets to the nearest millimeter, using the nut end of the fingerboard as zero. You may choose to make a fretless banjo—our design fits in well with the warm, primitive, fretless style of playing.
After drafting the basic shape of your instrument, mark out the extension of the neck through the rim by drawing lines parallel to the centerline, starting where the neck intersects the rim as shown in figure 1. This defines the width of the whole neck piece and the shape of the rim halves. Trace the neck and the rim halves onto another piece of paper and cut them out as patterns to trace on the wood.
Frame— Sturdy native hardwoods like maple, ash, cherry and hickory were used by mountain instrument makers. I made my banjo of 8/4 cherry. For the neck, choose stock a couple of inches longer than the entire banjo and a tad wider than the section of the neck that extends into the rim. If your peg head is to be wider than that dimension, add the length of a second peg head to the overall length of the neck blank. Joint one face and two edges of the stock.
From Fine Woodworking #53
For the full article, download the PDF below:
Fine Woodworking Recommended Products

Suizan Japanese Pull Saw


Log in or create an account to post a comment.
Sign up Log in