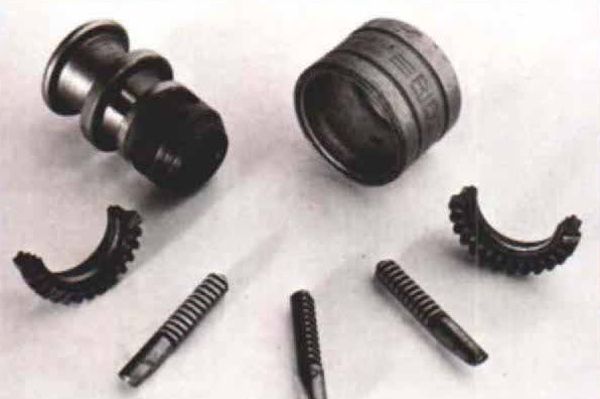
Synopsis: Binding, sticking, hard-to-operate drill chucks rate high on most woodworkers’ pet-peeve list. And most tend to struggle along with the same old cantankerous chuck year after year. But chucks can be readily field-stripped for servicing; here, Richard B. Walker tells how. Cleaning, deburring, and lubricating will cure most chuck problems, and Walker explains how to replace jaws, nuts, and sleeves. He starts by explaining how to remove the chuck, then disassemble it, recondition it, and reassemble it. Photos and drawings illustrate the parts involved.
Binding, sticking, hard-to-operate drill chucks rank high on most woodworkers’ pet-peeve list. Yet few of us do anything about them. A hoary myth is floating around that balky chucks can’t be repaired. And since new ones aren’t cheap (name-brand half-inchers are nudging $45 these days), most of us opt to struggle along with the same old cantankerous chuck year after year.
But the truth is, chucks can be readily field-stripped for servicing. Knowing how is the key. Like interlocking Oriental wooden block puzzles, a chuck’s disassembly procedure is not immediately apparent. But once you find out how to get one apart, chances are excellent that just cleaning, deburring and lubricating will cure its problems. And, should any components turn out to be worn, replacement jaws, nuts and sleeves are available for most name-brand chuck models. Even a badly worn chuck can be totally rebuilt to like-new condition for roughly half the price of a new one.
I’d advise doing one thing before commencing any overhaul. Carefully inspect the gripping surface of the jaws. If the jaws are badly flattened, scored or unevenly worn, you’ll probably need new ones. If that’s the case, check to see if replacement jaws are available for that particular brand and model of chuck. If not, it makes no sense to do an overhaul, and you might as well resign yourself to buying a new chuck.
Removing the chuck— Thread-mounted chucks are used on portable tools and a few drill presses. Taper-mounted chucks are standard on the majority of drill presses, mounted either directly onto the machine spindle or via an intermediary adapter arbor, as shown in figure 1.
Usually you can remove taper-mounted chucks with wedges or a drift as shown, but if in doubt, consult your owners’ manual for directions. For thread-mounted chucks, first open the jaws completely and check inside for a retaining screw. All reversing drills plus a few fixed-rotation models use them. Take care in selecting the proper size screwdriver to avoid damaging the slot. . . which could preclude ever removing the chuck. Retaining screws are always left-hand thread, so remember to turn clockwise for loosening. Sometimes factories apply a dab of thread-locking compound, and cracking it loose takes some force.
From Fine Woodworking #53
For the full article, download the PDF below:
Fine Woodworking Recommended Products

Starrett 12-in. combination square

Stanley Powerlock 16-ft. tape measure

Sawstop Miter Gauge


Log in or create an account to post a comment.
Sign up Log in