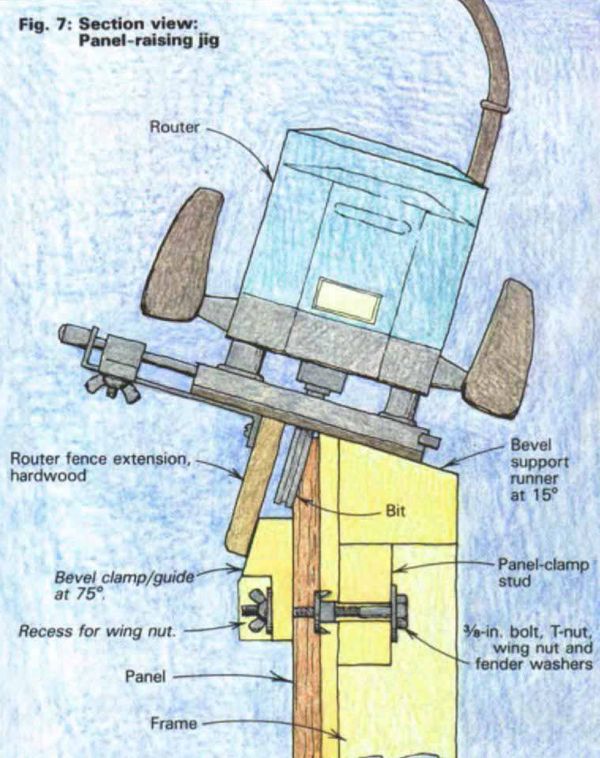
Synopsis: After a few years breaking his router in, Bernie Maas believes that the router is one of the more significant innovations in our craft in a century. Here, he talks about making fixtures, or jigs, to enable your router to do more. He explains how to make auxiliary sub-bases, which help when routing around corners or working small sections, a shopmade T-square fence, and a slotting cutter for aligning boards for edge gluing. For plunge routers, he makes a simple pair of jigs to help cut mortise-and-tenon joints. Maas developed a router panel-raising setup for use in frame-and-panel construction, too. He addresses router drawbacks and tips for keeping routers running smoothly.
Then I bought my first router in the mid-1960s, I thought that it might be useful for putting fancy edges on things. My attempts to do something more with it, like dado or rabbet, usually came to grief when the machine kicked out and gashed the piece. I kept at it though, and over the years, with the addition of a variety of sub-bases, jigs and templates, the limitless possibilities of the router became apparent to me. Today, I believe that the router is one of the more significant innovations in our craft in this century, particularly since the recent introduction of plunge routers.
The router is relatively safe, and it promises surety of performance without a lengthy apprenticeship—ideal qualities for the students in the shop that I run at a small Pennsylvania university. Shapers are expensive and they can be dangerous; I have neither the budget nor the inclination to buy one for our shop. The router can do much of what a shaper can do, and much that a shaper can’t. The new generation of heavy-duty plunge routers can accept -in.-shank bits with the size and mass of some shaper cutters. Our 3-HP Hitachi TR12 plunge router, for example, comes with collets for -in., -in. and -in. bits; it lists at about $300, although it can be found for half that price. Bits vary in price from a few dollars to over $100 apiece. Most of the jigs and fixtures I’ll discuss here can also be used with much less expensive light-duty or medium-duty routers, and inexpensive cutters.
Perhaps the simplest router fixtures are auxiliary sub-bases. We commonly make two sub-bases for new routers, as shown at left and center in figure 1. We prefer to use -in. Masonite or voidfree plywood (such as Baltic birch), both of which are hard, slide easily, and wear well.
The first sub-base is similar to the router’s original base, but we cut the center hole just large enough for the biggest bit we use to pass through. This reduces the chances of dipping or sniping when routing around corners or working small sections. Additional holes make it easier to see the cut in progress. The second base has a long, straight edge (12 in. or more) to guide the router against a fence for dadoing, rabbeting, or cutting grooves. The straight edge helps prevent loss of control when exiting a cut. The third sub-base shown in the drawing, which extends 6 in. either side of the router, is useful for spanning large templates. Make it as thick as possible while allowing the router’s template guide to protrude.
An excellent partner for the straightedge sub-base is the shopmade T-square fence shown in figure 2.
From Fine Woodworking #57
For the full article, download the PDF below:
Fine Woodworking Recommended Products

Festool DF 500 Q-Set Domino Joiner

Veritas Standard Wheel Marking Gauge

Suizan Japanese Pull Saw


Log in or create an account to post a comment.
Sign up Log in