Carving a dough bowl
Using ax, adze, knife, and gouge
My experience with carving is rooted in my very early years in my grandparents’ kitchen. My grandfather’s workbench was there, and my brother and I often sat at it whittling toys and other important things. In later years I often pondered the fact that never once did I hear my grandmother complain about the chips and shavings we left behind on the kitchen floor. At one time, the kitchen was the room that was kept warmest, and it was there that people spent the most time, making and repairing things. Women carded wool, spun yarn, wove and knitted, while men made utensils and other implements for the household and farm, including dough bowls. These bowls were very common kitchen objects when I grew up and they are still useful in today’s homes.
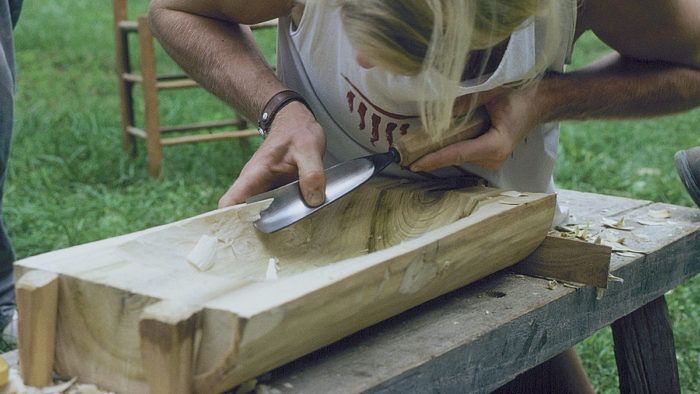
In this article I’ll tell you how to carve a dough bowl using mainly an ax, adze, knife and gouge. Deformities in trees, such as burls, can be hollowed to make natural bowls or scoops. Traditional Swedish drinking vessels were made from burls, and sometimes part of the tree trunk was left on the vessel as a handle. Larger troughs or bowls, however, are often made from split round stock. Feeding troughs, several feet in length, were made for livestock. Smaller troughs were used for making cheese, kneading bread, and serving food.
Tools and material— You will need an ax or hewing hatchet, a hollowing adze and a couple of gouges to rough out the bowl. For truing surfaces and finish-carving, a knife, drawknife or splitting knife, spokeshave, and plane will be helpful. A stable workbench or a low bench with some means of securing the stock is an advantage. And, of course, you will need a chopping block.
The size and sweep of the gouges determine the technique needed to work with them and the type of cut produced. Wide gouges remove more wood, but require more power. A gouge with a deep sweep is good for roughing out; a shallow gouge removes ridges left by the deep gouge. A bent gouge is sometimes necessary to smooth the bottom of the bowl.
Traditionally, softer woods have been used for troughs and bowls. Aspen and birch are among the first choices, but pine and spruce are not uncommon. Almost any kind of wood can be used, except for those that are toxic, contain resins, or might otherwise taint food. Alder, tulip poplar, and basswood are easy to work; maple, beech, mountain ash, juniper, and fruitwood are more challenging.

Avoid wood with knots and uneven grain. The pith and some wood close to it should be removed to avoid radial checking. Whether you work with green or dry wood is often a question of what you have access to. Roughing out green wood is easier than dry wood, but you must prevent checking and cracking when it dries. For greenwood bowls, leave the blank 3/8 in. to 1 1/4 in. larger than you intend the final shape to be, so you can make adjustments after the wood has dried.
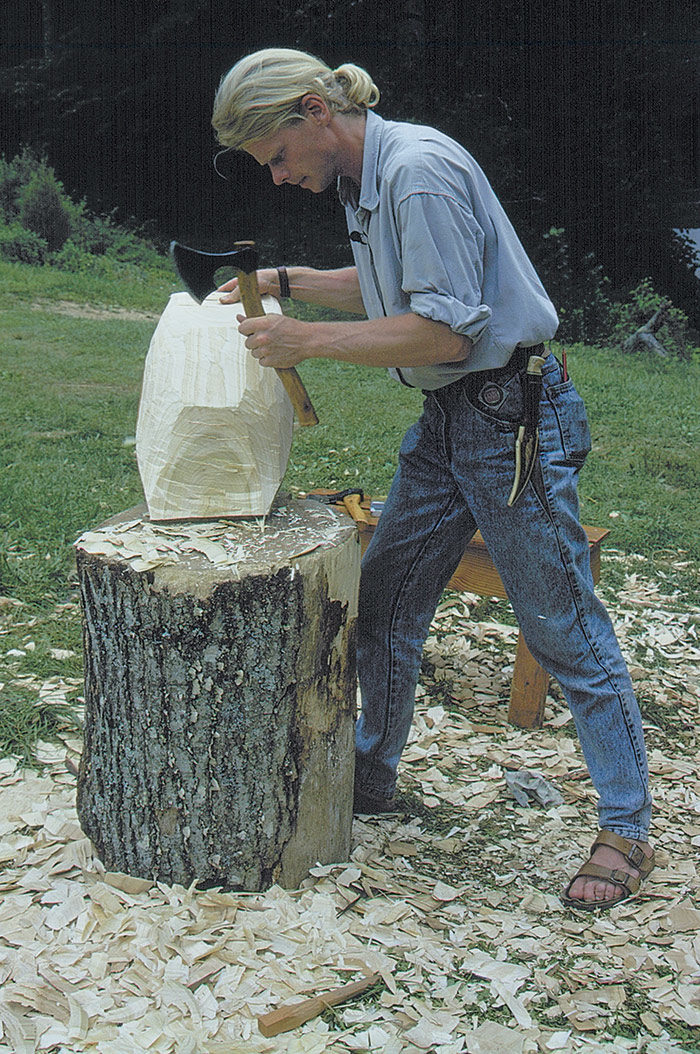
Hewing with an ax— To shape an object with an ax, it is necessary to use a technique other than one you would use when felling or limbing trees. When you hew on a chopping block, you don’t chop the wood, but shear it. The cut starts at the near corner of the blade edge and slices toward the far corner. This stroke, combined with the momentum gained through the ax’s weight, lets you cut with the entire length of the blade edge. This technique applies to axes with short edges, but precision is increased with long-edge axes because the bevel registers on more of the blank’s surface.
Because of this shearing action, your feet should be fairly wide apart. If you hew with your right hand, your right leg should be far back, as shown in the photo. This stance keeps your leg out of the path of the ax and also helps you gain power for your stroke. When making a stroke, the ax head should angle upward, with your hand well below it. It’s a good idea to support the blank on the far side of the block, especially on full-powered strokes, so if you miss or strike a glancing blow, the ax edge ends up in the block, not in your leg.
Start hewing low an the blank and work upward, but not clear to the top; then turn the blank upside down to work the opposite end. Work carefully in controlled increments. Don’t take that last stroke after you’ve decided you’re getting tired and should stop for a rest.
For the full article, download the PDF below:


Log in or create an account to post a comment.
Sign up Log in