A Shaker Style Drop-Leaf Table
Turned legs with drilled-and-chiseled mortises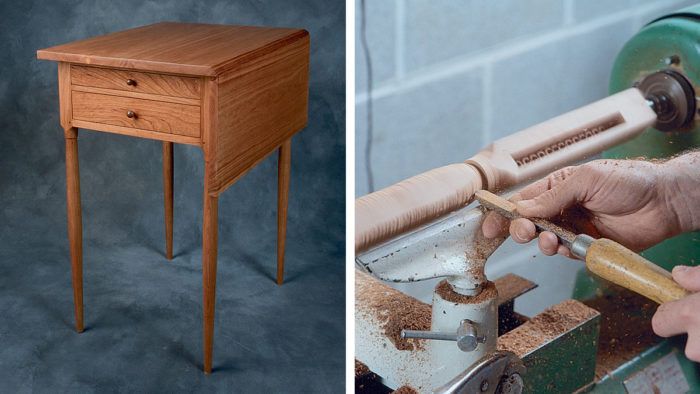
Synopsis: The table Greg Isaak built was inspired by several original Shaker pieces, but he modified it with Sheraton-style tapered legs. There’s nothing tricky about building it, he says; all the work can be done with a few simple tools. Components are small, so stock preparation is simple, too. He explains how he mortised and turned the legs, how he constructed the case and drawers, and how he built the top. A detailed project plan illustrates his design.
I first became interested in Shaker furniture because of some pieces my mother owned. I was drawn to the Shakers’ simple, unadorned designs, their restrained, but strong joinery, and their uncompromising insistence on quality. As I examined my family’s furniture and studied pieces presented in books and museums, I also became fascinated with the way Shaker designs had been influenced by Federal furniture built in the United States between 1782 and 1815. The ideas of designers like Duncan Phyfe, Robert Adam, Thomas Sheraton and George Hepplewhite can be easily identified in many Shaker originals.
Since I like this diversity of design ideas, it’s not surprising that my table, shown finished on the facing page, is not an exact replica of any one piece. Rather, it incorporates the features of several New York and Massachusetts pieces. I based the overall size of the table and the shape of its legs on a New York original, but I modified the turned legs to capture the graceful look of Sheraton furniture. The single drop leaf is from a table at the Hancock Shaker Museum in Massachusetts.
Like its Shaker ancestors, my table is very functional. Its small size and two shallow drawers make it ideal as an occasional table, end table or nightstand. And there is nothing tricky about building the piece; all the work can be done with a few simple tools. Stock preparation is relatively easy because the components are so small. The legs were milled into square blanks, mortised and then turned to shape. After cutting the aprons to size, I tenoned their ends to fit the leg mortises. The top is two edge-glued boards, with a routed rule joint for the drop leaf.
Mortising and turning the legs
I cut the leg mortises with the old drill-and-chisel method. This is one of the simplest methods for cutting mortises if you don’t have a horizontal mortising machine, hollow-chisel mortiser or router. A drill press and a chisel or two are the only equipment needed. I started by cutting the stock for the legs to the dimensions given in the drawing on p. 93. To avoid splitting the wood when mortising near the top of the legs or when turning the narrow feet, I cut the square blanks about 1 in. oversize on each end.
Next, I laid out the mortises and bored out the space between the layout lines using a brad-point bit with a diameter just slightly smaller than the width of the mortise, as shown in the bottom photo on the facing page.
From Fine Woodworking #90
For the full article, download the PDF below:
Fine Woodworking Recommended Products

Stanley Powerlock 16-ft. tape measure
Bessey K-Body Parallel-Jaw Clamp

Festool DF 500 Q-Set Domino Joiner






Log in or create an account to post a comment.
Sign up Log in