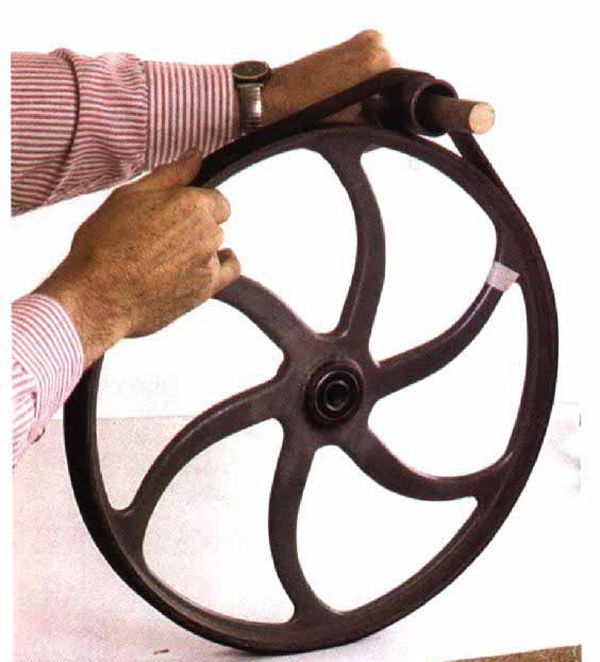
Synopsis: No matter how much attention is paid to alignment and adjustment, a bandsaw with bad tires simply won’t perform well. Robert M. Vaughan is often asked to repair or adjust bandsaws as part of his machine-restoration business. No Here, he talks about how to remove old tires and clean the rims, stretch on new tires using a method he came up with that uses dowels, equalize tires and cement them on, and trim and crown the tires. He explains how to rebalance the wheel and advises that you install a brush on the lower wheel to sweep away dust and debris.
Bad tires are the number one cause of poor bandsaw performance. I’m often asked to repair or adjust bandsaws as part of my machine-restoration business. Often, the tires on old machines are brittle or full of grooves caused by the tooth set of narrow blades, or they have deep cracks and missing chunks. Sometimes, the tires have been replaced but haven’t been properly trimmed and recrowned, resulting in a bandsaw that vibrates and won’t track blades correctly. No matter how much attention is paid to alignment and adjustment, a machine with bad tires simply won’t perform well.
The way to restore an older bandsaw’s smooth and accurate performance is to replace the tires. Although each bandsaw is a little different (some types of bandsaw wheels require factory-made tires that need special installation), fitting new tires usually can be done right in the shop by following the steps outlined in this article. The process includes removing the old tires, cleaning the rims and then stretching the new tires on and gluing them in place. Then the new tires should be equalized, trimmed and crowned and, finally, the wheels should be rebalanced.
Removing old tires and cleaning the rims
Getting off the old tires is sometimes easily done with two fingers. Other times, the cement tenaciously sticks to both the tire and the wheel. In either case, the process is simple enough, but a few extra steps can effectively reduce some of the wheel cleanup later. In the toughest instances, insert a razor knife between the wheel and the tire and pour in a slight amount of lacquer thinner, which will partially dissolve the contact adhesive that holds the tire to the wheel. Wait about 30 seconds, and then pry with a screwdriver to enlarge the opening. After inserting a small wooden wedge, pour in a little more thinner, and wedge the tire farther off the wheel. Continue this process until the tire comes off entirely.
Next, all of the old contact cement has to be removed from the wheel; otherwise, it will cause lumps and gaps in the bonding of the new tire. First, remove the wheels from the saw, a process that’s usually only slightly more complicated than taking a V-belt pulley off a motor shaft. Typically, this involves just removing a single nut on the end of each axle and pulling the wheel off (if you’re in doubt, consult your saw’s manual). Clamp one of the wheels in a vise with padded jaws. Working in a well-ventilated area, lay a strip of old sock on top of the wheel and pour on lacquer thinner.
From Fine Woodworking #95
For the full article, download the PDF below:
Fine Woodworking Recommended Products
JessEm Mite-R Excel II Miter Gauge
Freud Super Dado Saw Blade Set 8" x 5/8" Bore

Stanley Powerlock 16-ft. tape measure






Log in or create an account to post a comment.
Sign up Log in