A Hand-Rubbed Oil Finish
Proper surface preparation underlies its beauty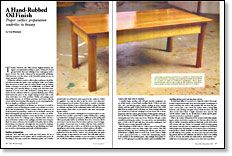
Synopsis: Tom Wisshack says oil finishes accentuate the grain, color, and figure of the wood rather than obscure it. An oil finish will never chip, peel, develop fisheye, or orange peel. Wisshack explains the work involved in preparing a surface for an oil finish and how to rejuvenate previously oil-finished pieces. Preparation is important because the finish will heighten any defects, so be sure to plane or scrape well before sanding with several grits of paper. He spells out the grits he uses and tips to make the work easier, as well as and how to use steel wool to repair old finishes. He ends with information on choosing and applying the oil and his own homemade linseed-oil mixture.
Thomas Sheraton, the 18th-century English furniture designer, recommended making a paste of linseed oil and ground brick dust and rubbing it into mahogany with a piece of cork. The result, enhanced by innumerable polishings with beeswax over the years, is the beautiful patina we see on many treasured antiques.
Oil finishes still have much to offer today’s craftsman. An oil finish will accentuate the grain, color and figure of the wood rather than obscure it, as many coats of a surface finish (such as varnish, shellac or lacquer) are prone to do. Additionally, an oil finish will never chip, peel, develop fisheye or orange peel. And dust contamination is not an issue with oil finishes, making them a good choice for the craftsman without a separate finishing space. If dust lands before the piece is dry, simply wiping it down with a soft, clean cloth takes care of the problem. Finally, and perhaps most importantly, because an oil finish penetrates and bonds with the wood, rather than forming a film atop the wood, renewing the finish is as simple as rubbing in some fresh oil.
As simple and beautiful as oil finishes are, however, it would be a mistake to view oil finishing as a quick, easy solution or a coverup for bad workmanship. On the contrary, there is quite a lot of work involved in preparing a surface for an oil finish, and an oil finish will magnify any imperfections in the wood. Also, an oil finish is only moderately resistant to water and alcohol, so it may not be the best choice for a dining room or kitchen table, but for a piece of furniture subject to less spillage and daily wear, it may be ideal. For many craftsmen, the beautiful, rich patina that an oil finish develops over time far outweighs the care needed to maintain it. In this article, I’ll discuss preparing for and finishing new furniture as well as rejuvenating previously oil-finished pieces.
Surface preparation
Someone once said that you could put used motor oil on a perfectly prepared wood surface and it would look good. As shocking as that may sound, the statement points out a fundamental truth: An oil finish is only as good as the surface to which it’s applied. You may be able to get by with a less than perfectly prepared wood surface if you plan to varnish or lacquer because these finishes form a relatively thick coating. But with an oil finish, any flaws in the unfinished surface will only become more evident when oiled, so you need to take extra care preparing the surface.
Some craftsmen prefer a handplaned or scraped surface to one that has been sanded a great deal.
From Fine Woodworking #97
For the full article, download the PDF below:
Fine Woodworking Recommended Products
Waterlox Original
Foam Brushes

Bahco 6-Inch Card Scraper







Log in or create an account to post a comment.
Sign up Log in