Build a Shaker Round Stand
Classic lines blend a simple turning and straightforward joinery on this round table.

Synopsis: The measured drawing that Christian H. Becksvoort includes in this piece on a Shaker round table is by no means definitive, but it’s exceedingly close; he’s built more than 70 like it, refining as he goes. He explains here how to turn and dovetail the post, make the legs, and complete the top and cross brace. Side information includes details on how to use a router to make sliding dovetails.
Having built almost 70 round stands, I still continue to revise and refine the shape and dimensions in an effort to achieve the perfect shape. The Shakers built a variety of round stands. They were conveniently placed near reading chairs, desks, worktables, benches and beds because the Shakers did all after-dark work by candlelight. That’s why round stands are often called candle stands. Although crude at first, the designs became more refined and delicate during the early 19th century.
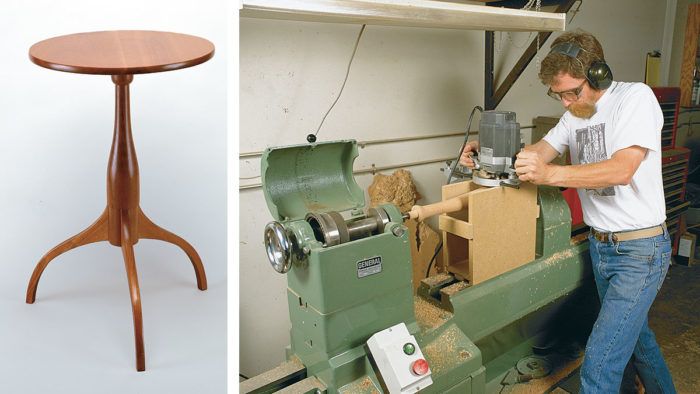
The pinnacle of round-stand design was achieved by a Shaker craftsman from Hancock, Mass., in the first half of the 1800s. The original stand is now in New York’s Metropolitan Museum of Art. The stand consists of a -in.-thick by 18-in.-dia. top with a rounded edge, and the stand’s tabletop is attached to the post by a cross brace. The post is a 3-in.-dia. turning resembling a wine bottle, with a -in. indentation at the bottom to accept the legs. The post is topped with a tulip swelling that has a round tenon to fit into the cross brace. The legs are a smooth cyma curve flowing out of the post with an arched curve below. The shape of the post is reflected in the profile of the cyma curve, and the thickness of the leg tapers from in. at the intersection with the post, to in. at the tip. Overall, it is a design so clean, so simple, it cannot be improved upon.
As far as I know, there are no measured drawings of this round stand, although pictures and overall dimensions appear in several books. The measured drawing shown on the facing page is by no means definitive, but it is as close as I have been able to come without actually measuring the original.
Turning the post
Like the original, I made this round stand out of clear black cherry. I turned the post into a 3-in.-dia. cylinder on the lathe, and then I laid out detail lines, as shown in the drawing.
Although the turning is fairly straightforward, there are several locations where tolerances are critical. The first is the tenon diameter. I turned the tenon slightly oversized with a parting tool. Then I drilled a hole into a piece of scrap to test the diameter of the tenon. This way, I could turn the diameter for a perfect match to the drill bit I used to drill the cross brace.
Next I sized the neck just below the tulip, using the parting tool and caliper. Then I roughed out the shaft, turned the tulip and under-cut the shoulder of the tulip using the tip of a diamond-point tool. With the top of the post completed,I moved the tool rest to the other end and cut the reduced cylinder at the bottom. The actual dimension is not critical, but the cylinder must be perfectly straight to attach the legs properly.The best way to achieve that is with a straight, hardwood block wrapped in sandpaper and used in conjunction with a dial caliper.
Shaping the main shaft is the last step and visually the most difficult. There are only two reference points to rely on, the 1 in.dia. at the top and 3 in. dia. at the bottom. A series of light cuts with a sharp gouge got me to the elongated cyma curve that I was after.Then I sanded progressively from 120-grit to 600-grit. Finally, I re-versed the rotation of the lathe and then polished the post with#000 steel wool.

Dovetailing the post
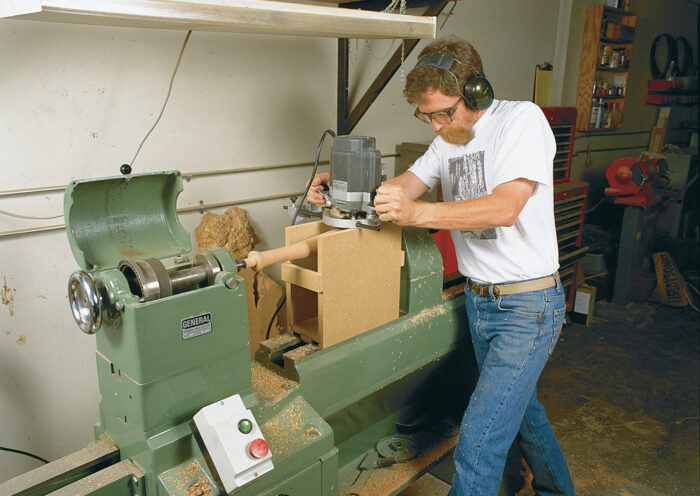
Cutting the dovetail slots for the legs was the next step. Ordinarily, I make one stand at a time and find it just as fast (and a lot more fun) to cut the dovetail slots with a handsaw, chisel and mallet (see FWW #85, pp. 84-86). But this time, I had two orders of two stands each, plus I needed a stand for display, so I decided to make a cradle to hold the post for cutting the slots with a dovetail bit mount-ed in my spindle mortiser. An interesting and perhaps more approachable alternative for the home shop is the neat, on-the-lathe, router technique shown in the story on p. 72.
Making the legs
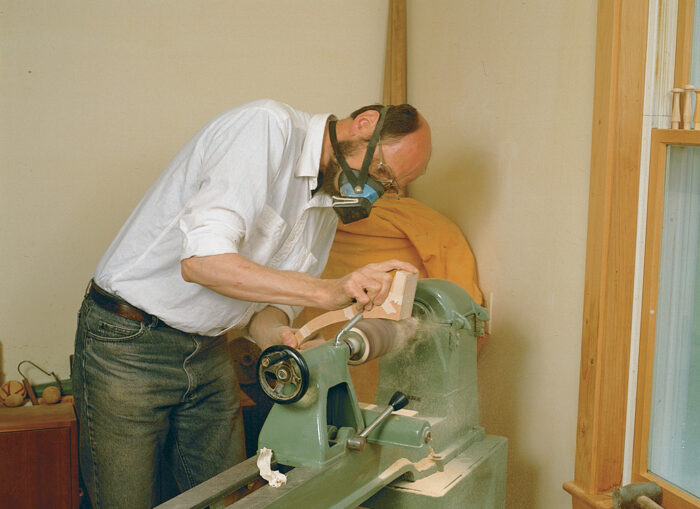
The legs were cut using the pattern shown in the drawing. By tracing the pattern on the stock, I could be sure that the grain ran from the upper corner of the leg to the lower end for the greatest possible strength. For consistency of color, all three legs were cut from the same board. After the legs were bandsawn, I stacked and taped them together with masking tape. Then I used a disc sander and a pneumatic sanding drum mounted on my lathe to clean up the shape, as shown in the photo at left, sanding one untaped side at a time.
To cut the dovetail pins on the legs, I used the same -in.-dia. dovetail bit I used to cut the slots. Only this time, the bit was in a table-mounted router. I set the depth of cut to the same depth as the dovetailed slot and slid the fence over to cut a dovetail just thicker than the -in.-dia. bit. Then, through trial-and-error cuts on a piece of scrap, I adjusted the fence until the dovetail pin slid snugly into the slot in the post.
The leg thickness was tapered on the jointer. I set the jointer to-in. depth of cut and used a wide push stick with a notch to holdt he end of the leg. I slowly and carefully placed the upper section of the leg on the outfeed table, as shown in the bottom photo on the facing page. Then I pushed the leg across the blade, turned it over and repeated the process on the reverse side.
After completing the other two legs, I beltsanded them to150-grit and dry-fit them into the post. Using a sharp, pointed knife, I scribed the top of each leg where it joins the post. At the same time, I marked the bottom of the post at the lower edge of the leg, I removed the legs and bandsawed the post to length.Then I sanded the legs to the scribed mark on the pneumatic sanding drum. The top of the legs have the same radius as the post and blended smoothly into the post when reassembled. All legs were then sanded to 600-grit and glued into place.
Completing the top and cross brace
I glued up the top from two pieces cut from a single 10-in.-wide board to match color and grain. While the top was drying, I cut the cross brace, rounded the ends and drilled the center hole for thepost tenon. Then I tapered the rounded ends back about 2 in. so that only in. of thickness was left on the ends. Finally, I sanded the brace from 120-grit to 600-grit.
I dry-fit the brace to the tenon, making sure it was perpendicular to one leg. I considered this leg

the front of the table and picked the one on the quartersawn side of the post. I made a mark across the tenon, perpendicular to the grain of the brace. With a handsaw, I cut a slot in the tenon and made a wedge to fit. Then I applied glue to the hole in the brace, slid the brace into position and hammered in the wedge. The post must be hand-held, or the base of the post must be supported on the corner of the bench be-cause the legs won’t stand up to these direct hammer blows.
After the tenon was trimmed, I put the base aside to dry while I cut and sanded the top. I bandsawed the top just shy of the layout line and disc sanded to the line. I radiused the top’s edge on a slightly deflated pneumatic-drum sander. This could also be done by hand. Although a router would make quick work of shaping the edge, I’ve never found an appropriate bit with the subtle radius I prefer. I then sanded the edge and both sides of the top to 600-grit.
Before attaching the top, I sanded the bottom of the post flush with the bottom edge of the legs. I lightly chamfered the foot at the bottom of the legs, so they don’t splinter and catch on carpeting.
I screwed on the top, centered on the cross brace and oriented with the brace perpendicular to the grain of the top. The screwholes near the outside edge were elongated to allow for cross-grain movement of the top. The stand was now ready for finishing. The original has a clear varnish finish, but I’ve used a rubbed oil finish on mine.
From Fine Woodworking #110
For the full article, download the PDF below:
Fine Woodworking Recommended Products

Stanley Powerlock 16-ft. tape measure

Drafting Tools

Dividers


Log in or create an account to post a comment.
Sign up Log in