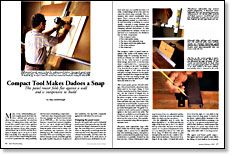
Compact Tool Makes Dadoes a Snap
This panel router folds flat against a wall and is inexpensive to build
Synopsis: Skip Lauderbaugh designed and built his own version of a panel router with common materials and hardware, and it folds out of the way when not in use. He explains how to design your own, focusing on six basic components: the workpiece table, the router guide system, the fence with an adjustable stop, the upper and lower guide stops, the router subbase, and the router tray. Then he talks about how to use it. An exploded drawing illustrates how he built his. Side information details commercial bits.
Many of my cabinetmaking projects require panels that have dadoes, rabbets and grooves to allow strong, easy assembly. I’ve tried lots of ways of cutting these joints and have found that a panel router is the quickest and most accurate tool to use. Unfortunately, the expense of one of the commercial machines (up to $3,500) and the floor space it requires (up to 25 sq. ft.) is more than I can justify. As is often the case, however, once you have tasted using the proper tool for a particular job, using anything else becomes a frustrating compromise.
I had seen other shopmade panel routers (for one example, see Steven Grever’s article in FWW #88, p. 48), but they lacked features I wanted and seemed complicated. So I set out to design and build my own version of a panel router. By simplifying the guide system and by using common materials and hardware, I built a panel router for less than $100 (not including the router, which I already owned). And although this jig easily handles big pieces of plywood and melamine, the jig folds compactly against the wall when it is not in use.
Designing the panel router
Because the guide rails used in industrial panel routers often get in the way, the rails were the first things I eliminated on my design. The next thing was to orient the machine so that gravity would help feed the router into the work. Big panel routers are oriented horizontally, and they have the capacity to handle 36-in.-wide pieces of plywood. But because shelf dadoes in cabinets and cases are usually less than 3 ft. wide, I scaled things down a bit, and I situated the whole setup vertically. This orientation also saved considerable shop space. Then I came up with a clamp-on router guidance system, so I don’t have to do any measuring or marking on a panel. Finally, I devised a router subbase that eliminates depth-of-cut adjustments when changing material thicknesses. To help you understand the abilities of this tool and how it is constructed, I’ve divided it into six basic components:
From Fine Woodworking #110
For the full article, download the PDF below:
Fine Woodworking Recommended Products

Leigh Super 18 Jig

Suizan Japanese Pull Saw

Milescraft 4007 6in Bench Clamp


Log in or create an account to post a comment.
Sign up Log in