Stow-Away Router Table
Cantilevered frame clamps to bench quickly, stores in seconds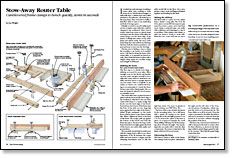
Synopsis: Jim Wright built a simple router table that he clamps to his workbench, eliminating the clunky, space-hogging problems of his first few router-table designs. A detailed project plan shows how he put it together. He explains how to build the frame for the bench and router, and then make the tabletop and fence.
I’m afraid my early attempts at making a router table were nothing to write home about. The first three designs—a table with legs, a cabinet base and a table attached to my tablesaw—all ended up on the scrap heap. They were just too bulky, a fatal flaw when it came to my small shop and lack of storage space.
It finally occurred to me all I really needed was a simple router table that could be clamped to my workbench. Here’s how it works: I attach my router to a plastic insert and drop it into the frame of the table; the router hangs over the front edge of my bench. A sliding fence rides on top of the frame and adjusts easily. The mass of the bench kept the router table from vibrating, but best of all, the whole assembly is compact and easy to store.
The key was in finding a way to clamp the assembly to my bench, so it wouldn’t move. I did that by sizing the frame of the router table, so it spanned my bench exactly. Then I held the frame in place with a simple clamp made of a wooden wedge and a length of all-thread.
Building the frame for your bench and router
The first step is to decide how large a tabletop you need for your miter. Allow enough room for the knobs and handles on your router, and give yourself room to adjust the router when it’s attached to the table. Just how much is enough depends on your router. I have a D-handle on my router, so I had to cut a relief in the framing to accommodate it. I made the frame for my router table of hard maple. The corners are fastened with #10 wood screws, so assembly is easy.
The router table stays in place because it grabs both the front and the back edge of my workbench. Attached to the rear of the router-table frame is a maple wedge that hooks over the back edge of my bench. Screwed into the bottom of the frame near the front of the table are two dogs that press against the front edge of the bench. I added 80-grit sandpaper on the inside faces of these pieces to give them a better bite. When I tighten the knob at the back of the frame, the wedge pulls up against the bottom of the bench and locks the frame into place. Because the dogs on the front of the frame are tight against the front of the bench, my router table really can’t go anywhere.
From Fine Woodworking #111
For the full article, download the PDF below:
Fine Woodworking Recommended Products
Double Sided Tape

Olfa Knife
Veritas Standard Wheel Marking Gauge




Log in or create an account to post a comment.
Sign up Log in