Build a Harvest Table
A quick, satisfying project with simple lines and loose-tenon joinery
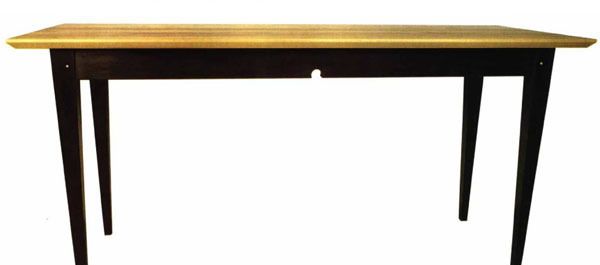
Synopsis: Gary Rogowski had a crowd coming for Thanksgiving and no table to seat them, so he put together a clean and simple tapered-leg harvest table quickly with loose-tenon joinery. Cutouts in the rail centers and contrasting dowels add a touch of elegance. He explains how to mortise the legs and rails and prepare the wood for a finish with a handplane, before glue-up. He also describes how he made and fitted the tenon stock: He glued it up in sections, finished the base, and pegged the tenons. He offers side information on making a taper jig. He made the tabletop out of poplar, beveling the edges and handplaning the top, finishing it with three coats of polyurethane. It’s a no-sand project, but chairs will have to wait.
I invited the entire family over for Thanksgiving dinner last year. Parents, siblings, spousal units, kidlings and significant others—all were welcome. Unfortunately, I had no table that was large enough to seat everyone. A small detail in the greater scheme of things, but an important one nonetheless if we were all to sit together as we dined.
I set out to design and build a table that was handsome, sturdy and serviceable. And the table would have to take only a couple of days to make. I wanted it to have a clean and simple look, so I decided on tapered legs and a painted base, with a clear finish for just the top. I also decided on loose-tenon joinery to help simplify the construction.
Because time was of the essence, I decided to try a new approach to preparing the piece for a finish. For years, I’ve sweated over successively finer sanding grits of sandpaper as I ground down acres of wooden surfaces. This table was going to be different. There was to be no sanding of any sort on this piece—just handplaned surfaces and edges. “Why not?” I thought. “That’s how it used to be done.”
So I needed a wood that planed nicely without too much effort. Fancy figure or nice color wasn’t really important because the base would be painted. I checked with my local hardwood dealer and found he had 12/4 poplar in stock. That clinched it. I didn’t want to spend time laminating the leg blanks from thinner boards, so poplar it would be.
Tapering the legs
I tapered both outside faces of the table legs from their tops down to the floor. To get a taper I liked, I experimented with patterns made of hardboard until I was satisfied. I ended up with a leg that tapered from in. at the top to 1 in. at the floor.
To cut these tapers, I used my tablesaw and a taper jig I built specifically for these legs. The jig took only about 10-15 minutes to build and ensured consistent tapers.
I cut the first taper and then rotated the leg so that the cut face was face up in the jig, so the leg would fit snugly in the jig for the second cut. I then made the second taper cut. I cleaned up the sawmarks by passing the legs over the jointer, which was set for a light cut—less than in.
From Fine Woodworking #112
For the full article, download the PDF below:


Log in or create an account to post a comment.
Sign up Log in