Through Mortise-and-Tenon Joinery
Cut mortises first for clean, accurate results.
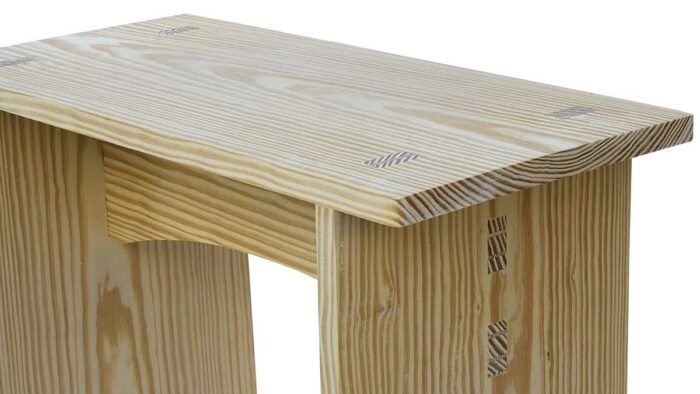
Synopsis: It’s hard to hide mistakes in through mortise-and-tenon joints because these strong, attractive joints show on the other side of the mating piece. Jim Richey prefers using a drill press when making a lot of mortises, and he explains how to avoid tearout. He cuts the mortises first, then uses a shopmade saw to clean out the corners. Then he explains how to lay out and cut the tenons, cut the wedges, and assemble everything.
It’s hard to hide mistakes in through mortise-and-tenon joints. Both the tenon and the mortise are there for anyone to see. I found it tough to get crisp, chip-free mortises that were uniform and had clean, square corners. Then, not too long ago, I came across a drawing of a simple bench made from 1×12 stock, like the one shown in the photo below. I wanted to build several of them, but the joint that held the bench together was a wedged through mortise and tenon. The bench was an incentive. I worked on my technique and experimented with prototypes until I could cut this joint quickly and accurately.
In a through mortise and tenon, the tenon goes all the way through its mating piece and shows on the other side. Wedges are often added to spread the end of the tenon and lock the joint together. It’s a strong, attractive joint.
I can cut the mortises by hand, but when I’m faced with making a lot of them, I like to use a machine. In my shop, that means using either the drill press or the router. I prefer using the drill press because it’s quiet and setup is fast and accurate. I can easily see the cut in progress.
When I’m boring holes for a through mortise, I try to minimize tearout where the bit exits the stock. If possible, I’ll select the side where tearout will be the least noticeable; then I’ll lay out and cut the mortise from the opposite side. If tearout is unacceptable on either side, then I’ll use a router and a jig. For this bench, though, I decided I could live with some minor tearout on the back side because this area is fairly well-hidden.
Cut the mortises first
The usual approach is to build from the “inside out.” That is, cut the tenons first, and then use the tenons as a template to mark the mortise locations. The problem is that you drill the mortises from the back, which virtually guarantees some tearout on the face of the piece, no matter how careful you are. I prefer the “outside-in” approach—cut the mortises first by drilling from the face side, and then mark the tenon locations from the mortises.
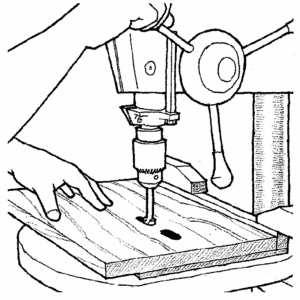
To do it this way, I set up my drill press with a Forstner bit and a fence to register the workpiece. Forstner bits are best for this operation because they make such clean cuts. Just remember that the bit diameter should be equal to or slightly smaller than the tenon thickness. You can always enlarge a mortise that’s too narrow.
To minimize tearout, I set the drill-press depth stop so that the bit just goes through the workpiece or leaves a paper-thin layer of material on the bottom of the mortise. It’s best to back up the workpiece with a clean piece of scrap. I drill the first hole at one end of the mortise. Then I nibble away the remaining waste by sliding the work face down on the fence and drilling successive holes every 1/4 in. or so until I reach the other end. Toward the bottom of each hole, I slow down and use light pressure on the drill-press arm.
Shopmade saw cleans out corners
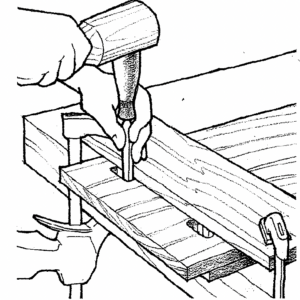
After roughing out the mortise on the drill press, I trim up those little waves on the sides and any remaining waste on the bottom of the mortise with a sharp chisel. This can be done by eye, but you’ll get better results if you clamp a straight piece of 3/4 -in.-thick scrap across the workpiece to serve as a guide. You can use the guide to square up the corners by working toward the corner from one direction and then swinging the guide 90° and working in from the other. If you use a chisel to square up the corners, be sure to work in from both sides of the workpiece, or you’ll tear out some really nasty chipping on the back side.
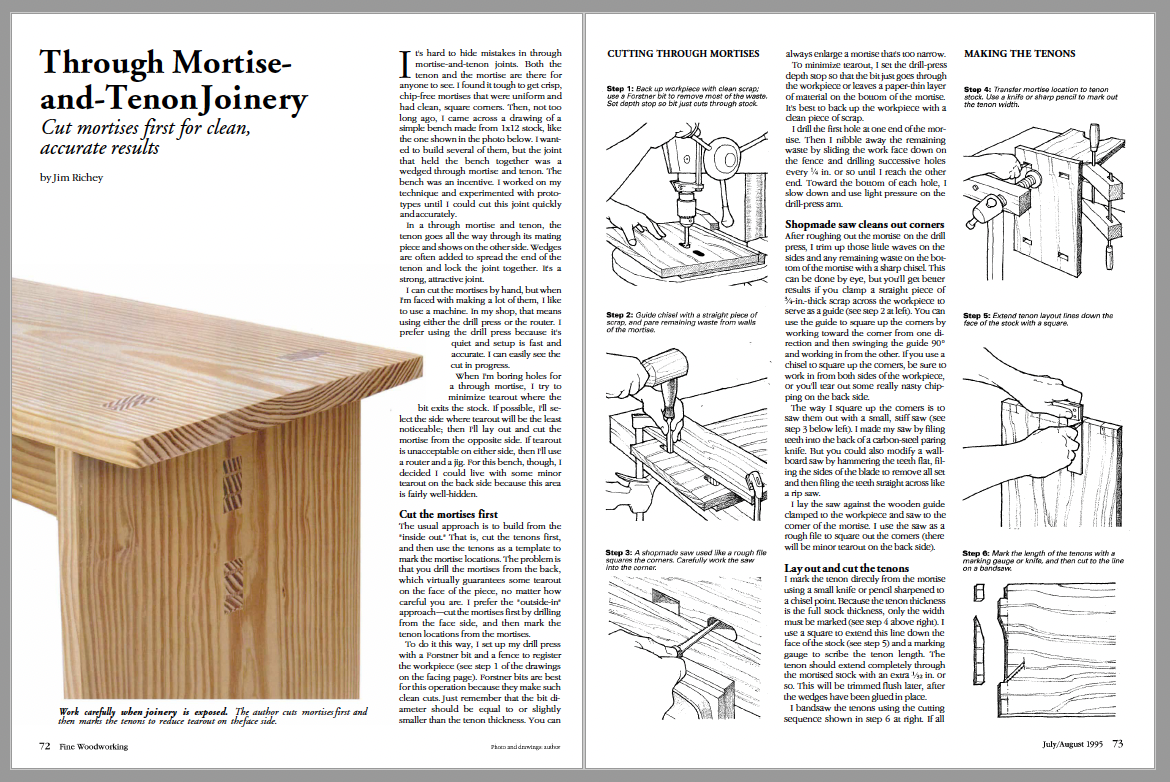 From Fine Woodworking #113
For the full article, download the PDF below:
Fine Woodworking Recommended Products

Olfa Knife
Pfiel Chip Carving Knife

Suizan Japanese Pull Saw


Log in or create an account to post a comment.
Sign up Log in