Spray-Finishing Done Right
Getting a blemish-free finish is easier than you think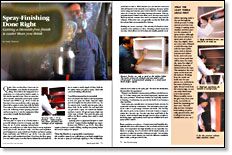
Synopsis: Contrary to popular belief, there are many easy-to-operate, reasonably priced spray systems out there, writes Andy Charron. It didn’t take him long to get proficient, and he shares his tips here. You’ll learn what types of booth you’ll need, depending on the finishes you use. Charron also talks about preparation and thinning the finish to a sprayable consistency. He strains the finish and talks about accessories you’ll need and how to adjust the gun. He advises that you spray the least-visible areas first, and he advocates a spray strategy. He offers tips on spraying uniformly, on drying, and on cleaning up. The article also includes side information on correcting spray-finish problems.
Quite a few woodworkers I know are unenthusiastic, even fearful, about spray finishing. They believe the equipment is too mysterious, too costly and too hard to master. In fact, just the opposite is true. There are many simple-to-operate, reasonably priced spray systems out there. It took me less time to become proficient with a spray gun than it did to master a router. Best of all, the finish from a gun is often so smooth that I don’t have to rub it out. Following sound spraying principles and knowing how to use the equipment helps me produce virtually flawless finishes.
Where to spray
The best place to spray is in a booth where a powerful exhaust removes overspray and dust from the air. If you’re spraying solvent-borne finishes, you really have no other choice than to use an explosionproof spray booth. But they’re costly. You don’t need explosionproof equipment to spray waterborne finishes, and they’re getting better and better. You only need a place that is well-ventilated and clean. If you have the floor space, you can build a spray room that has an exhaust fan and intake filters to ensure a steady supply of clean, fresh air. No matter where you plan to spray, check with your local building officials first.
Careful preparation is essential
How you prepare the surface is just as important as how you spray the finish. Sand the entire piece thoroughly. For stained work, I usually raise the grain with a damp cloth, let the surface dry and sand with 220-grit before I spray. For waterborne finishes and dyes, I sand to 180-grit and spray a light coat of dye stain or finish. This raises the grain and stiffens the fibers, making them easier to sand with 220-grit.
Spraying paint or pigmented lacquers is more involved. Opaque finishes highlight tiny imperfections. They often require at least two rounds of filling, sanding and priming before the wood is ready to be sprayed.
From Fine Woodworking #117
For the full article, download the PDF below:
Fine Woodworking Recommended Products

Stanley Powerlock 16-ft. tape measure
Bosch 12V Trim Router

Makita SP6000J1 Track Saw








Log in or create an account to post a comment.
Sign up Log in