Sliding Fence for a Miter Gauge
Shop-built fence adjusts quickly for accurate cuts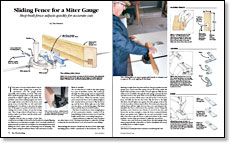
Synopsis: Woodworker Tim Hanson explains how to make a miter-gauge fence that can be moved right or left and locked in place by flipping two small levers. Minute adjustments in the position of a workpiece can be made by releasing the levers and sliding the fence rather than unclamping and re-clamping. Hanson explains how the fence works, and drawings show how he made it.
The piece of scrap I kept bolted to my tablesaw miter gauge was a great improvement over the gauge alone, especially when making crosscuts. This extra fence made the gauge easier to grip, and it supported the workpiece right up to the blade. The problem came when making angled cuts. Each new angle made a new divot in the fence, and pretty soon, it looked like an old comb with missing teeth. I would try to save time by using one of the gaps as a point of reference when cutting, but sooner or later, I’d use the wrong one. Then I’d get ticked off and have to stop work to make a new fence, and the whole cycle would start again.
I finally took the time to make a fence that could be moved right or left and locked in place by simply flipping two little levers (see the photo at right). Now I can make minute adjustments in the position of a workpiece by releasing the levers and sliding the fence rather than unclamping and re-clamping. The fence makes using the tablesaw faster, safer and more accurate.
How it works
The wooden fence is held to the miter gauge by a pair of machine screws. The screws go through the miter gauge and are tapped into 21⁄2-in.-long metal bars that ride in T-slots in the back of the fence. When the machine screws are loosened, the fence can be adjusted right or left—exactly where you want it. Flip the levers up, and the fence slides right up to the blade (see the photo on the facing page). Flip them down, and the fence is locked in place.
The fence is made from a clear, straight piece of 2×4 construction lumber. I made it 20 in. long thinking I’d shorten it later, but I found the length useful when crosscutting long pieces.
I used a tablesaw to make the T-slot, but there are other ways to do it. The important thing is to make the slot larger than the bar stock by about 1⁄16 in. all around for easy sliding. Fine-tuning the levers—I fashioned the levers from right-angle mending plates, which I purchased at the hardware store.
From Fine Woodworking #118
For the full article, download the PDF below:
Fine Woodworking Recommended Products
Rockler Deluxe Panel Clamp
Woodriver Circle Cutting Jig
Hedgehog featherboards




Log in or create an account to post a comment.
Sign up Log in