The Belt Sander as a Cabinetmaking Tool
This hand-held machine does a lot more than sand surfaces flat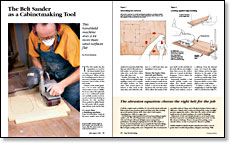
Synopsis: When a lot of sanding must be done on time and on budget, every professional Sven Hanson knows relies on the belt sander. It makes a lot of noise and dust, but if you select the right belt, put it on a well-tuned sander and carefully monitor stock removal, you may develop an affection for this machine. It can do surprisingly delicate work, and Hanson explains how it can be used creatively and effectively. He discusses the basics, how to choose the right belt, and how to handle edges. Hanson uses his belt sander to hollow chair seats, manage narrow stock, sand thin strips, and perform on-site scribing (for cabinet installations).
The belt sander has the reputation as a tool for the heavy-handed. Even so, here’s one guaranteed “secret of the pros”: When a whole lot of sanding must be done on time and on budget, every professional I know relies on the belt sander.
Granted, a belt sander generates a lot of noise and dust, which makes it easy to dislike. But if you select the right belt, put it on a well-tuned sander and carefully monitor stock removal, you just may develop an affection for this machine. When guided by skilled hands, the belt sander will do surprisingly delicate work. And it’s fast.
It’s more than a finishing machine
Some woodworkers overlook the more creative uses of belt sanders because they think that they are only for flat surfaces. A belt sander can perform many other jobs—work that’s often done with other tools.
Besides flattening, the belt sander will level applied edge molding, round over or square off edges, hollow out chair seats, sand several pieces of narrow or thin stock at the same time, and scribe-fit a cabinet to a wall faster than any handplane I ever used.
Master the basics first: smooth and flatten
For smoothing, you only need to follow two rules: Keep the sander moving in small rectangular patterns across the work surface, as shown in the drawing above left, and don’t press down. Allow the sander to balance itself. Let the machine do the work with its own weight. I draw lines across the surface with a no. 2 pencil. As the lines disappear, I know where the sander has been.
Improperly handled, a belt sander quickly rounds over edges that should remain square. I avoid this problem by sanding from the inside out. I always sand surfaces, such as a tabletop, from the internal areas out toward the edges. And I always sand in the same direction as the grain of the workpiece. When the sander reaches an outside edge, I barely extend the pad over it. I try to keep two-thirds or more of the platen on the work surface.
To flatten a surface, I use a straightedge to mark the highs with X’s and the lows with O’s, as shown in the photo at right, as though the surface were a topographic map full of hilltops and swamps. I also check the diagonal to see if the surface twists, and I mark the high and low corners. I’ll sand a little extra on the high corners and take it a little easier on the low ones.
From Fine Woodworking #119
For the full article, download the PDF below:
Fine Woodworking Recommended Products
Bosch 12V Trim Router
Ridgid EB4424 Oscillating Spindle/Belt Sander

Craftsman Random Orbit Sander




Log in or create an account to post a comment.
Sign up Log in