No-Frills Router Table
Build it in an afternoon for about the cost of a good bit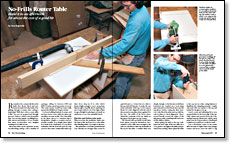
Synopsis: Gary Rogowski would rather spend his money on wood than on manufactured router tables, so he built his own. It’s inexpensive, easy to build, and extremely versatile. He explains here how to make his three-sided box from a half-sheet of ¾-in.-thick melamine with the front left open for easy access to the router. It’s 24 in. deep by 32 in. wide, light enough to move around but sturdy, and 16 in. high. He used biscuits and dadoes to join the parts, and there’s an L-shaped fence for dust collection.
Remember the commercial about the knife that sliced, diced and performed a myriad of other tasks, even gliding through a tomato after cutting a metal pipe? Well, that’s what a router table is like. You can cut stopped and through grooves, dadoes, rabbets and dovetailed slots. You can raise panels, cut sliding dovetails, tenons and mortises. It’s no wonder that many woodworkers can’t imagine working wood without one.
But router tables can be expensive. In one woodworking catalog, I saw a number of packages selling for between $250 and $300. I’d rather spend my money on wood. That same money would buy some really spectacular fiddleback Oregon walnut.
I’ve been building furniture for years, and my bare-bones router table has given me excellent, accurate results. The router table in the photo above is a variation that is inexpensive, simple to construct and extremely versatile. It’s a simple, three-sided box made from a half-sheet of 3⁄4-in.-thick melamine with the front left open for easy access to the router. I made mine with a top that’s 24 in. deep by 32 in. wide, which keeps it light enough to move around yet big enough to handle about anything I’d use a router table for. It’s 16 in. high, which is a good height for placing it on boards on sawhorses or on a low assembly bench.
Biscuits and dadoes join parts
When you buy the melamine, make sure the sheet is flat. And buy it in a color other than blinding white—it’s tough on the eyes.
The melamine I used had a particleboard core. Biscuits are stronger than screws in particleboard, so I joined the two sides to the top with #20 biscuits. To make the cuts in the underside of the top, I took a spacer block 5 in. wide, aligned it with the end of the top and set my plate joiner against it for the cuts. The width of the block determined the overhang of the top. Marks on the spacer block gave me my centers.
The biscuit joints probably would have been plenty strong by themselves, but I wanted to add a little extra strength to the joint. So I decided to dado the underside of the top for the sides. I couldn’t dado very deeply, though, or the biscuits would have bottomed out. I settled on a 1⁄16-in.-deep pass centered over the biscuit slots (see the top photo). Before cutting the dado, however, I dry-fitted the sides and top with biscuits in place to check alignment. Then I scored heavily around the edges of the side pieces with a marking knife and routed the shallow dadoes.
From Fine Woodworking #123
For the full article, download the PDF below:
Fine Woodworking Recommended Products
Sawstop Miter Gauge
Hedgehog featherboards
Tite-Mark Marking Gauge




Log in or create an account to post a comment.
Sign up Log in