An Edge-Jointing Primer
Well-tuned tools and the right technique create joints that last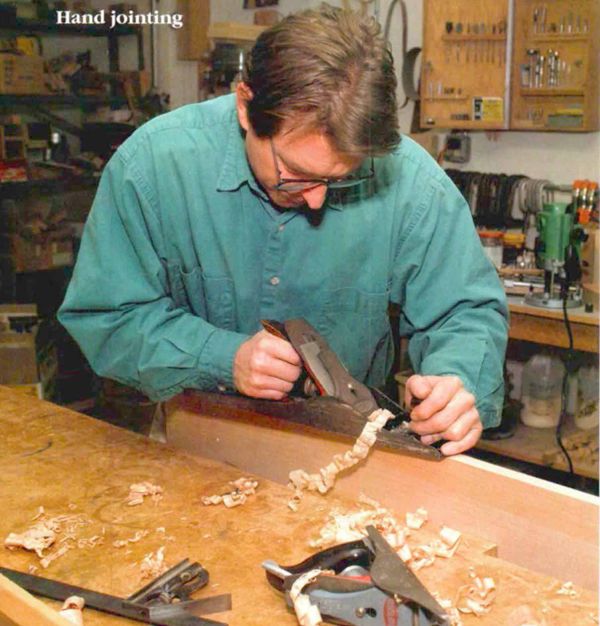
Synopsis: There was a time when Gary Rogowski was convinced that his jointer was possessed. Since then, he’s discovered that edge-jointing problems, though common, are almost always correctable. He says the most overlooked detail when edge-jointing lumber is what the board looks like to start with. He explains how to get a flat reference face, how to read the grain to prevent tearout, how to check for high and low spots, and techniques for both hand-jointing and machine jointing. Boards planed at complementary angles mate flat, he says, and the jointer must be well-tuned to create straight edges. Rogowski diagnoses jointer outfeed-table problems, shows how to joint a long board, and discusses how to handle problem boards. Then he talks about trying not to get a straight edge – when he makes a spring joint.
There was a time when I was convinced my jointer was possessed. It would thwart my every effort to make a crooked edge straight. Sort-of straight edges became more humped, and wide boards became ever narrower at one end. Like many woodworkers, I found myself talking to my jointer, pleading for cooperation. My early efforts at handplaning edge-joints didn’t go much better. When I would get an edge close to straight, it might not be square.
I have since happily discovered that edge-jointing problems, though common, are almost always correctable. A well-tuned jointer or handplane is essential, and some basic techniques will solve most problems. But the most overlooked detail when edgejointing lumber is what the board looks like to start with.
To get a straight, square edge, you first need a flat reference face. If your boards are cupped or twisted, choose one face to be the reference face, and joint it or plane it dead flat. If you plane the other face parallel to the first, you can use either side against the jointer’s fence to joint the edge.
Read grain to prevent tearout
The edge of a board is where the work will actually take place. Whether you’re handplaning or using a jointer, your success depends on knowing where to start cutting and in which direction. The object is to take down the high spots without touching the low areas and to plane with the grain to avoid tearout.
Wood fibers generally rise up in one direction to meet an edge, although they sometimes rise in opposing directions along the same edge or swirl in the board like eddies in a pool. When you try to plane or joint an edge against the grain, you’re likely to get tearout. So how do you tell which way the grain is running? The best analogy that I have for grain is fur. If you pet a cat from its head to its tail, the fur lies down smoothly. You’re moving your hand with the grain. But if you pet the cat from its tail to its head, the fur will resist your hand and stand on end. You’re going against the grain, and the cat may take offense at your insensitivity. With the cat, you risk a scratch; with a board, you risk tearout.
The first step is to read the grain direction on the face of a board to see how it rises up to meet the edge (see the drawing at right). Check both sides of the board if you’re uncertain. Look closely enough to see the grain lines, not just the more prominent growth rings. These often will line up with the grain direction, but not always.
From Fine Woodworking #124
For the full article, download the PDF below:
Fine Woodworking Recommended Products
Hedgehog featherboards

Suizan Japanese Pull Saw

Stanley Powerlock 16-ft. tape measure





Log in or create an account to post a comment.
Sign up Log in