Basic Repairs for Portable Power Tools
When a tool won't run, look for a faulty cord, switch or worn-out brushes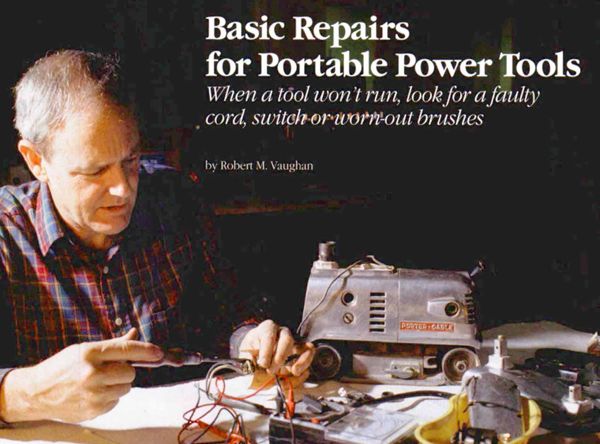
Synopsis: Robert M. Vaughan, who repairs and restores woodworking machinery for a living, shares some trade secrets in this article. He talks about how to troubleshoot a tool that won’t start by checking the cord for breaks, testing for a bad switch, and examining brushes. Parts are easily replaceable, he says, and he guides you through repairing cords and plugs, preparing raw wire ends, testing cords and switches, and replacing brushes. Then he discusses when it’s worth taking a malfunctioning tool to a professional or replacing it.
A portable power tool is a small universal motor with a wood-shaping instrument on one end and a woodworker on the other. Mechanical details among drills, routers or belt sanders may vary. But the basic electrical components, such as cords, switches and brushes, are similar, no matter what the machine.
When a power tool won’t start, it’s a good bet that an electrical part is broken. My procedure for tracing problems begins with testing and examining wires, then switches and finally brushes. The only special tool you need is a multi-tester, available from an electronics shop for about $25. With it, a host of problems can be traced right to the source.
Many electrical components on power tools can be replaced for $20 or less if you do the repair work yourself. Rechargeable power tools are another matter and won’t be addressed here. Before tackling disassembly, be sure to unplug your tool. Find a spot in your shop that is clean, neat and well lighted. Take an organized approach to the job, and draw diagrams of wires and other disassembled components (see the photo above).
Start by checking the cord for breaks
If you have a tool that won’t start, examine the power cord first. Serious kinks, abrasions or cuts sometimes point to a broken copper wire. To check the cord, you have to get inside the tool and find where the cord meets the switch. This is often inside the handle (see the top photo on p. 86).
With the tool open, locate the wires coming from the cord. Connections at these points vary. Among the most common are screw-on terminals, spring-loaded terminals and wire nuts. If there’s bare metal at these connections, such as screws, you can test the cord without further disassembly because the probe of your multi-tester can make contact with the screw.
When wires go straight into the plastic housing of a switch, the connection is probably spring-loaded. You’ll need to pull out these wires. To remove the wires, insert a needle or thin probe into the small slots located next to the wires. Push until you feel some resistance, and then pull on the wires, one at a time.
With the ends of the cord exposed, use a multi-tester to determine whether current can flow from the plug prongs to the wire ends. The continuity setting on a multitester measures electrical resistance. Wires, plugs and simple on/off switches (in the “on” position) should show a resistance reading of zero, which means the current can flow unimpeded. (The multi-tester actually sends a tiny flow of current through its two probes.) Never plug your tool into an outlet when testing its components.
From Fine Woodworking #126
For the full article, download the PDF below:
Fine Woodworking Recommended Products

Festool DF 500 Q-Set Domino Joiner
Craftsman Random Orbit Sander
Milwaukee M12 23-Gauge Cordless Pin Nailer





Log in or create an account to post a comment.
Sign up Log in