Building an Arts and Crafts Sideboard, Part III
Ebony and carved yellow heart inlay: crowning touches for a handsome case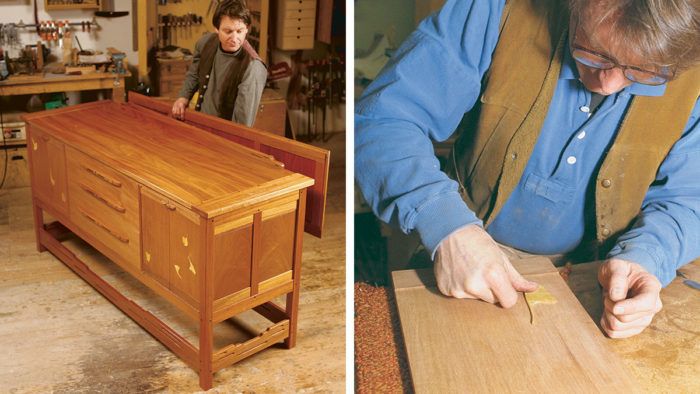
Synopsis: The third in a series on how to build a sideboard, this article focuses on details that make your furniture stand out. Gary Rogowski explains how to make the top, back rail, drawer pulls and door handles, and the inlay across the front. The top has breadboard ends so it stays flat but allows seasonal movement. A detailed project plan shows how the top and back rail fit onto the piece, and a side series of photos show how the top is pinned and plugged to the piece. Rogowski designed the handles after the piece was completed; another side explanation shows their dimensions and explains how to attach them. The inlay design was inspired by ginkgo leaves; Rogowski describes how he captured their movement to begin carving them. The recess was routed and refined with carving tools.
Details in a handmade piece of furniture are what make it sing, and where a furnituremaker can really have fun. In some ways, this mahogany sideboard looks as if it could have been designed by Charles and Henry Greene in the early 1900s. I relied on the inlay of ebony and carved yellow heart to make this design my own.
Articles in the last two issues of Fine Woodworking have covered construction of the carcase, the web frames, which support the drawers, and the doors. What’s left is the top, back rail, drawer pulls and door handles, and, finally, the inlay across the front of the case. Although each of these remaining parts gave me some chance to experiment with design, I especially looked forward to the carved inlay that would simulate ginkgo leaves blowing across the face of the finished sideboard.
A breadboard top stays flat but allows seasonal movement
To keep the top flat, I used breadboard ends, which prevent the top from cupping yet still allow it to move across its width as humidity changes (for more on breadboard ends, see FWW #110, pp. 78-81). The breadboard ends were dimensioned in. thicker than the top and a little longer than the top is wide, adding shadow lines. The top and breadboard ends are flush on the bottom.
To join the breadboard ends and top, I used four mortises and tenons at each end, along with a full-length groove in the ends and a mating tongue at either end of the top.
The mortises and grooves in the breadboard ends were cut on the router table. The tenons and tongue across the ends of the top, both in. thick, were cut with a hand-held plunge router after being defined by sawkerfs. Remember that any trimming to fit must be from the top cheek of the tenon so the bottoms of the breadboard ends and top remain flush. When the tenons were finally seated, I pulled the two end pieces off and planed a slight belly along their inside edges. This spring joint ensures that the joints between top and ends remain tight.
Once the joinery was cut and fitted, I eased all exposed edges on the top and ends, except for those where the ends meet the top. I finish-planed and then wetsanded before I glued on the ends. This work is easy now, but a real pain later on.
From Fine Woodworking #127
For the full article, download the PDF below:
Fine Woodworking Recommended Products
Whiteside 9500 Solid Brass Router Inlay Router Bit Set
Circle Guide

Dividers





Log in or create an account to post a comment.
Sign up Log in