Making Wood Look Old
Adding texture, dye stains and glazes transforms even lumberyard pine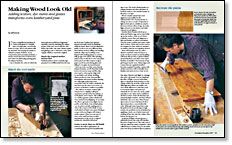
Synopsis: Wood looks better as it ages, writes finisher Jeff Jewitt. He often has to match an old look when fabricating missing parts for antique furniture, and in this article, he explains how he does it. He matches the original surface texture, such as tool marks, first, and pays attention to patina. Dyes, bleach, and light can change the color of the wood. Jewitt talks about when and how to distress the surface and how to finish the job with a glaze, to duplicate the depth of color in old wood. Multiple photos illustrate each step.
From a magnificent specimen of Cuban mahogany to a humble piece of white pine, wood looks better as it ages. All woods mature with use and time, developing the patina so valued in antique furniture. In my conservation and restoration business, I need to match the look of old wood to new when I’m fabricating missing parts for antique furniture.
I try to simulate the order in which the wear and tear would have happened naturally. I start by matching the surface texture of the new wood with the old. I follow that with a dye stain, distress marks and glazing coats to add more color. Then I apply a finish to match the original.
Match the original surface texture first
Furnituremakers of two centuries ago prepared wood differently from the way we do it now. Lumber was dressed, shaped and made ready for finishing solely by hand. Their tools left distinctive marks on the wood very different from those left by modern milling and sanding methods. Edges and moldings were shaped with molding planes or carved with gouges and chisels. After planing, surfaces that would show were smoothed and evened out with scrapers or glass paper (made by pulverizing glass and sifting it over glue-sized parchment).
Even on some very fine, more formal antique furniture, you’ll often find marks from tools such as rasps and files that were used to clean up the ridges left by sawblades and chisels. Molding planes produced crisp, deep profiles unattainable with many modern shaping bits. Although results may seem somewhat crude by today’s standards, the goal then was the same as it is now—to produce as flawless a surface as possible.
Flat surfaces on many country-style antiques have a slightly scalloped appearance produced by fore planes, or scrub planes, and scrapers. The scallops are readily apparent under a finish and when viewed in backlighting. To re-create this effect, I ground a very slight convex profile on the blade of an old jack plane (see the photos at left), making sure to relieve the corners of the blade. A very small relief is all that’s necessary. Flexing a scraper with your fingers will create a similar pattern. When you use any of these tools, small tearouts or other imperfections in the wood—a sign of handwork—should be left alone.
Patina is more than an old finish
Patina is the surface appearance of something that has grown beautiful with age or use. The much desired patina on antique furniture involves alteration of both the surface color and the texture of the piece as it ages.
From Fine Woodworking #127
For the full article, download the PDF below:
Fine Woodworking Recommended Products

Stanley Powerlock 16-ft. tape measure
Bumblechutes Bee’Nooba Wax






Log in or create an account to post a comment.
Sign up Log in