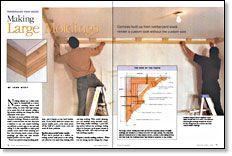
Synopsis: John West tackles the problems that often accompany the installation of large moldings – the tendency to cup, the difficulty of making good outside corner miters when the molding isn’t flat, and handling mitering inside corners with beaded profiles. West explains how smaller pieces yield better results, how to cope a joint, and how to make scarf joints invisible. A detailed drawing shows a cross-section of molding and illustrates his techniques.
Nothing dresses up a drab room quite so dramatically as a fancy cornice molding where wall meets ceiling. In rooms with high ceilings or in rooms full of tall cabinets, adding a big cornice molding can change the visual dimension of the space.
But there are some problems with large, one-piece moldings. Because so much material is removed from one side, they have a tendency to cup, and cupped moldings are difficult to hold tight to the wall and ceiling. It is also impossible to make good outside corner miters when molding isn’t flat. And mitering inside corners of large moldings can drive you nuts because beaded profiles can’t be coped.
There is an answer to large molding problems, and it begins at your local lumberyard. If you break down the cornice into several smaller parts—even stock pieces off the shelf of a nearby store—you can avoid all these problems.
Smaller pieces yield better results
When you’re perched on a ladder, installing several small pieces at the ceiling can often be a lot easier than dealing with one huge molding. With careful planning, you can establish many desirable conditions using smaller moldings: a good nailing surface behind the moldings, hiding places for fasteners, good square corners at ceiling and walls, and a way to locate and lock moldings together.
Prepare a sturdy nailing surface—When you are laying out the design for a large cornice, start with a piece of inverted baseboard molding on the wall. This piece of molding answers two important needs: a solid nailing surface for building up the cornice from the bottom and plenty of room to hide large fasteners. It doesn’t matter whether you use nails or screws to secure the baseboard to the wall. All but the bottom edge will be hidden from view. You can put as many fasteners as you need to anchor the baseboard solidly in place.
With the inverted baseboard we installed in the dining room shown on the previous pages, we started by nailing the pieces in place and followed with screws. If you’re going through drywall, you want to secure these pieces to studs whenever possible. If you’re going through plaster, as we did on this job, all but an occasional screw will grab hold of lathing behind the plaster, which is plenty strong to do the job.
From Fine Woodworking #129
For the full article, download the PDF below:
Fine Woodworking Recommended Products

Dubuque Clamp Works Bar Clamps - 4 pack

Jorgensen 6 inch Bar Clamp Set, 4 Pack

Stanley Powerlock 16-ft. tape measure


Log in or create an account to post a comment.
Sign up Log in