Strong, No Clamp-Up Corner Joints
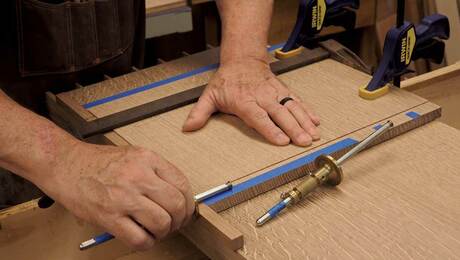
Tablesawn miters for case work are assembled using clear packing tape
Synopsis: Steve Latta calls this tablesaw technique the key to making perfect miters without tilting the blade. He rips and crosscuts all stock to finished dimensions, with square edges, then cuts whatever internal grooves and slots the project requires. He cuts the miters with the blade buried in scrap stock clamped onto the rip fence. A drawing shows the jig he references. He explains how to make the auxiliary fence and adjust the blade, and he recommends checking to be sure all your stock is the same thickness. Miters go together with glue, without splines. The article includes uses for mitered case work and safety information for cutting miters in this manner.
From Fine Woodworking #129
A good part of my early woodworking career was spent making cheap, lacquered medium-density fiberboard (MDF) furniture. My co-workers and I called it curb furniture because of its inevitable resting place. Despite the lack of inspiration or style, working in that shop taught me a valuable skill: how to make foolproof mitered corner joints. All case work was done this way because we had to hide the ugly edges of MDF, which telegraph through paint.
Eleven years and three shops later, I now spend my days building reproduction 18th-century American furniture. Although this job calls for a lot of traditional joinery—dovetail and mortise and tenon—the mitering technique used to join slabs of MDF has a place here, too. It works on solid stock and is handsome and durable.
When mitering large stock on a tablesaw, most woodworkers use a traditional rip-cut method: One edge of the workpiece rides along the rip fence, and the other edge is mitered by the tilted blade.
There are problems with this method. Many tablesaws have a limited capacity between the fence and blade. Also, tilting your blade throws off the reading on the rip-fence scale. Safety is a concern, too. When mitering a wide piece, it’s nerve-wracking to try to keep your eyes on the fence and sawblade at the same time. At the very least, stock cut this way is prone to minor imperfections unless you own a sliding-table attachment.
With my method, you first rip and crosscut all stock to finished dimensions, with square edges. Next cut any internal grooves or slots your project may require. Miters are cut with the blade buried in scrap stock clamped onto the rip fence. I should stress that although I’ve found this method to be perfectly safe, it’s unconventional. My auxiliary fence and hold-down minimize the chance of the offcut kicking back. But you should always stand to the left of the blade, just in case. Most of the time, the offcut just rattles around harmlessly between the blade and fence until the next piece of stock pushes it through. Alternatively, shut off the saw, and between cuts, move the offcut out of the way after the blade stops spinning.
For the full article, download the PDF below.
Fine Woodworking Recommended Products

Festool DF 500 Q-Set Domino Joiner

Rockler Dust Right 1250 CFM

Bessey K-Body Parallel-Jaw Clamp


Log in or create an account to post a comment.
Sign up Log in